Creating a cute DIY key cover using fabric is a simple and fun project that adds a personal touch to your everyday items. Whether you want to easily distinguish between different keys or just add a bit of flair to your keychain, this guide will show you how to craft adorable key covers with minimal supplies and basic sewing skills.
In just a few steps, you can transform ordinary keys into charming accessories that reflect your style. Let’s get started on this delightful DIY adventure!
Key Takeaways
- Create a template and cut out fabric pieces, adding unique designs like a tomato pattern for a personalized touch.
- Pair outer and lining pieces, stitch them together, and insert a cotton layer for protection against scratches.
- Add embellishments like beads, charms, or sequins to personalize the key cover and make it stand out.
- Use quality materials and precise cutting and stitching to ensure a professional finish and enhance durability.
Gather the Materials and Tools
What materials will you need to get started on your DIY key cover project?
- Fabric scraps: Choose fabrics with cute patterns or colors you like.
- Muslin fabric: As the lining pieces.
- Template: You can make a template according to your preferences to be the cover shape.
- Fabric marker or chalk: To trace the template onto the fabric.
- Pins or fabric clips: To hold the fabric pieces together while sewing.
- Scissors: Sharp scissors will help you cut the fabric accurately.
- Needle and thread: Choose a thread that matches the color of your fabric.
- Cotton: For inserting the key cover.
- Keyring: This will be used to attach the key cover to your keys.
- Rope or big thread: For hanging the keys.
- Embellishments (optional): You can personalize your key cover by adding buttons, beads, or other decorations.
With these materials, you can start your DIY key cover tutorial and unleash your creativity.
How to Make a Cute DIY Key Cover Using Fabric
You’re now ready to start crafting your DIY key cover. Follow these step-by-step instructions to bring your unique design to life.
You’ll be guided through each process stage, from creating a template to stitching the final pieces together.
Step 1: Make a template and cut out fabric pieces
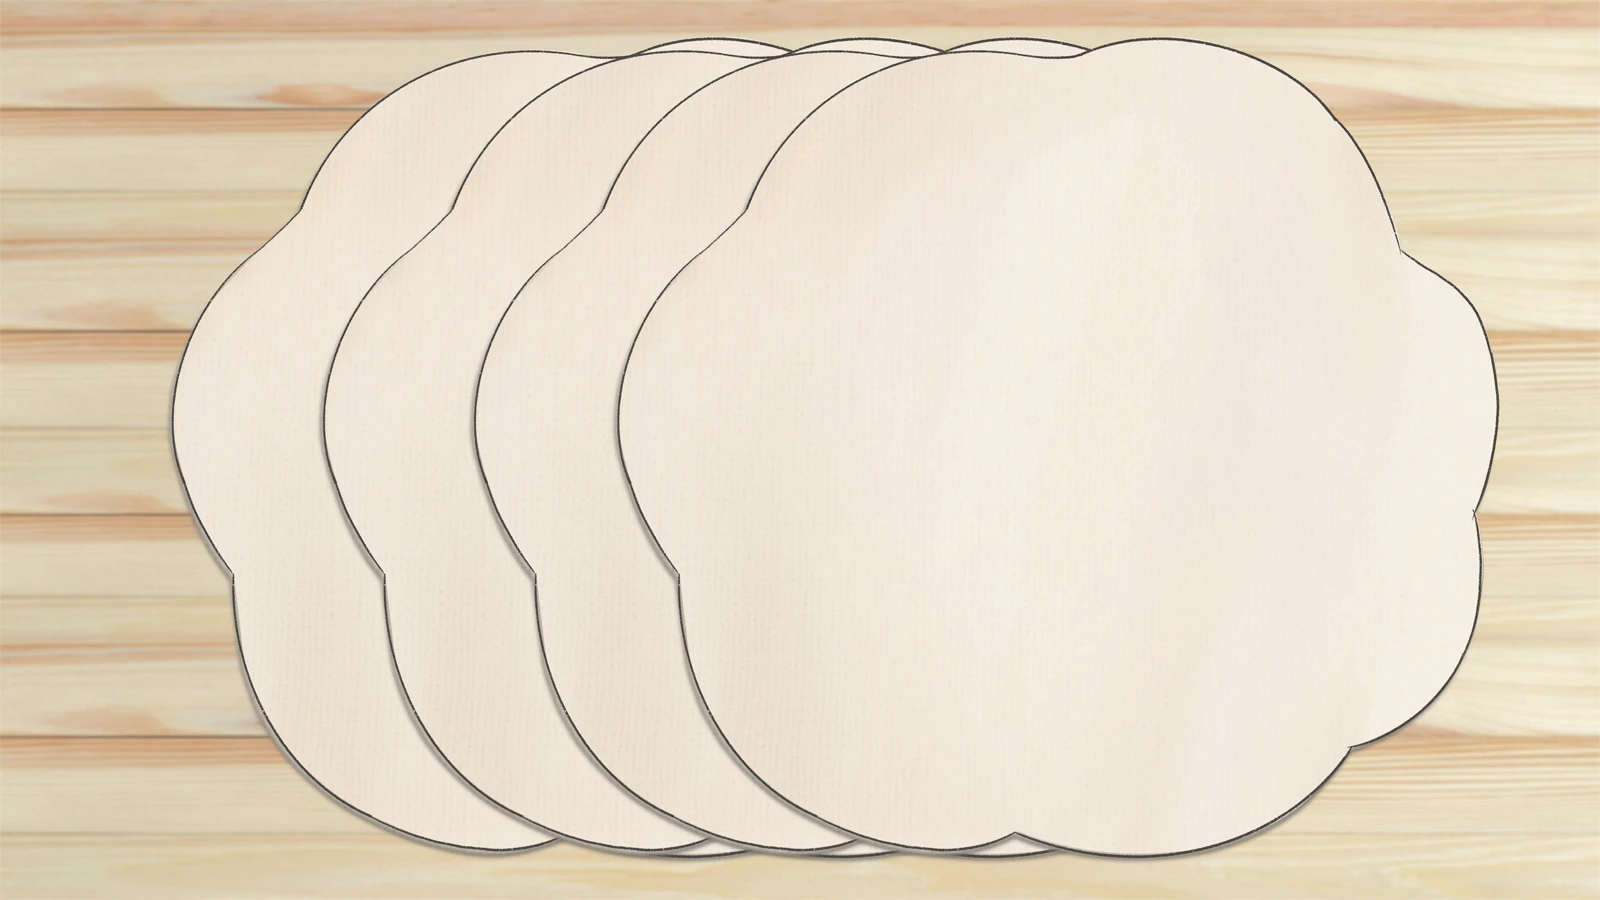
Create a template according to your preferences. Here, I made a flower-shaped template for my key cover.
Next, use the template to cut out two outer fabric pieces and two lining pieces. These will form the foundation of your DIY key cover.
Cut out precise pieces to ensure a clean and professional-looking finish.
Step 2: Add a tomato pattern to the outer fabric piece
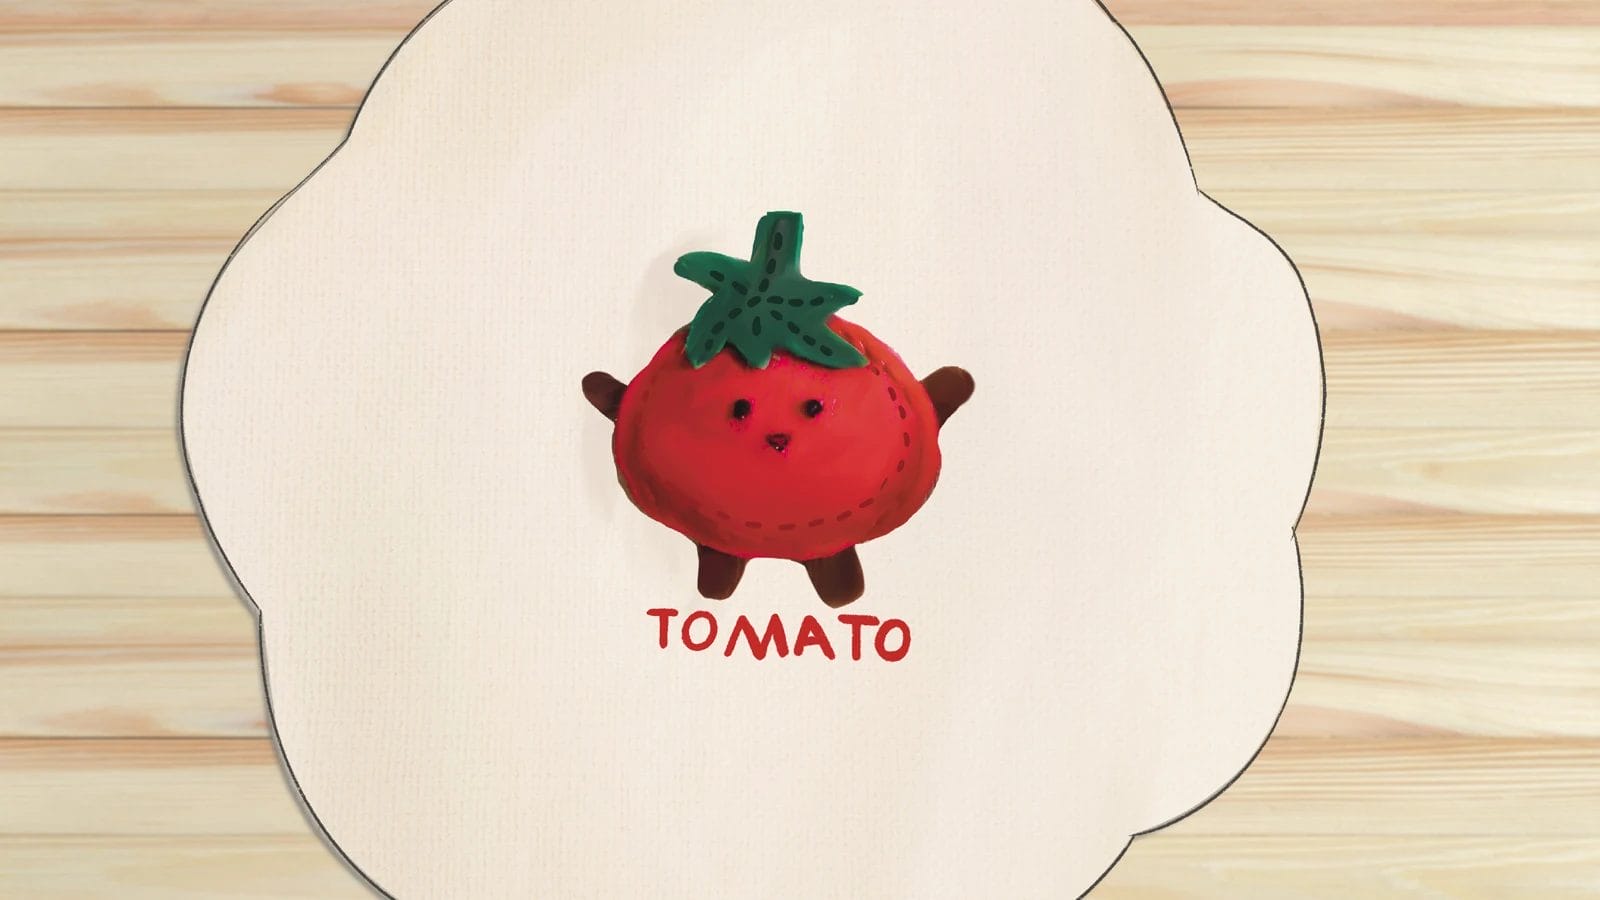
After cutting out your fabric pieces, it’s time to add some personality to your key cover by adding fun design elements. I used felt and made a tomato pattern in advance. So now, stitch the pattern in the center of the outer piece. You can make patterns you like or add other embellishments.
Step 3: Pair and stitch fabric pieces, leaving small openings
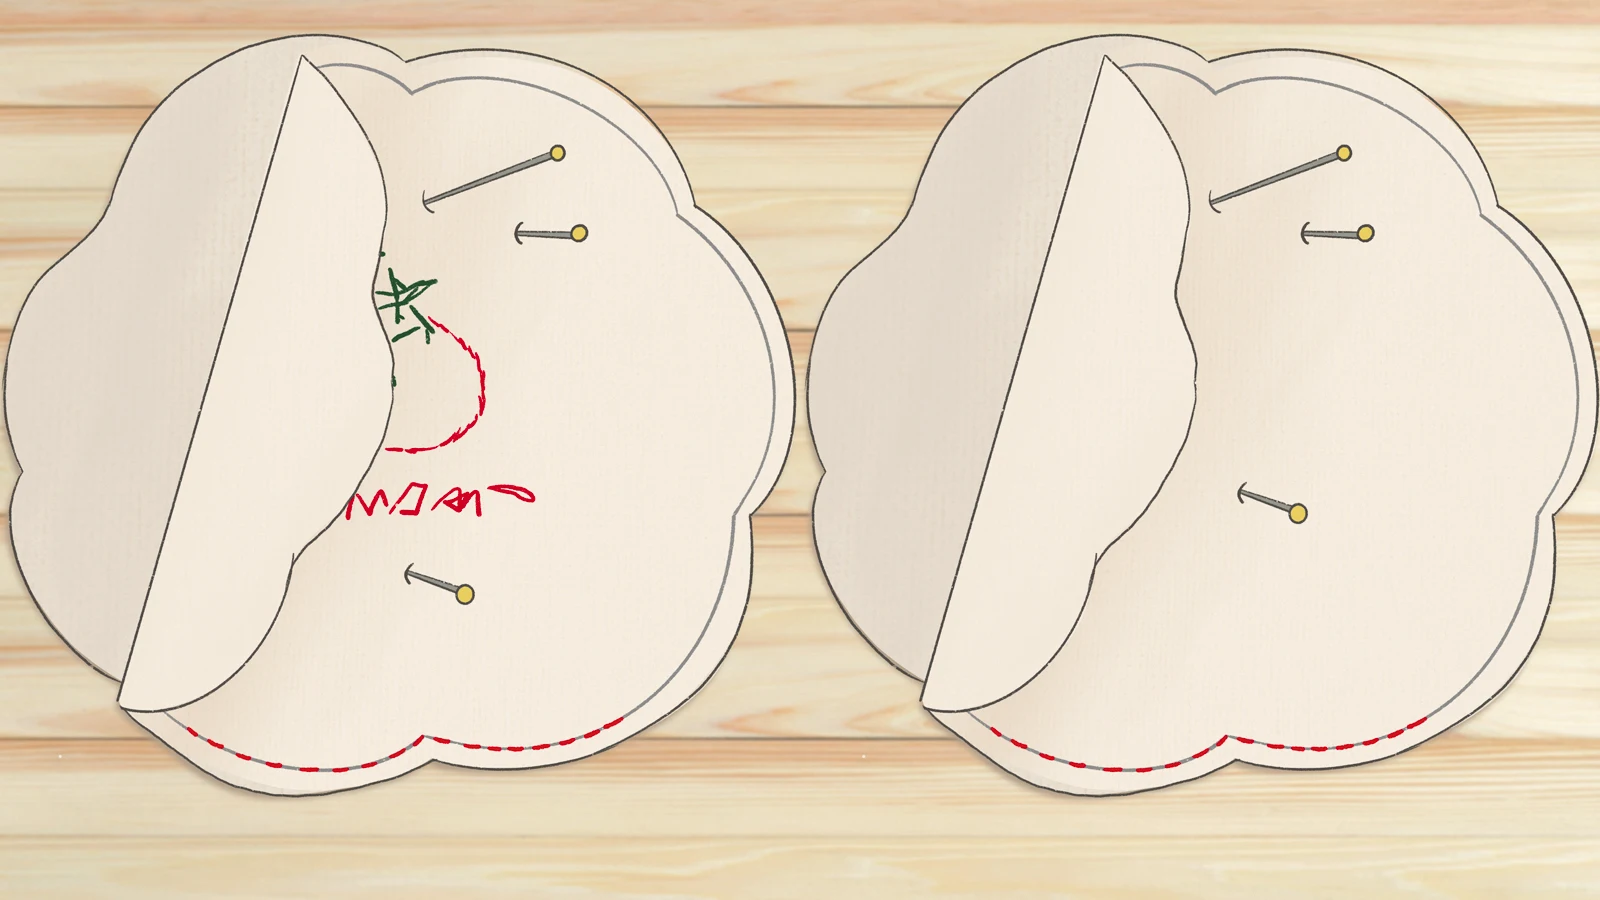
Pair the outer pieces with their corresponding lining pieces, ensuring that the right sides are facing each other. Align the edges carefully with pins before stitching along them. Make sure to leave small openings for turning the key covers right side out later.
Step 4: Turn the covers right side out and insert cotton
Turn the two key covers right side out. Then, you can carefully insert thin layers of cotton into the key covers.
The cotton layers act as a soft barrier, absorbing any impact or pressure and keeping your keys safe and secure. By inserting this thin layer of cotton, you’re enhancing the functionality and durability of your DIY key covers.
After inserting the cotton, don’t forget to stitch the two openings closed.
Step 5: Sew the covers together, leaving the top and bottom
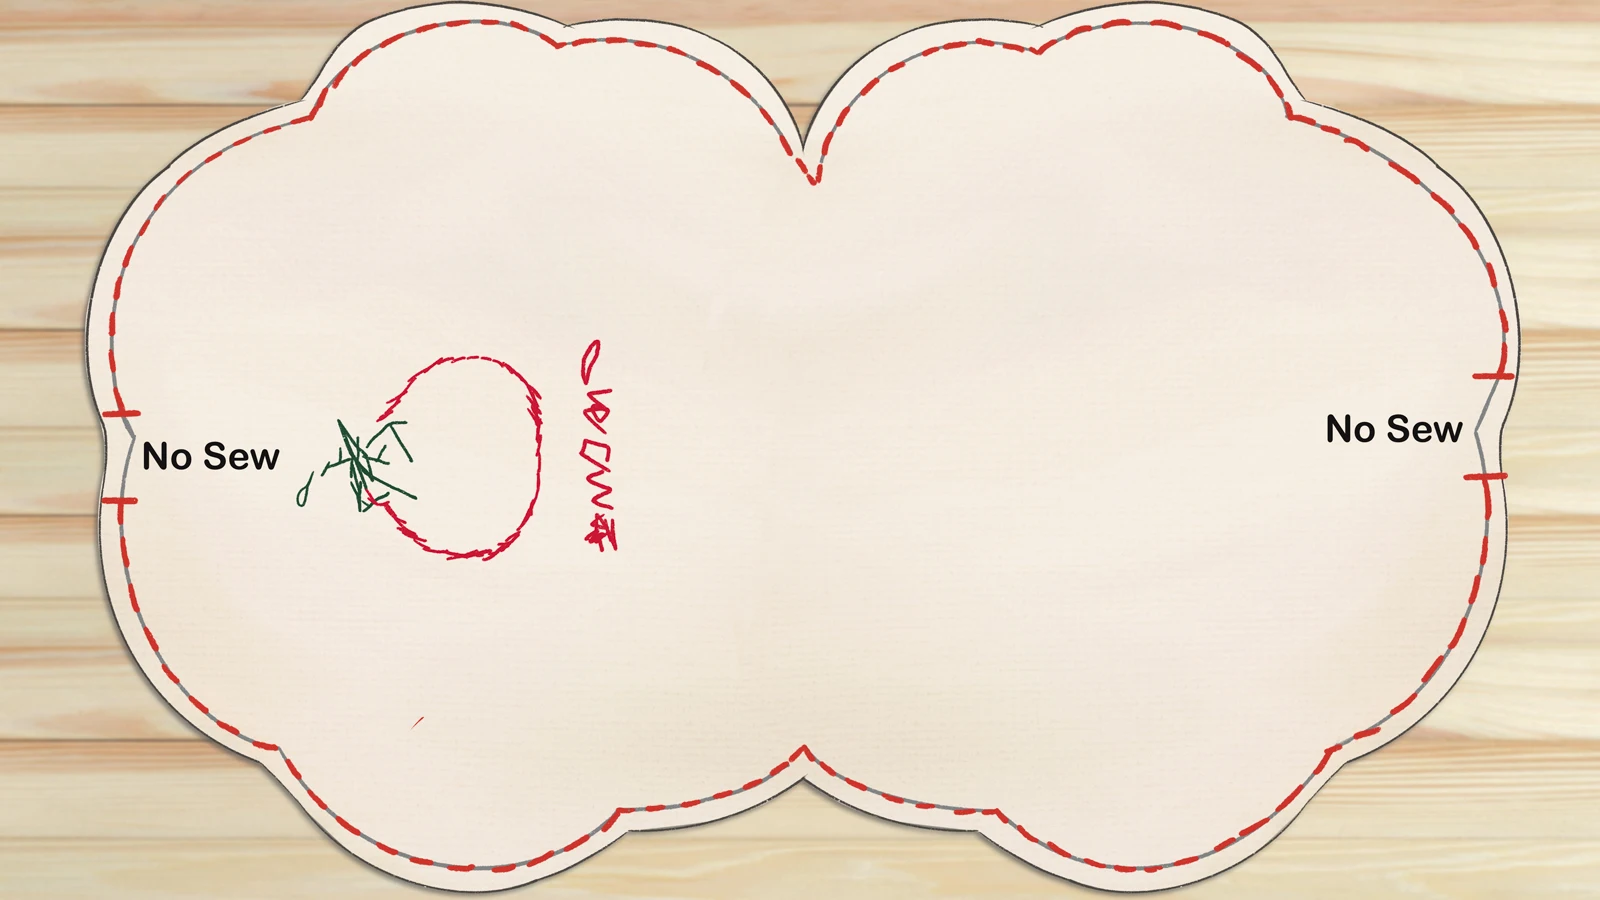
With your cotton layer in place, you’re ready to sew the two pairs of key covers together, leaving the top and bottom open. This means you only need to sew along the left and right sides.
As you sew, leave enough space at the top and bottom for the keyring to slide in easily. Pay attention to your stitching to ensure it’s strong and long-lasting.
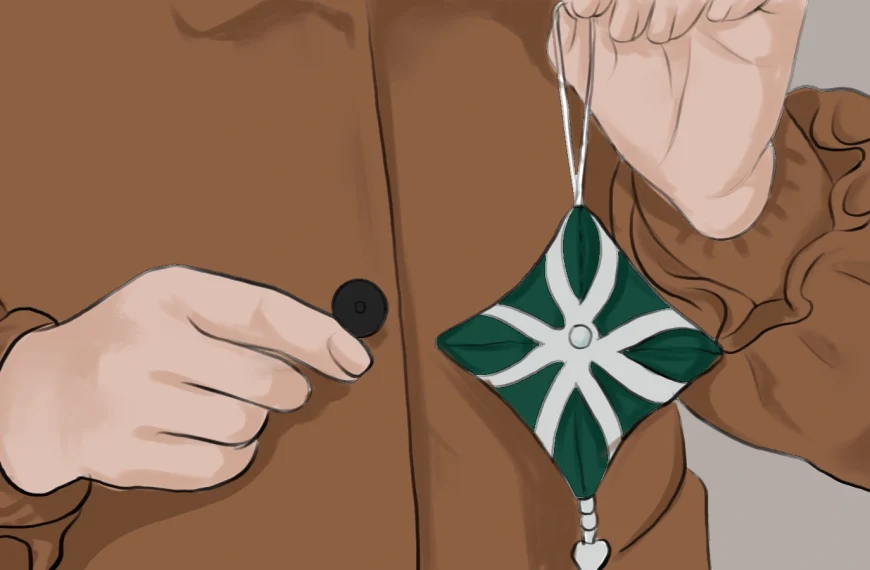
Step 6: Attach the key ring with a string through the hole
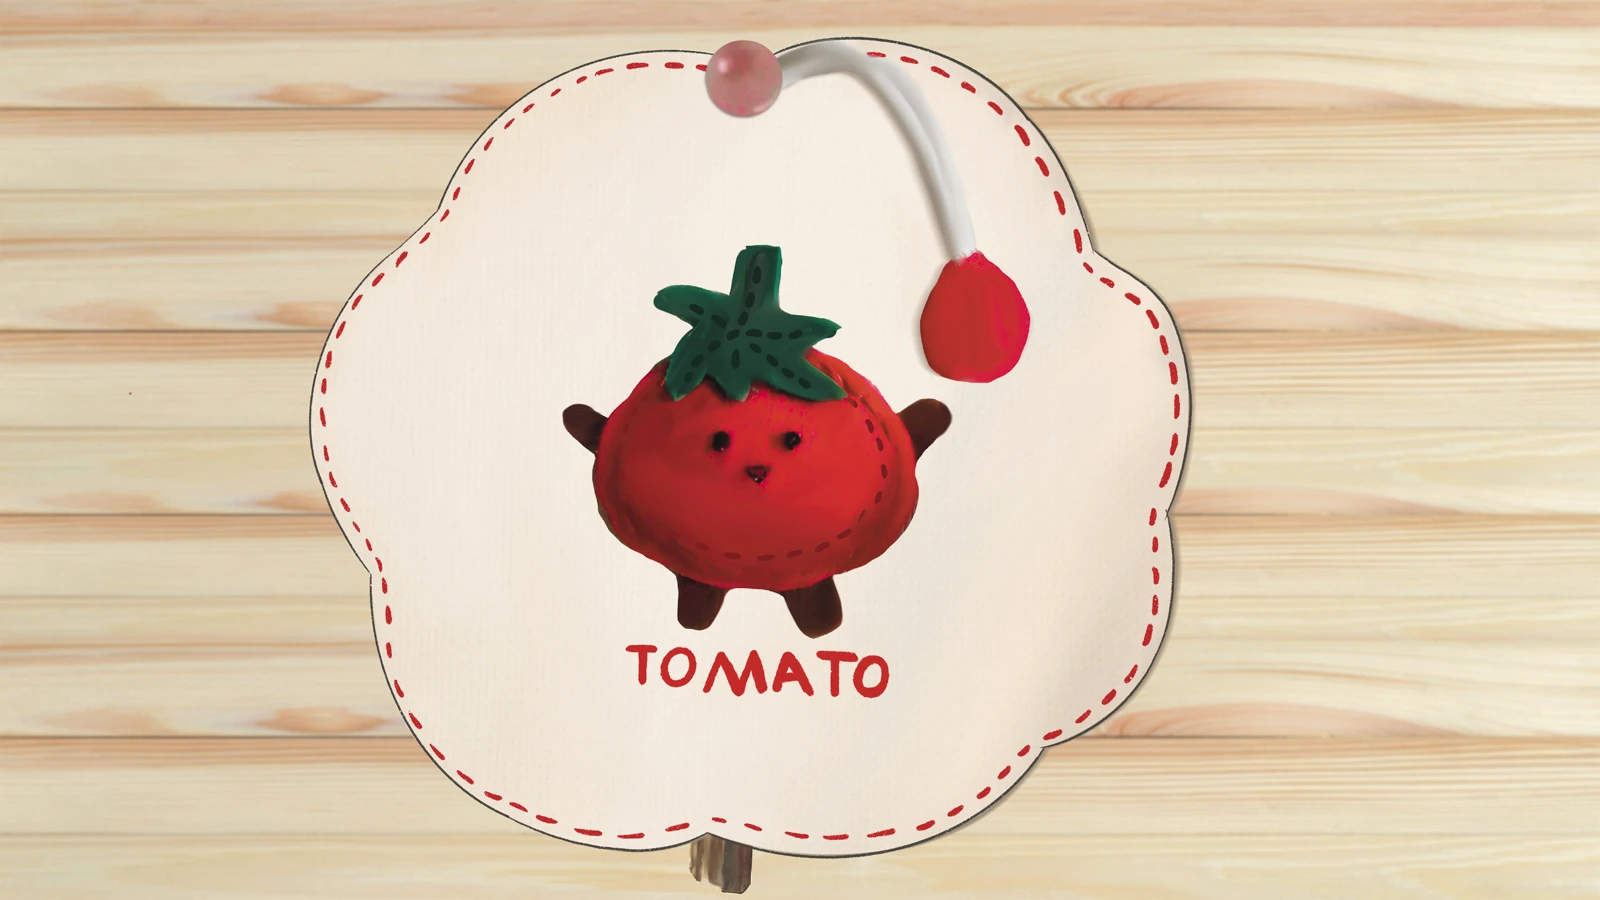
Tie your key ring tightly with a string or ribbon to prevent it from slipping off. Then, pass the string through the opening you created in the previous step, from the bottom to the top.
Next, to prevent the string from falling, thread a bead to the top opening. The bead should be larger than the top opening. What about the top of the string? You can tie a knot to secure it. You can also add another bead or pom-pom as decoration.
Step 7: Add embellishments you desired
By now, you’ve completed your cute DIY key cover, and it’s time to add some personality with embellishments. This is where you can really make your key covers shine and personalize them to your taste.
You can use beads, charms, or sequins to add a unique touch to your key covers. Simply glue these embellishments securely onto your key covers, and you’ll have a one-of-a-kind accessory. Consider using small buttons, mini pom-poms, or rhinestones for added flair.
Experiment with different materials to create eye-catching and personalized key covers. With embellishments, you can make your key covers stand out and reflect your style.
Conclusion
You’ve successfully created a one-of-a-kind key cover that’s both functional and stylish. Your DIY skills have paid off, and now you can proudly show off your personalized key cover.
Whether you’re into bold patterns or subtle designs, your key cover reflects your personality. Attach your keys to it, and you’re ready to take on the day with a touch of flair.
Your creativity has turned a mundane item into a fashion statement!
Learn more DIY projects from the Longan Craft Blog, and dive into the fabric world with Longancraft!
FAQs
How Do I Attach Charms or Beads to My Key Cover?
Using jump rings, head pins, or a hot glue gun, you can easily attach charms or beads to your project. Simply thread the charm onto the ring or pin or apply a dab of glue to secure it in place.
Can I Use Hot Glue to Attach Embellishments?
While it’s possible, hot glue can be messy and difficult to work with, especially on small surfaces.
Will a DIY Key Cover Damage My Keys or Lock?
Generally, a well-made DIY key cover won’t cause harm, but using hot glue or heavy decorations might put pressure on the key or lock mechanism.