Ever since I saw a child’s face light up with joy at their custom-made mermaid tail, I’ve been hooked on crafting these magical garments. I’ve learned that making a DIY mermaid tail isn’t just about creating a costume. It’s about weaving a bit of fantasy into everyday life.
I can’t wait to guide you through each step, from selecting materials to the final stitches. So you can bring a splash of mermaid magic into your world, too. Join me as we craft an enchanting escape for the little dreamers in our lives.
Gather the Necessary Supplies
To kick off your mermaid tail project, you’ll need to gather your materials. These supplies are essential for the foundation of your tail. So, let’s make sure you have everything ready to go.
Fleece Fabric

I recommend a generous amount of 60-inch-wide fleece or minty fabric to create the body of the mermaid tail. These materials are soft and easy to sew.
Scissors or Rotary Cutter
For cutting the fabric of the mermaid tail accurately, a pair of sharp scissors or a rotary cutter is essential. Precision in cutting would make or break the aesthetic and fit of the final product. Here’s why these tools are indispensable:
- Precision: A rotary cutter glides through multiple layers of fabric. They ensure clean, straight lines for a professional look.
- Versatility: Scissors can handle the delicate curve needed at the bottom of the mermaid tail, making them perfect for the job.
- Efficiency: Cutting those fabrics is a breeze with these tools, saving time and hassle.
Chalk and Pins
You need a handful of chalk and pins to ensure precision during the cutting and assembly process. Use the chalk to trace the tail pattern. The pins can hold fabric pieces together, so everything stays in place while sewing.
DIY Mermaid Tail Tutorial: A Step-by-Step Guide
Now that you’ve got everything ready, let’s get started on creating your own enchanting mermaid tail.
1. Measure Your Size
Before crafting the mermaid tail, you need to take precise measurements to ensure a snug yet comfortable fit. It’s crucial for the mermaid tail to look magical, especially if you’re making it for little girls who dream of swimming through the ocean like a real-life mermaid.
Here are the key steps you’ll need to follow:
- Waist Measurement: Measure around the waist, where the tail will sit. Add 4 inches to this measurement for ease and seam allowance.
- Tail Length: Measure from the waist down to the ankle to determine the length of the tail. Add 2 inches to this measurement for the hem and any adjustments.
- Ankle Measurement: Measure around the ankle, where the tail will narrow, ensuring that it’s not too tight to be uncomfortable or too loose to slip off.
When making these measurements, remember that accuracy is everything. A misstep here could mean a mermaid tail that’s too restrictive or, worse, one that doesn’t stay up at all. And, since you’re creating a piece that’s both a costume and a blanket, comfort is as important as the enchanting appearance.
Now, with a tape measure in hand, it’s time to turn these numbers into a mermaid dream come true.
2. Make the Tail Pattern
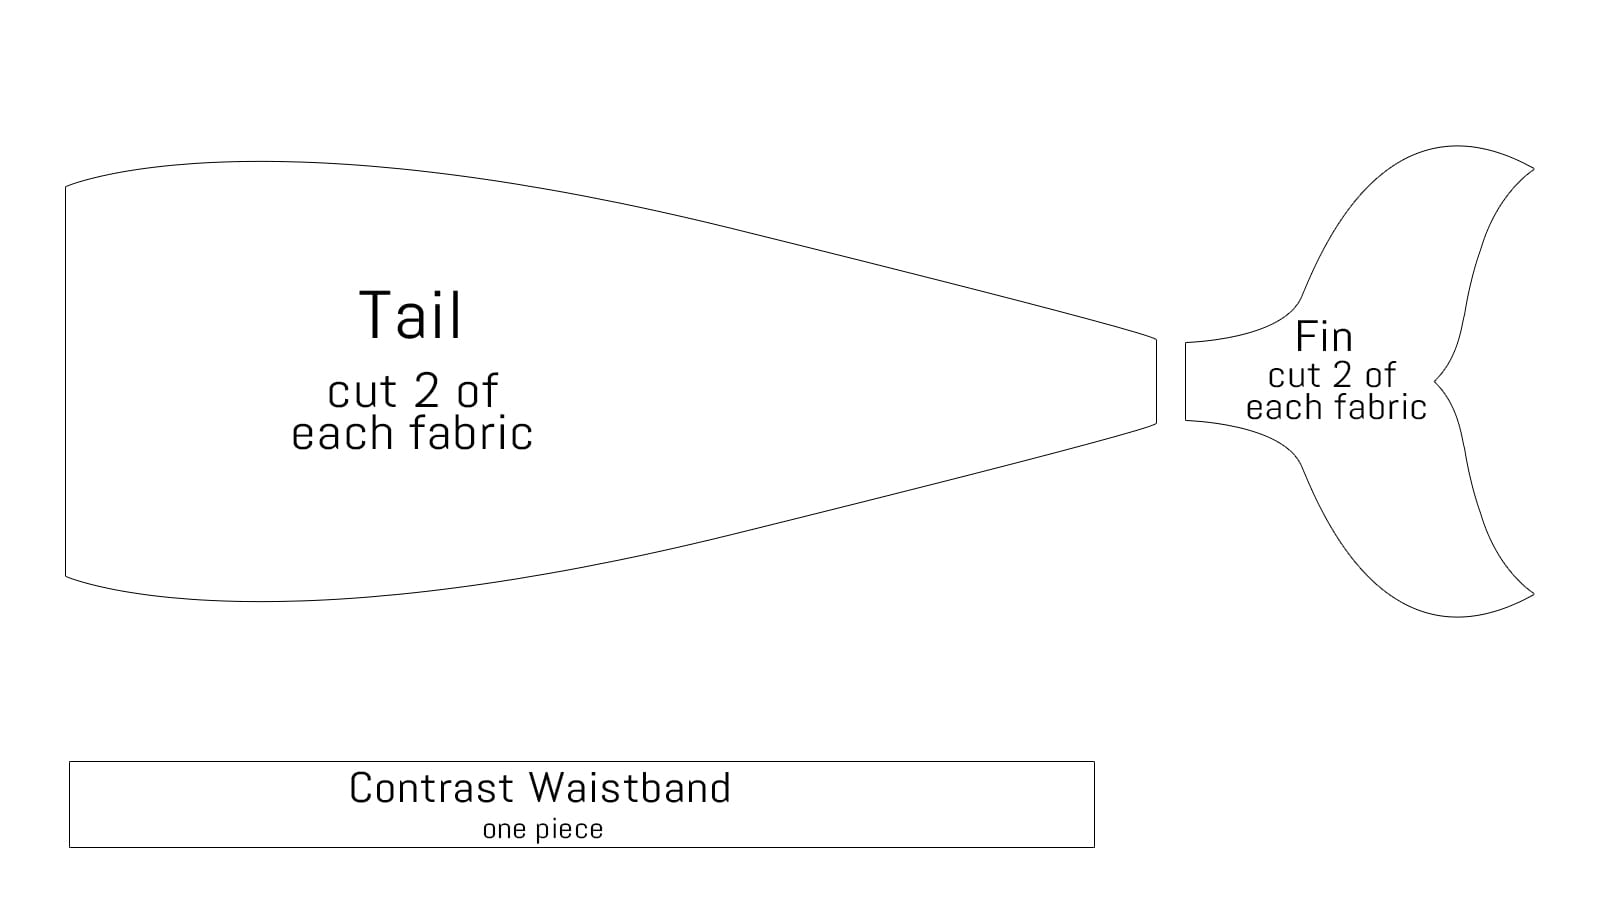
Having taken your measurements, you’re now ready to draw out the pattern for the mermaid tail on paper. You can craft a two-piece tail, which will allow for better movement and a more realistic look.
The first step is to sketch the body piece, which extends from your waist down to your ankles. Plus, an extra 2 inches for the height will ensure a snug yet comfortable fit.
Cut out the pattern and join the pieces as indicated. Next, position and either trace or attach the pattern to the lower section of your wrapping paper to gauge the remaining material available for crafting the tail.
3. Cut the Fabric Pieces

Now, you should cut the necessary fabric pieces for your mermaid tail.
You’ll start by cutting the body shape. Ensure it’s half the hip measurement plus one inch for a snug yet comfortable fit.
Next, tackle the fin and the band, using precise measurements to get that perfect mermaid silhouette.
Cut the Body
You must begin by cutting two pieces of fabric. Ensure they stretch widthwise and match the required dimensions for the mermaid tail.
- Measure and mark the fabric for your DIY mermaid project.
- Cut the two pieces, following the hip and height measurements plus allowances.
- Trim the bottom edge in a curve to create the iconic mermaid tail shape before you sew the two parts together.
Cut the Fin
After trimming the body of your mermaid tail to the desired shape, proceed to cut out the fin.
Carefully cut the fin pieces from the fabric, ensuring they’ll make the tail look enchanting.
Cut the Band
Next, measure and cut a single band piece from your chosen fabric. You should ensure it’s the same width as the top of the tail and the desired length for the waistband.
4. Sew the Tail
Now that you’ve cut the fabric, it’s time to put your sewing skills to work on your DIY mermaid tail.
You’ll start by sewing the body of the tail, ensuring you use a zig-zag stitch to accommodate the stretch of the fabric.
Next up, you’ll carefully sew the fin and then add the band to give the tail its final shape and structure.
Sew the Body
Before moving on to the fin, you’ve got to sew the body of the mermaid tail. You need to ensure the pieces are snugly stitched together along the sides.
Here’s how you can keep it simple:
- Straight Stitch: Join the pieces together with a straight stitch for durability.
- Zig-Zag Finish: Then, secure the edges with a zig-zag stitch to prevent fraying.
Sew the Fin
Once you’ve stitched the body snugly, it’s time to tackle the fin, which will give your mermaid tail its enchanting shape and flair.
Align the top of the fin with the bottom of the tail, right sides together. Carefully stitch them, remembering to include seam allowances for durability.
This step transforms the tail, adding the final touch to your magical creation.
Add the Band
After sewing the fin to the tail’s bottom, add a comfortable and snug band to the top of your mermaid tail.
- Fold the Top: Fold the top edge over by an inch, creating a casing but leaving the top open.
- Thread Elastic: Using a safety pin, thread the elastic through the casing.
- Elastic Together: Overlap the ends and sew the elastic together securely.
Conclusion
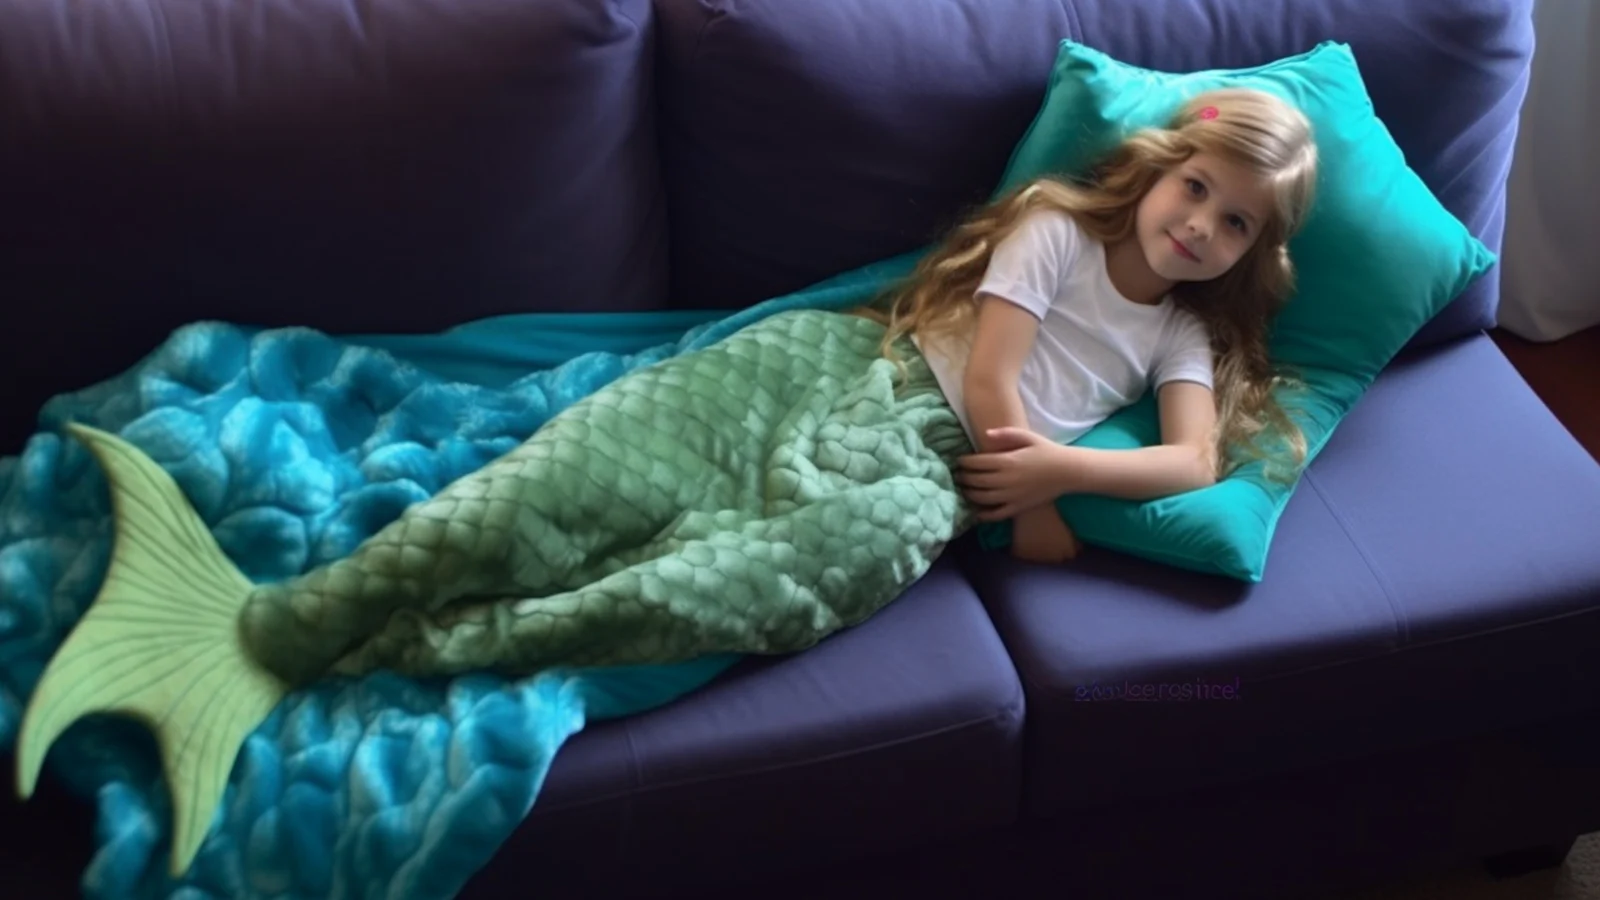
And there you have it, my fellow crafters—you’ve just finished stitching up the dreamiest mermaid tail blanket! It’s snug, it’s sparkly, and it’s ready for some serious lounge time.
Trust me, the smiles you’ll get from this DIY project are worth every minute spent wrangling that minty fabric.
So grab your scissors, thread that needle, and dive into your own magical sewing adventure.
Can’t wait to see the waves of creativity you’ll create with this one!
FAQs
How do I make a mermaid tail without sewing?
You can use metallic fabric and tulle, cutting them to shape and attaching them with basting stitches. Then, trim for proportion and secure an elastic waistband with pins or clips, avoiding sewing altogether.
How do I make a mermaid tail out of cardboard?
Cut out cardboard to your desired tail shape, then tape the seams for stability. You can decorate it with paint or fabric to resemble scales and attach straps to secure it around your waist.
What materials are used for mermaid tails?
You can typically use stretchy fabrics like spandex or minky for mermaid tails. They often feature neoprene or vinyl for structure. And shimmering details are added with metallic or swimsuit-type materials.
Get more sewing tutorials on Longan Craft Blog! Dive into the fabric world with Longancraft!