Many people are unaware of the rich history behind cloth napkins. They can be dated back to ancient times and were once a status symbol reserved for the wealthy. As you consider crafting your own set, you’re not just making a practical item for daily use. You’re participating in a tradition that spans centuries.
With the right technique, you can create napkins that rival those found in high-end boutiques. You’ll need to choose a fabric that is not only attractive but also absorbent and durable. This ensures your creations can withstand repeated uses and washes. You’ll also discover the importance of precise measurements and neat seams to give your napkins a professional look.
As you move forward, remember that the devil is in the details, and the choices you make now will determine the quality and longevity of your handcrafted napkins. Stay tuned to uncover the secrets of selecting the ideal thread count, mastering the mitered corner, and adding personal touches that make each napkin uniquely yours.
Key Takeaways
-
Consider cotton or linen fabric for durability and ease of maintenance.
-
Standard sizes for cloth napkins range from 12 inches for tea to 22 inches for formal dinners, with a 1-inch allowance for hemming.
-
Prewash fabric before cutting and sewing to account for potential shrinkage of up to 1/2 inch on each side.
-
Fold the corners evenly at a 45-degree angle. Press them with an iron to achieve clean seams and mitered corners.
Which Fabric is Suitable for Making Cloth Napkins?
When selecting fabric for your cloth napkins, consider cotton or linen for their combination of durability, absorbency, and ease of maintenance. There is a wide selection of these materials. Each presents unique characteristics suitable for napkin creation.
Linen, derived from flax fibers, is known for its natural texture and elegance. It can enhance the dining experience with a touch of sophistication. Its high absorbency and inherent strength make linen napkins a long-lasting choice.
In comparison, quilting cotton is a versatile option that provides a plethora of patterns and hues. It allows for personalization and thematic alignment with your dining decor. Quilting cotton’s tight weave ensures durability, making it a practical choice for everyday use. However, it’s essential to pre-wash different fabrics, as shrinkage can alter the final dimensions of your napkins. This step is crucial to maintaining the intended size and shape post-production.
To ensure optimal results, invest time in researching the properties of different fabrics. Focus on those that offer a balance between functionality and aesthetic appeal. By doing so, you’ll create napkins that aren’t only practical but also contribute to an inviting table setting.
What is the Ideal Size for a Cloth Napkin?
Selecting the ideal size for your cloth napkins depends on the occasion. Standard measurements range from 12 inches for tea to 22 inches for formal dinners. Incorporating a 1-inch allowance for hemming ensures a finished look. Understanding the standard sizes and how to adjust for hemming is crucial to achieving a professional and polished outcome.
To deepen your understanding, consider the following technical details:
-
Standard Sizes: Most cloth napkins are square. The industry standard sizes are 18–22 inches for formal settings, 18–20 inches for regular dinners, 14–16 inches for lunches, and 12 inches for tea.
-
Hemming Allowance: Cutting the fabric into a 17-inch square, for example, will give you enough material to fold and hem. This will result in a perfectly sized 15-inch napkin.
-
Hemming Template: Utilize a hemming template made from cardboard with 1-inch and 1/2-inch markings to guide your folds. This can ensure uniform hems on all napkins.
-
Prewashing Fabric: Always prewash your fabric to account for potential shrinkage, which can be up to 1/2 inch on each side. Doing so ensures your napkins maintain their intended dimensions after laundering.
You can customize the size and choose different patterns or colors of fabric to create unique and personalized cloth napkins.
Supplies You Need
Now let’s gather the necessary supplies to begin the crafting process.
You’ll need fabric squares, which you should prewash and press to eliminate the possibility of future shrinkage. Opt for a fabric like cotton or linen. They not only feel pleasant to the touch but also hold up well to repeated laundering.
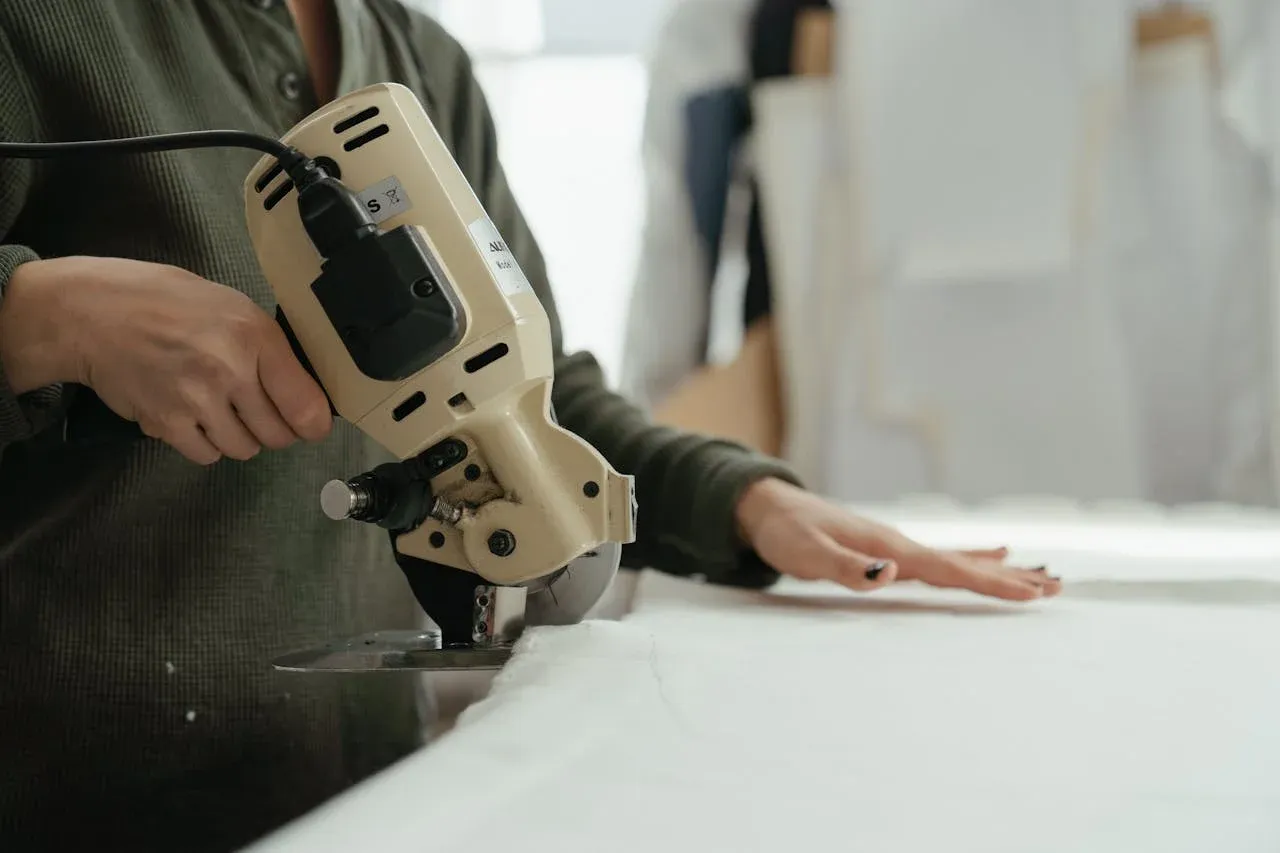
For cutting your fabric to the exact size, a pair of sharp fabric scissors is indispensable. Or you can use a rotary cutter if you prefer clean, straight edges. Ensure that the scissor blades or rotary cutter are sharp enough to prevent fraying and to guarantee a clean cut.
Of course, you’ll need a sewing machine for assembling your napkins. It offers speed and precision that hand-sewing simply can’t match. Equip your sewing machine with a thread that matches or complements your fabric, and you’re set to produce durable seams.
To hold your fabric in place while sewing, grab some pins. They’ll be your guide to maintaining even hems. And don’t forget the iron. Pressing your fabric before cutting is crucial for achieving a crisp, professional look for your finished napkins.
With these tools at hand, you’re well on your way to crafting elegant, homemade cloth napkins.
How to Make Cloth Napkins: A DIY Cloth Napkin Sewing Tutorial
Begin your DIY cloth napkin project by accurately cutting your prewashed fabric into squares. Make sure you account for a 1/2-inch hem allowance.
Next, fold and press the edges to create a crisp, double-folded hem. Pay special attention to maintaining even widths for a professional finish.
After folding the edges, meticulously topstitch around the perimeter to secure the hems in place. Reinforce the corners for added durability.
Step 1: Cutting the fabric

Before cutting your fabric for napkins, it’s crucial to measure and mark it accurately. You should take into account potential shrinkage and the seam allowance needed for a polished finish. Ensure you have a sharp rotary cutter and a cutting mat to protect your surfaces and achieve precise cuts.
If you’re new to sewing, a fat quarter is a great way to start. Because it is pre-cut and usually measures 18’x22′. It can be divided into four large squares of fabric.
-
Choose a fat quarter for a manageable piece of fabric, ideal for beginners.
-
Use a cutting mat to safeguard your surfaces and ensure accurate cutting.
-
Measure squares of fabric, considering a seam allowance of at least 1/4 inch for hems.
-
Cut fabric with a rotary cutter for sharp, straight lines, enhancing the professional look of your napkins.
Step 2: Fold and press the edge

To ensure a crisp, professional look, start by folding the fabric’s edge over 1/4 inch to the wrong side. Press firmly, then fold it over another quarter inch and press again. This double fold creates a clean seam that conceals raw edges, mitigating fraying and ensuring durability.
After pressing the initial side, repeat this process on an adjacent edge.
Before sewing, unfold the pressed edges slightly and snip the corners diagonally. Follow the crease lines to reduce bulk and achieve mitered corners. Refold the corner over 1/4 inch to the wrong side and iron it flat. Then, refold the edges along the previous folds, pressing them into place once more.
Secure the folds with pins to maintain their position as you sew.
Step 3: Cut the corner

After pressing and folding, carefully unfold them and snip the corners diagonally along the crease lines to create mitered corners that will give your cloth napkins a professionally tailored look. This step is crucial for making mitered corners, which not only enhance the aesthetic but also ensure durability by reducing bulk.
-
Measure precisely: Each corner cut should mirror the others for uniformity.
-
Iron with care: Press the fabric properly to establish clear crease lines for cutting.
-
Secure the fold: Pin the edges before you sew around to maintain alignment.
-
Pivot smoothly: When sewing, approach each corner with caution and pivot the fabric to maintain a consistent seam allowance.
Executing these steps with precision will result in elegant and sturdy napkins ready for any occasion.
Step 4: Fold the edges evenly at the corner

With precision as your guide, carefully fold the corner over to the backside by a quarter inch. Press it firmly with an iron to set the initial crease for your mitered corner.
Next, fold the edges back over where they’ve been previously folded, ensuring the right sides are together, and press with the iron once more. This sets the stage for the crucial sewing step.
Now, fold them again, meticulously adjusting so that the folds meet precisely at the corner. This technique is essential for crafting sharp-mitered corners, giving your napkins a professional finish. Iron the folds flat and, if necessary, re-adjust to guarantee uniformity.
To secure the hem in place before the final sewing step, pin the fabric. This preparation is pivotal. It ensures that the corners remain even throughout the sewing process.
Step 5: Finish the cloth napkin by topstitching the edges

You’re now ready to secure these folds by topstitching. This will add both strength and a professional finish to your project. When you topstitch, you’ll sew a napkin along the border. Make sure the stitches are close to the edge for a crisp edge stitch that holds everything neatly in place.
-
Select a thread color that either matches or complements your fabric for a cohesive look.
-
Adjust your sewing machine to a straight stitch setting. Position the needle to stitch around the edges.
-
Maintain a uniform distance from the edge to ensure the topstitching appears even and professional.
-
Trim any loose threads after topstitching to present a neat and tidy final product.
Tips for Sewing a Napkin
For optimal sewing results, ensure you’re working with fabric that’s been pre-washed and ironed to remove any potential shrinkage or creases.
Begin by accurately cutting your fabric to the desired size, factoring in a seam allowance that will accommodate your hem.
When you’re ready to sew, place the fabric pieces with their right sides together, aligning the edges precisely. Sew around the perimeter, leaving an adequate seam allowance—usually about 1/4 to 1/2 inch. This will prevent fraying and ensure a durable edge. Take special care when you approach the corners. Mitered corners will give your napkin a professional and polished look. To achieve this, fold and press the corners at a 45-degree angle before stitching, which will reduce bulk and create a crisp, diagonal seam.
As you sew, maintain a consistent seam allowance. Use tight stitches to secure the napkin edges. Reinforce the corners by backstitching to add strength to these stress points. After sewing, trim any excess threads and press the napkins once more for a flawless finish.
Conclusion
You’ve now mastered the craft of creating elegant cloth napkins, selecting the perfect fabric, and executing professional hems. Your table will showcase your personal style and commitment to sustainability.
With these skills, you’re equipped to tackle more sewing projects, enhancing both your creativity and technique. Remember, precision and patience are keys to sewing. Take pride in your handiwork.
Enjoy your bespoke napkins at every meal, and may they spark conversations about your newfound sewing prowess.
FAQs
Q: What are mitered corners? Why are they used in cloth napkins?
A: Mitered corners are a sewing technique used to create neat and professional-looking corners on napkins and other fabric items. They are ideal for making cloth napkins as they give a clean and polished finish to the edges of the napkin.
Q: Can you explain the steps involved in sewing napkins with mitered corners?
A: The steps typically involve cutting the fabric to size, ironing the hems, mitering the corners, and sewing around the edges to secure the hem and corners in place. It’s a simple sewing process that yields impressive results.
Q: How do I ensure that my cloth napkins are properly hemmed?
A: To ensure a neat hem, it’s important to iron the fabric before sewing to create crisp edges. This step helps in achieving a professional and tidy finish for your napkins.
Q: Can I make placemats and a table runner using the same sewing method?
A: Yes, the same sewing method can be applied to make placemats and a table runner with mitered corners. Once you learn how to sew the napkins, you can use the same technique for other fabric items.
Q: How can I choose the right thread and needle for sewing cloth napkins?
A: For sewing cloth napkins, a medium-weight thread and the appropriate needle size for your fabric are recommended. Using the right tools and materials can make the sewing process easier and more effective.
Get more DIY tips on Longan Craft Blog! Dive into the fabric world with Longancraft!