Are you ready to embark on a creative journey to craft a mesmerizing fabric fish wind chime? With simple materials and basic sewing skills, you can create a visually striking decoration that adds a touch of whimsy to any room.
Before you hang your colorful fish, you’ll need to select the perfect fabrics, precision-cut the shapes, and master the art of assembling the pieces. Let’s dive in and uncover the step-by-step secrets to bringing your fabric fish to life.
Key Takeaways
- Cut out fabric pieces accurately using a template. Make sure of symmetry and precise cutting.
- Sew two fish shapes together, leaving a small opening. Then, stuff it with cotton or filling material and sew the opening closed.
- Attach a small loop at the top of the fish for hanging, and string the fish onto a long string or fishing line.
- Add beads or bells between the fish for extra decoration, and tie a knot at the top to create a hanging loop for the wind chime.
Materials and Tools
Now that you’re ready to start making your fabric fish, it’s time to gather the necessary materials and tools.
Fabric Selection
When it comes to fabric selection, cotton works well for the body of your fabric fish. If you want to add more details to your fish, felt is another excellent choice for the head, fins, and tail. You can combine these two types of fabrics to make more intricate fish.
Don’t be afraid to experiment with different fabrics and colors to make your fabric fish truly unique. Consider using pinking shears for a decorative edge on the fins, but this step is optional.
Additional Supplies
You’ll need to gather a few more materials to bring your fabric fish to life, including a template to trace the fish shape and sewing supplies like yarn or twine for stitching.
Don’t forget to gather your preferred stuffing material to fill your fish with a soft, plush texture.
How to Make Fabric Fish Wind Chimes: A Step-by-Step Tutorial
Now that you’ve gathered your materials and tools, it’s time to bring your fabric fish to life!
Step 1: Create the Fish Template
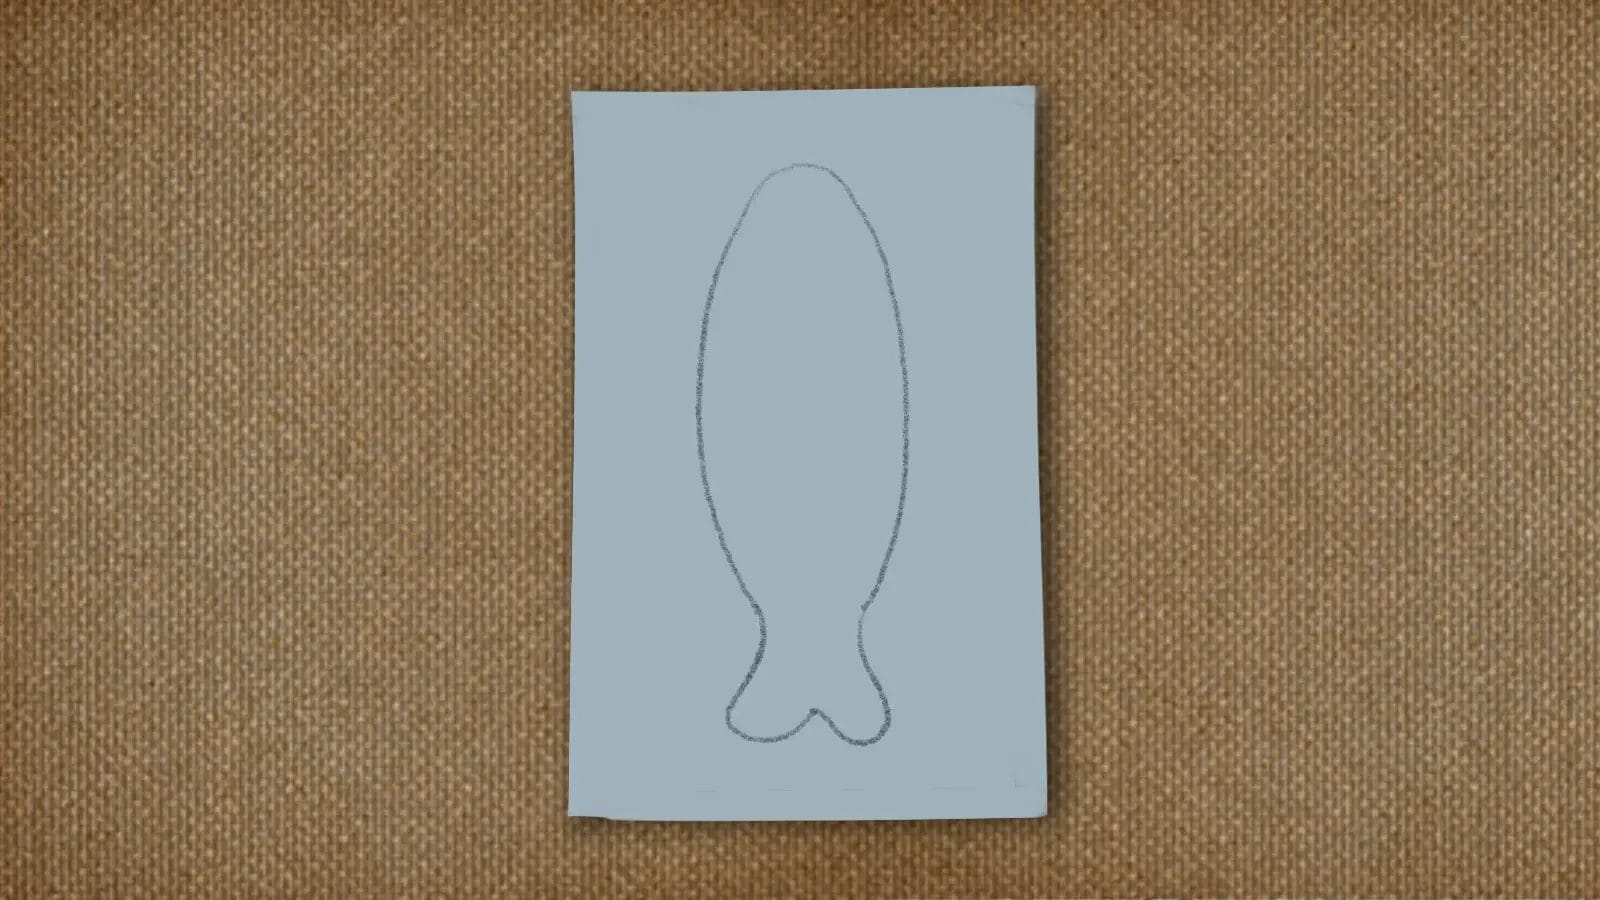
 Create a cardboard or template plastic fish shape template by drawing a fish outline, considering the size and design based on your desired final fabric fish size. This template will serve as a guide for cutting out your fabric fish shapes.
Carefully cut out the fish template to ensure accurate shapes. Label your template for future use and easy identification.
With your template in hand, you’ll be ready to move on to the next step in creating your fabric fish.
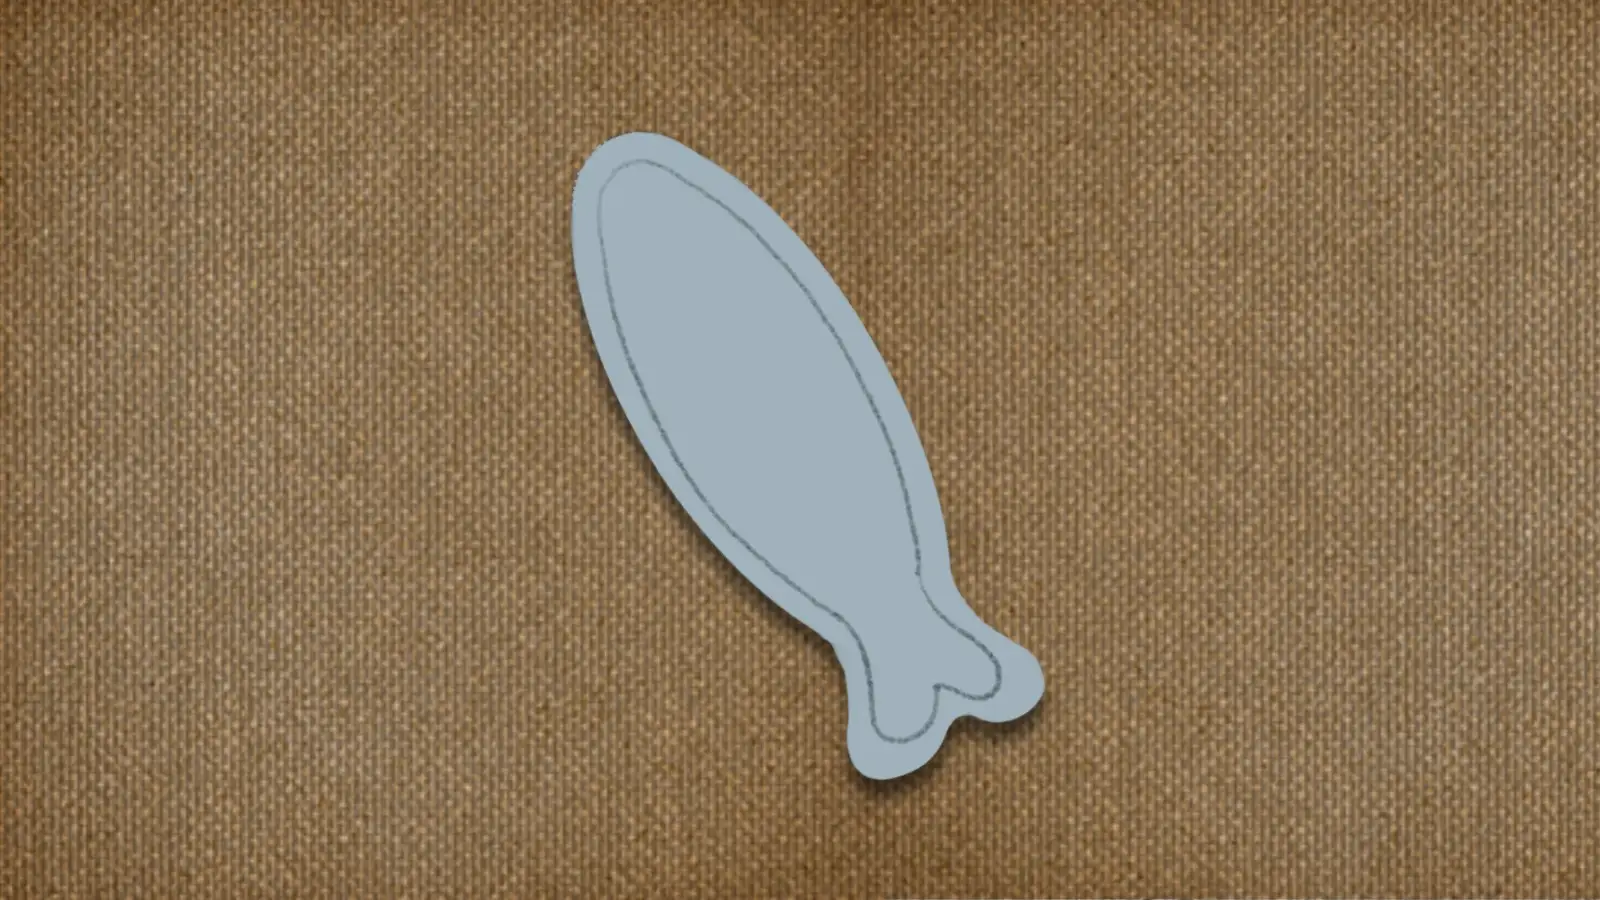
Step 2: Cut the Fabric Pieces
 Fold your light cotton fabric in half. Place the fish template on top of the fabric to ensure accuracy. Next, use sharp scissors to carefully cut along the outline of the fish template for precision.
Remember to cut slowly and carefully to avoid mistakes. As you cut, follow the template’s outline closely to achieve a smooth, curved shape for your fish.
Step 3: Sew the Fish
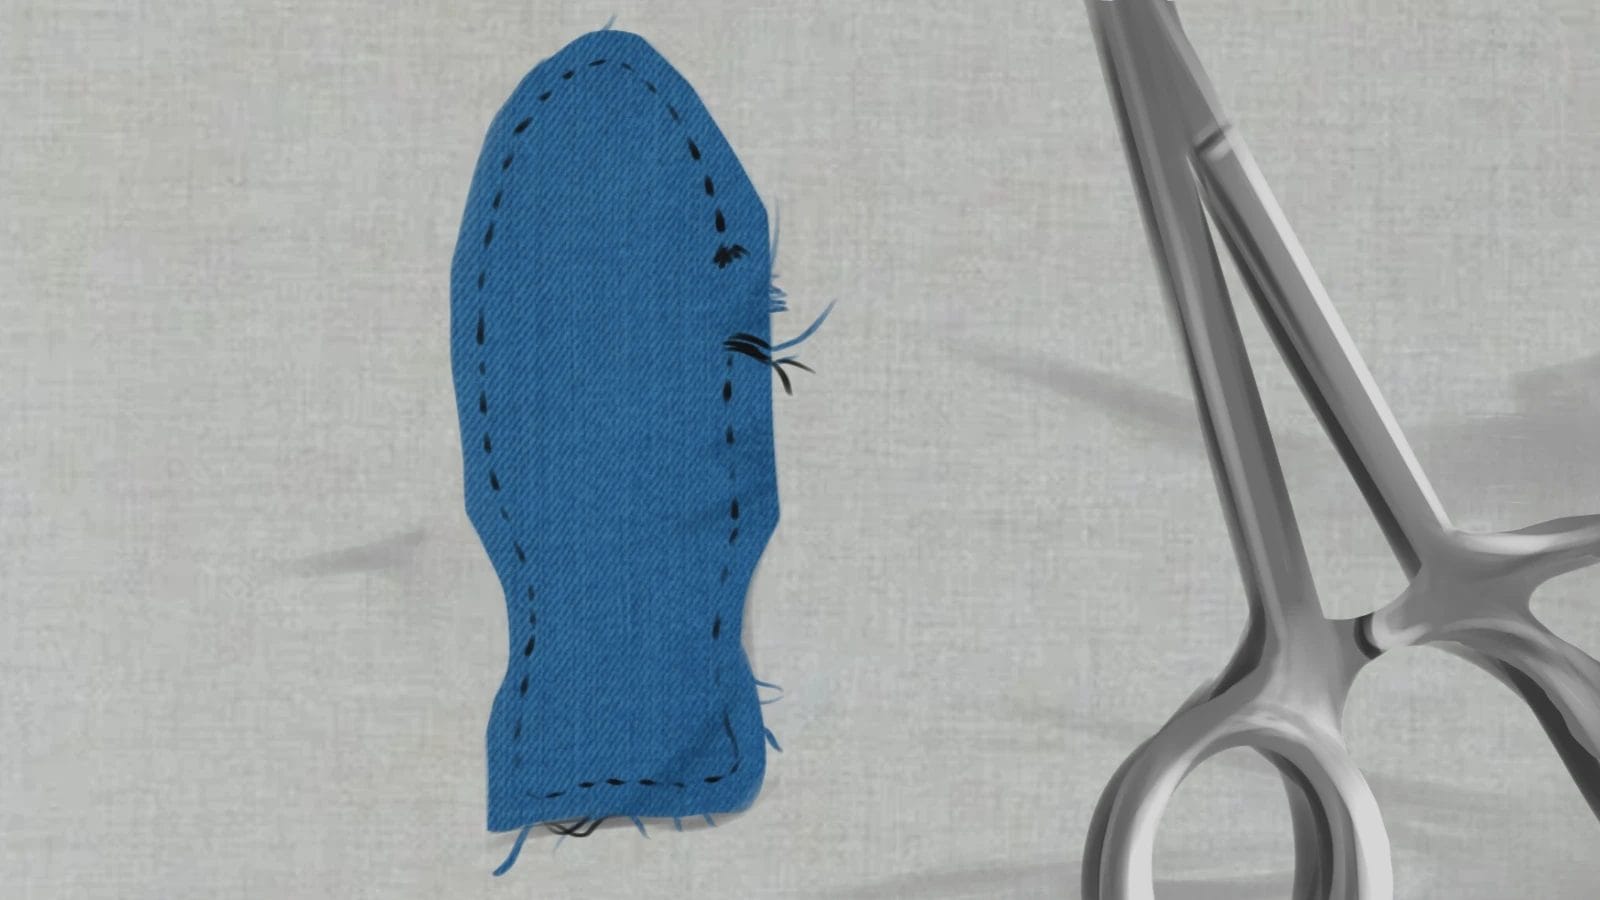 With your fabric fish body pieces cut out, start sewing them together, leaving a small gap for stuffing and aligning the edges carefully. Use a steady hand or a sewing machine to stitch along the marked seam line.
As you sew, keep the right side of the fabric facing inwards. Make sure to backstitch at the beginning and end of your seam to secure it.
Now, your fish is taking shape, and you’re ready to move on to the next step.
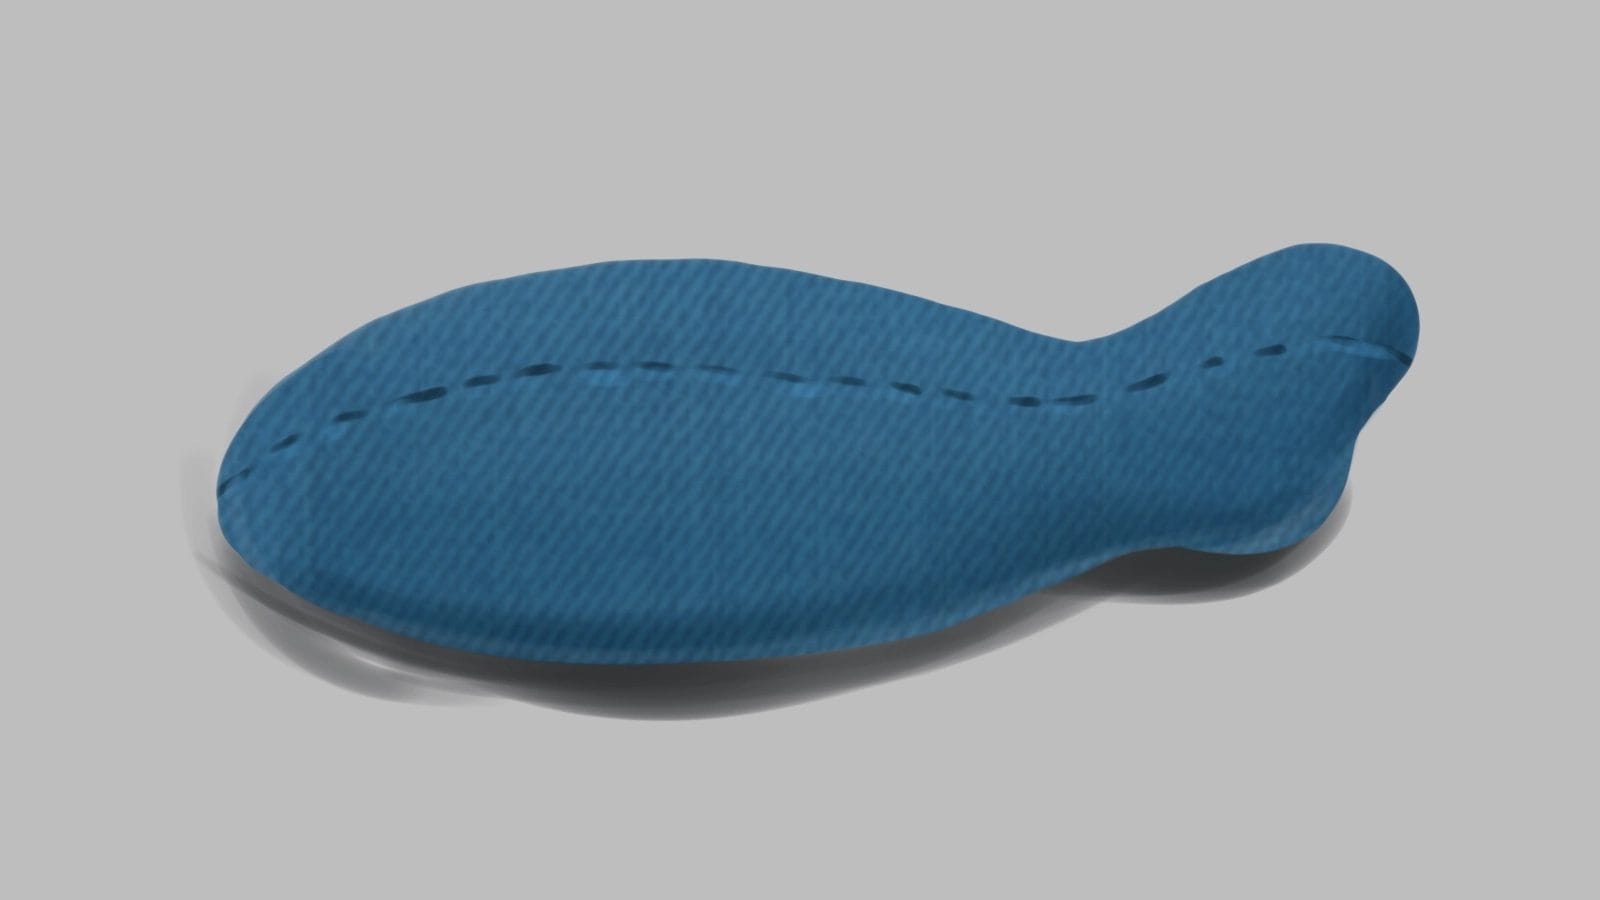
Step 4: Stuff the Fish
 Now that your fish body is sewn, it’s time to give it a plump and cuddly appearance by filling it with your preferred stuffing material. You can use as much or as little stuffing as you like, depending on how firm you want your fish to be.
Turn the right side out and start filling the fish from the opening. Make sure to fill it evenly, avoiding lumps or empty spots.
Step 5: Close the Opening
 After filling your fish to the desired plumpness, it’s time to securely close the opening to keep the stuffing in place.
Securely fasten the opening to prevent any stuffing from coming out. As you stitch, gently pull the thread taut to ensure a secure closure.
Once you’ve completed the whipstitching, your fish is ready for the final touches.
Step 6: Add Details to Your Fish
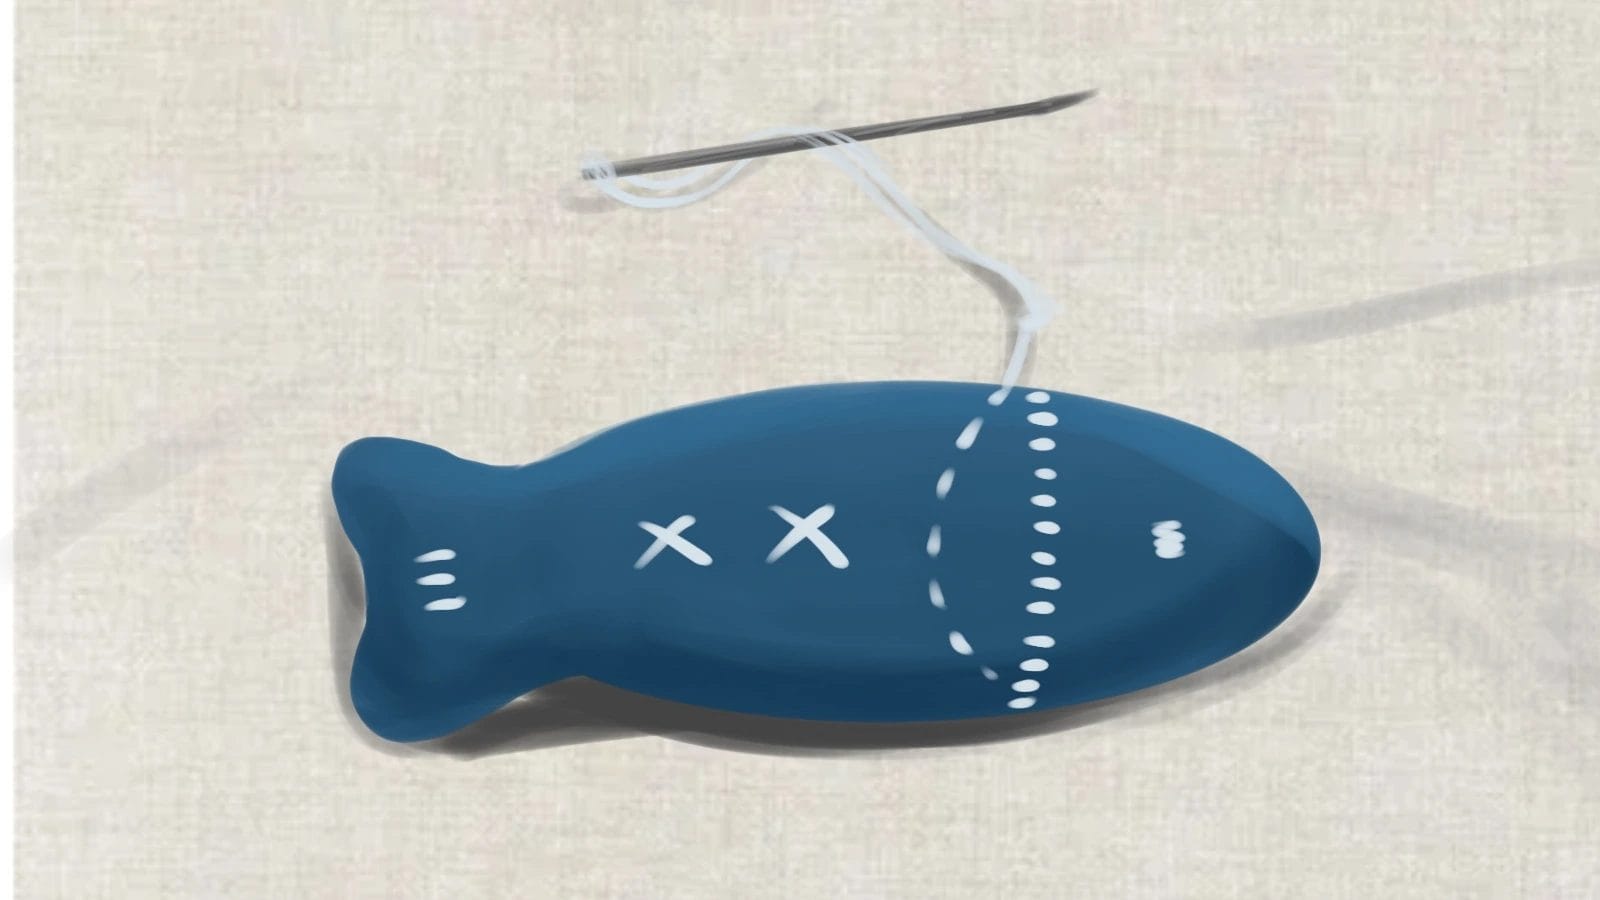 Get creative and embellish your fish by adding buttons for eyes, stitching on a smile, or using fabric scraps to create scales, letting your personality shine through in the details.
You can use embroidery or hand sewing to add unique details, like intricate patterns or textures. Add embellishments like lace, beads, or sequins to add flair to your fish.
With a little creativity, you can turn a simple fish into stunning artwork that showcases your personality and style.
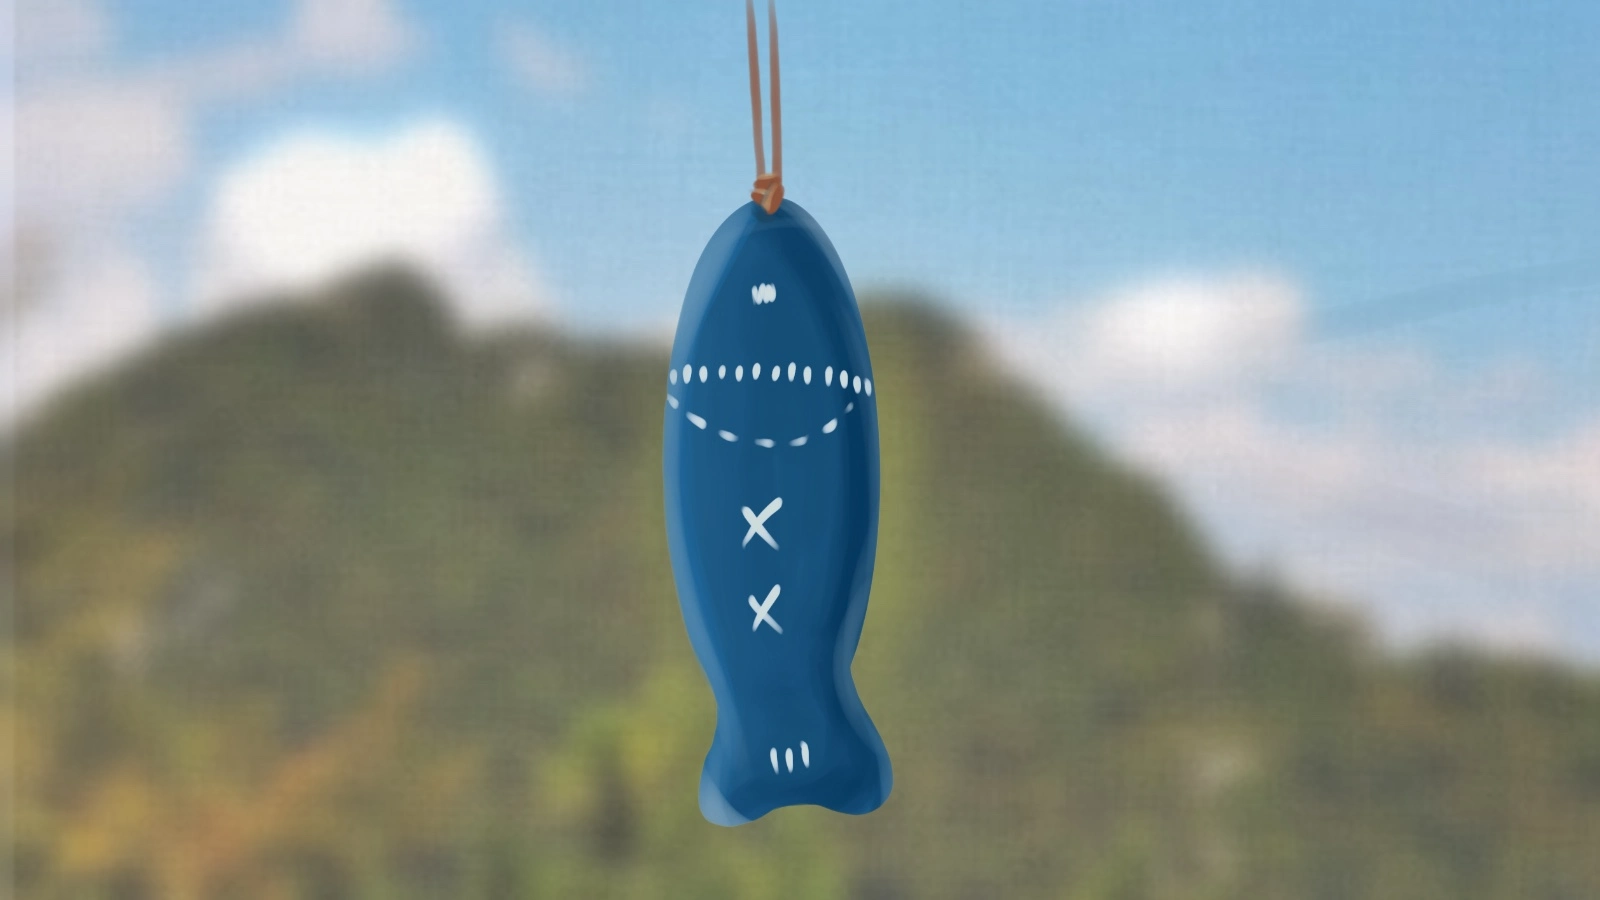
Step 7: Attach Hanging Loops
Attaching a hanging loop allows you to proudly display your creation. To do this, cut a small strip of fabric or ribbon to your desired length. Fold the strip in half to create a loop, ensuring the raw edges are aligned.
Place the loop at the top of the fish’s body, sandwiched between the front and back fabric layers. Secure the loop in place by stitching it along with the body pieces as you sew around the edges.
Make sure the loop is securely attached to the fish to support hanging your finished fabric fish.
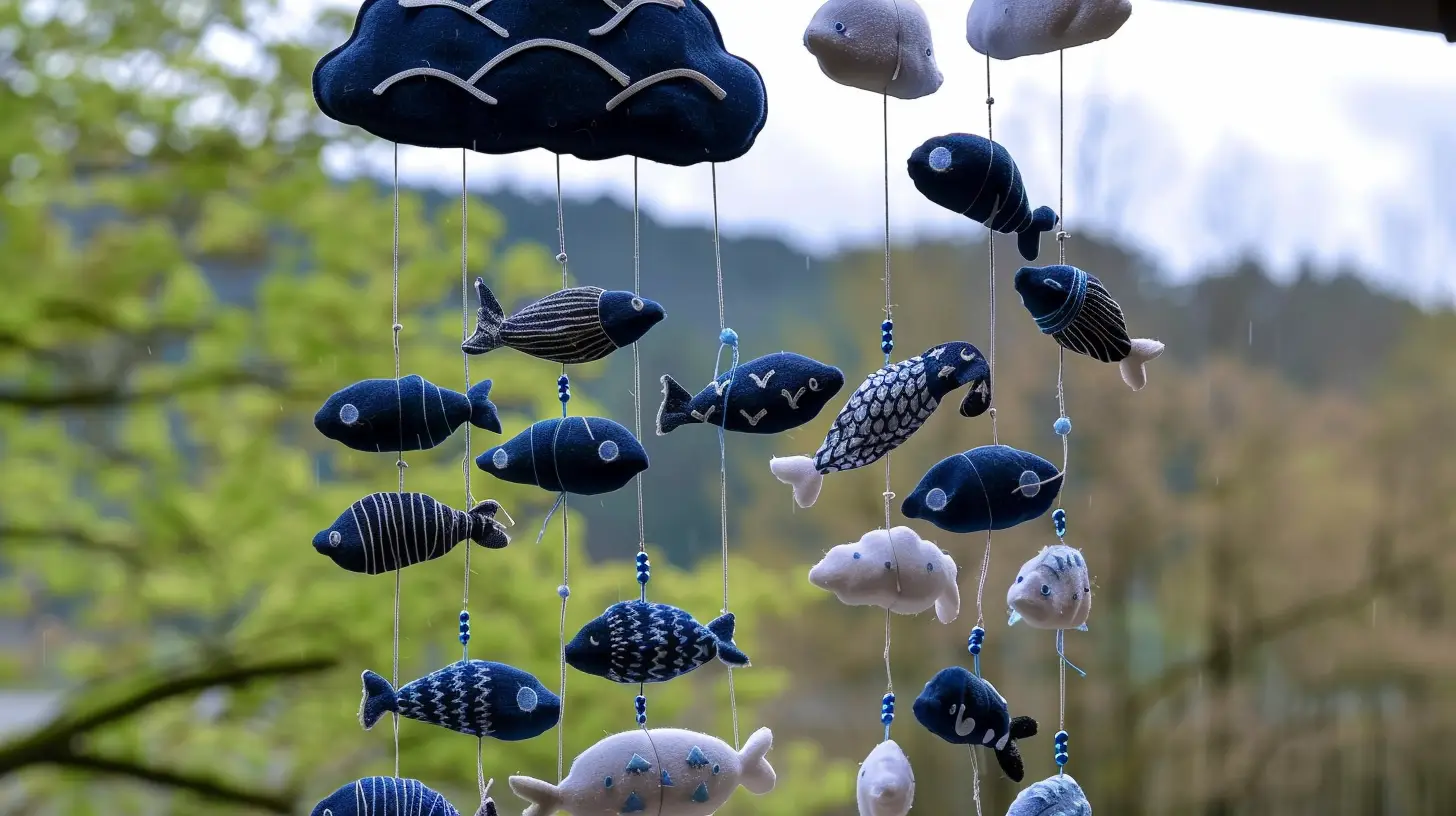
Step 8: Combine All the Fish for a Wind Chime
 Repeat the above steps and create a school of fabric fish. Thread a small loop of string through each one’s hanging loop, preparing them to be strung together into a melodious wind chime.
This is where your craft skills really come together! Take the string and thread each fish onto it, spacing them evenly for a balanced look. As you add each fish, adjust the spacing to create a harmonious arrangement.
When you’ve added all your fish, tie a knot at the top of the string to create a loop for hanging. Finally, find a breezy spot to hang your wind chime and enjoy the gentle tinkling sound as the fish sway in the wind.
Your fabric fish template has transformed into a beautiful, melodious project!
Conclusion
You’ve successfully created a beautiful fabric fish wind chime, adding a touch of fun and whimsy to any room. Hang it in a breezy spot and enjoy the gentle tinkling sound of the beads or bells as the colorful fish sway.
With every gentle breeze, your handiwork will come to life, bringing a smile to your face. Now, sit back, relax, and take pride in your creative accomplishment!
Explore more sewing projects on Longancraft Blog and discover the world of fabrics on Longancraft!