Imagine you are working on a handmade skirt and decide to add a slit for extra flair. How can you add a professional-looking slit without damaging your garment? It’s simpler than you think. With the right technique, you can easily introduce an elegant slit to any piece.
Now I will show you how to sew a slit for fabrics. Get ready for a practical guide to help you master this skill, whether you’re experienced or new to sewing. Let’s embark on this exciting sewing project!
Key Takeaways
- Precise measurements and markings are very important for a properly positioned and symmetrical slit in clothing.
- Good pinning and sewing techniques help achieve a neat, professional look and avoid mistakes in aligning slits.
- Applying finishing techniques like pressing and hemming greatly improves how the garment looks.
Materials Needed when Sewing a Slit
To sew a slit, you will need these items: your garment, a measuring tape, a fabric marker, thread, and sewing pins.
Use the measuring tape and fabric marker to mark the length and position of the slit on the garment.
To add a special touch to your clothes, use sewing pins and thread to create and secure a slit after marking it.
Garment
You can learn how to sew a slit for your dress, pencil skirt, or shirt.
Measuring Tape
Use a measuring tape to find the right spot and size for the slit on your clothing. It’s an essential tool in this process. The measuring tape helps achieve symmetry and provides precise markings on fabric when making a cut.
Fabric Marker
A fabric marker is an invaluable tool for marking the exact location of a slit on the fabric with precision. Please use markers with water-soluble or disappearing ink.
Thread
Choosing the right thread is important for sewing a seam. The thread affects the seam’s durability and the look of the garment. To achieve a professional finish, opt for a high-quality sewing thread that matches your fabric color.
Sewing Pins
You’ll need the right thread and appropriate sewing pins to sew a slit. Use these small tools to keep your fabric in place while sewing and ensure the correct seam allowance.
Sewing Machine
When sewing a seam, a good sewing machine is necessary. It should be able to do straight stitching with adjustable stitch length for a clean and secure finish.
Sew A Side Seam Slit Tutorial for Skirt or Dress
Here are the instructions for sewing a side seam slit. First, you’ll need to accurately measure and mark the position of the slit. Sew the side seams up to the mark, then press the seam open, neaten the slit edges, pin the seam, and finally sew the slit for a stylish and professional finish.
Step 1: Measure the Position of the Slit and Mark it
Before sewing a side seam slit on your skirt or dress, use a ruler or measuring tape to find the right position for the slit. You’ll want to mark this with fabric chalk or a fabric marker. This step is crucial to add precision to the slit opening.
Here’s a detailed list of steps to follow:
- Calculate the preferred length of your slit opening from the hem upwards.
- Mark the slit open line using fabric chalk, ensuring it aligns with the side seam.
- Check the slit position and adjust if needed for comfort and correct height.
Step 2: Sew Side Seams to the Mark
After marking the position for the slit, pin the side seams of the fabric together, making sure they align perfectly. After securing the fabric, sew the seam up to the top of the slit and stop at the mark.
Be careful to maintain a consistent seam allowance for a professional finish. After sewing, trim the seam allowance to reduce bulk and make it look cleaner. To prevent fraying and improve the finish, use a merger or zigzag stitch on the raw edges of the side seam.
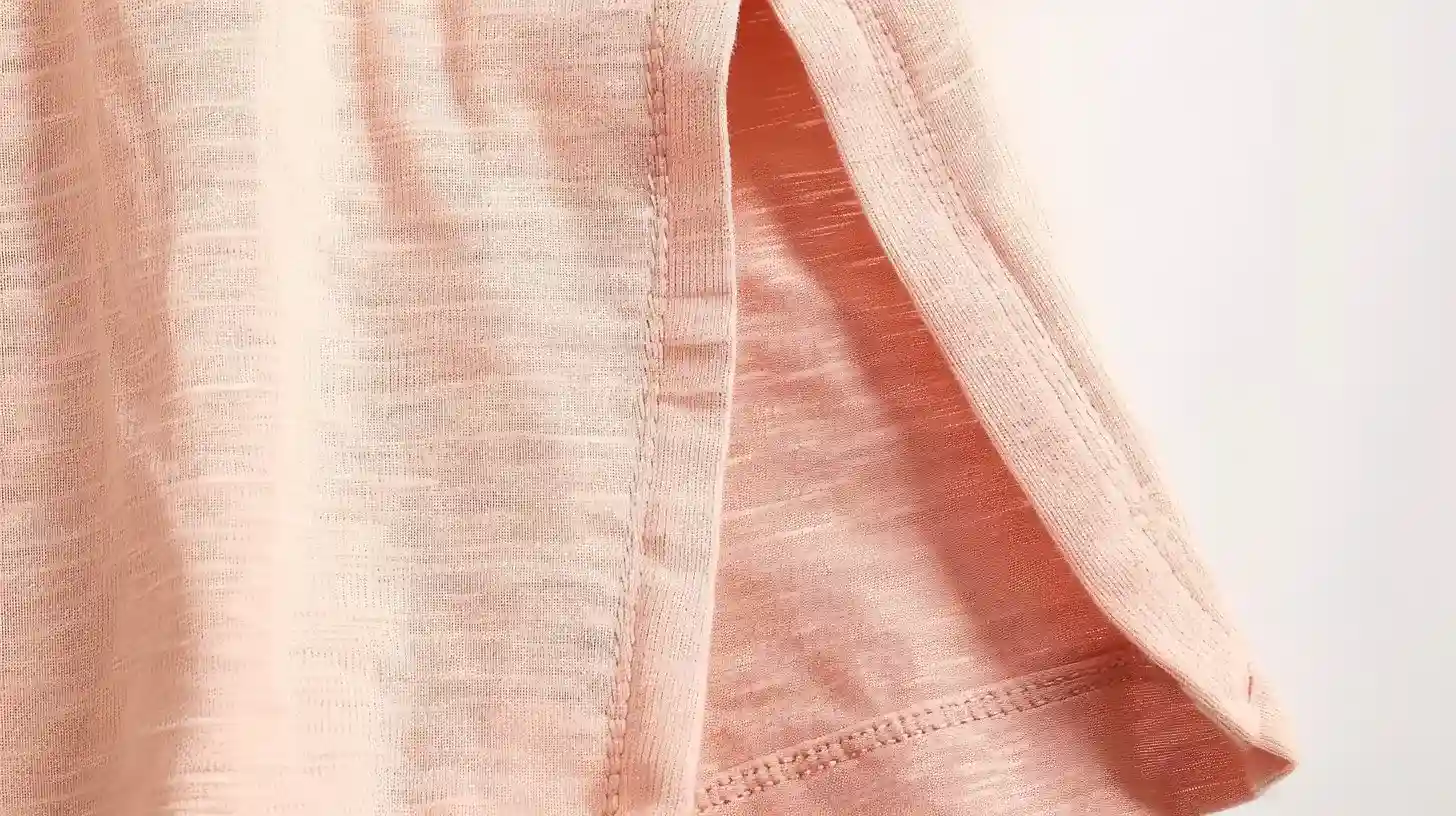
Step 3: Press the Seam Open and Neaten Slit Edges
After you sew and trim the side seams, the next step is to press the seam open to give your garment a clean, professional finish. Pressing is vital as it helps maintain the shape of the garment and adds to its overall aesthetics and durability.
Here’s how to do it:
- Set your iron to the correct heat setting for your fabric.
- With the wrong side of the garment up, press the seam open, using the tip of the iron to get into the seam.
- Neaten the edges of the slit by using a merger or zigzag stitch.
- Finally, press the slit edges flat to create a polished look and prevent unraveling over time.
Step 4: Pin the Seam
To ensure your slit aligns correctly, it’s essential to accurately pin the side seam. Pinning the seam with precision is crucial for a clean, professional finish. The trick is to start by aligning your fabric pieces and smoothing out any wrinkles.
Push the pins through both layers of fabric, securing them together. This process keeps the fabric in place while sewing, so your stitches stay straight and your cut ends up where you want it. Good pinning ensures fabric layers stay together during sewing and makes stitching along marked points easier.
Step 5: Sew the Slit
After carefully pinning the side seam of your garment, you should sew the slit and stop exactly at the marked point where the stylish slit starts.
Step 6: Give the Slit a Good Press
Use a dry iron on the wrong side of the fabric to make the slit look neat and professional. Always press from the wrong side to avoid any potential shine or iron marks on the right side of the fabric. Keep in mind not to rush; let the iron do its job, gently gliding over the fabric.
Step 7: Sew the Hem
Once you have perfected the side seam slit, focus on the garment’s hem. This important step will give your skirt or dress a polished finish. This slit tutorial emphasizes the importance of an even, straight hem for the balance and aesthetics of the garment. It also helps you make a fashion skirt.
- Start by trimming the bottom edge of the garment to ensure an even length.
- Next, use your sewing machine to stitch the hem, bearing in mind the type of finish you want for your slit.
- After sewing, press the hem to create a crisp, professional edge.
Conclusion
And there you have it! You’ve mastered the art of sewing a slit.
With a little patience, precision, and some practice, you’ve transformed a simple piece into something chic and stylish. Whether you want to add a slit to fabrics or add it to the pattern, now you have learned this skill.
Remember, the key to a flawless slit lies in accurate measurement and careful stitching. So, don’t rush, take your time, and relish this creative process.
You’re no longer a novice and can now confidently add this skill to your sewing repertoire. Keep sewing, keep learning, and keep creating, right away!
Learn more sewing tips on Longan Craft Blog! Dive into the fabric world with Longancraft!