Do you want to learn how to sew by hand but have never even created so much as a single stitch?
Do you really want to learn how to start a stitch by hand but are worried about getting it wrong and spoiling a project that was going really well?
The first thing you need to learn when starting to sew by hand is how to create a stitch.
In this article, you will learn what equipment you need to create your first stitch, how it works, and how to sew your first stitch.
Once you learn how to create your first stitch, you will be able to create a range of different projects and items. You will also be able to learn lots of new techniques to help you develop your hand-sewing skills.
How to Start a Stitch by Hand: Needed Equipment
- Sewing needle: There are lots of different types of needles, from small, sharp needles to thicker, blunter needles. Make sure you choose one appropriate for your thread.
- Thread: Different types are used for different purposes. Thin polyester thread is used to join fabrics and create seams, whereas embroidery thread is used to create topstitching and decorative stitch designs.
- Scissors: A good pair of sewing scissors will help you snip any thread.
- Fabric for sewing: A good beginner’s fabric is quilting cotton.
- Other equipment could include a needle threader, pins, or embroidery hoop.
How to Start a Stitch by Hand: Thread Your Needle
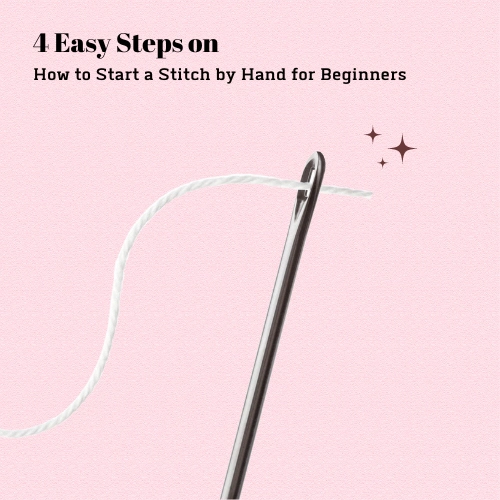
Before threading your needle, cut a length of thread at a maximum length of around 12 inches; any longer and your thread will tangle while you are sewing. (If you plan to sew with your thread doubled over your needle, you can cut a length up to 24 inches.)
Use a sharp pair of scissors to trim one end of your thread to create a sharp, clean edge. Trying to thread a needle with a frayed end will only end in frustration.
To help the end of your thread hold its shape, add water to the end and run the thread through your fingers to create a straight, sharp point.
Once your thread is ready, line it up with the eye of your needle and pass it through the hole. Continue to pull your thread through your needle so it doesn’t accidentally unthread itself.
How to use a needle threader
Needle threaders are a great tool if you struggle to thread your needle. The thin, diamond-shaped wire slides easier through your needle. You then insert your thread through the diamond shape and pull the wire back through the eye of the needle. Your thread should be taken with the needle threader, thus threading your needle at the same time.
How to Start a Stitch by Hand: Add a Knot to the End of Your Thread
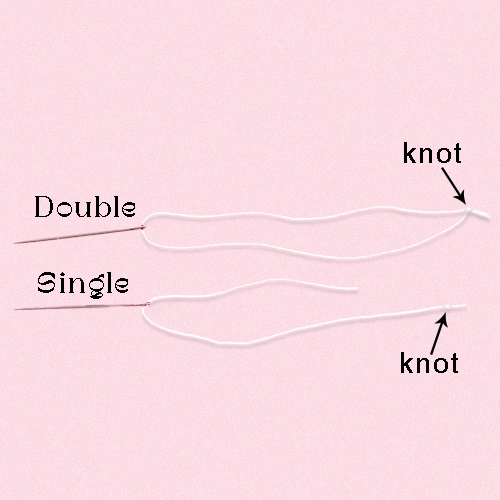
Adding a knot at the end of your thread is essential. The knot stops your thread from sliding out of your fabric and helps fix your sewing in place.
Your working thread can be threaded singularly with a knot at the end or doubled over, meaning there will be two threads knotted together at the end, and your needle will have no way of becoming unthreaded.
How to knot your thread
- Hold the end of the wet thread in place with your index finger and thumb.
- Wrap your thread around your finger, either once or twice.
- Then, using your thumb, slide the wrapped threads off the end of your finger.
- Pull the wrapped threads towards the end of your thread to tighten your knot.
How to Start a Stitch by Hand: Start to Sew
The following instructions will help you create a simple running stitch.
- Start by inserting your needle through your fabric from the wrong side to the right side. Make sure to leave at least 1cm from any edge when you start sewing. Try to start sewing somewhere your starting knot will be hidden; this will make your finished project look neater and more professional.
- Pull your thread so your knot sits against the wrong side of your fabric, but don’t pull it too tight.
- To create your first stitch, move your needle a few millimeters away from your initial entry point and insert the needle back down through the fabric.
- To create your next stitch, move your needle a few millimeters away from your first stitch and then bring your needle back up to the front of the fabric.
- Repeat steps 3 and 4 until you have finished your sewing. Make sure you keep an eye on the length of thread you have left during sewing. You will need to keep enough thread to create your finishing knots and secure your sewing.
How to Start a Stitch by Hand: Tie Your Finishing Knot
When you have finished your sewing, it is important to tie off the end of your thread to stop your sewing from unraveling.
To create your finishing knot:
- Turn your work over so you are looking at the wrong side of your fabric.
- Now create a small stitch, catching a few threads but not taking your needle all the way to the front of your fabric.
- Pull the thread until you have a small loop left.
- Insert your needle through the loop and pull your thread through, closing the loop.
- Repeat 2-3 times to make sure your knot is nice and secure.
- Trim any excess thread.
Conclusion
Once you have mastered the basic techniques of creating a stitch and perfected your knotting and tying skills, you will be able to create a range of different stitches and many different projects.
There are a multitude of different stitches and patterns to create once you know how to hand sew, and your confidence will grow each time you pick up your needle.
Hand sewing has many different functions, both functional and decorative, and by using this article to learn the basics of creating a stitch, you will now be able to go on to learn how to create whole projects and gifts to give your friends and family.
Learn more basic sewing skills, you can read this article.