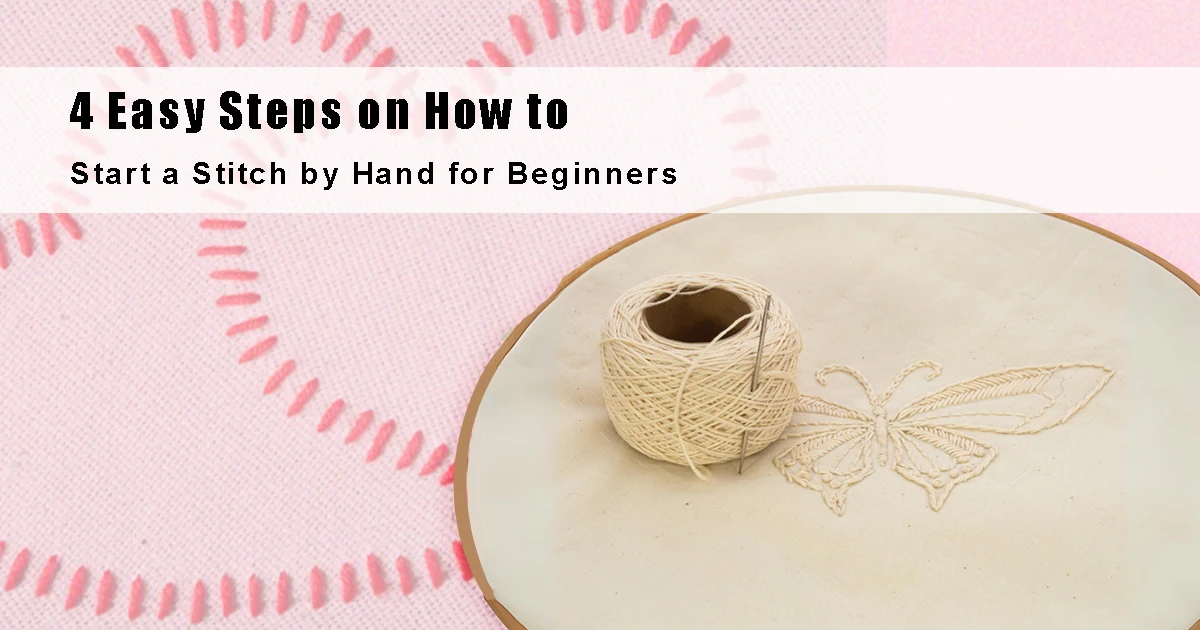
Have you been thinking about learning how to hand sew but are not sure where to start as a beginner? Maybe you’ve thought about taking up a new hobby, and making your own clothes seems like a great eco-friendly choice.
Learning how to sew by hand is a skill any sewist needs to develop. Sure, using a sewing machine may make sewing quicker, but the skill and art of hand sewing will mean you can pick up any project anywhere.
There are a few basic techniques and stitches used when hand sewing, along with many decorative stitches that can be used to embellish your projects and add unique artistic designs.
In this article, you will learn about the equipment needed to start hand sewing, along with 10 beginner sewing skills, including the most common hand stitches and some easy-to-learn beginner decorative stitches.
Equipment Needed
- Sewing project or garment
- A sewing needle
- Sewing thread
- Scissors
- Embroidery hoop
- Good lighting
Now that we know what equipment we need to start sewing, let’s look at the top 10 beginner sewing skills needed by a beginner sewist.
Top tip!
When starting these 10 beginner sewing skills, it is best to hide your starting knot, either at the back of your work or inside the fold of a seam. Follow this tip for the stitches below.
10 Beginner Sewing Skills: 5 Basic Sewing Stitches
First here’s a list of basic sewing stitches in the 10 beginner sewing skills.
1. Sewing a running stitch
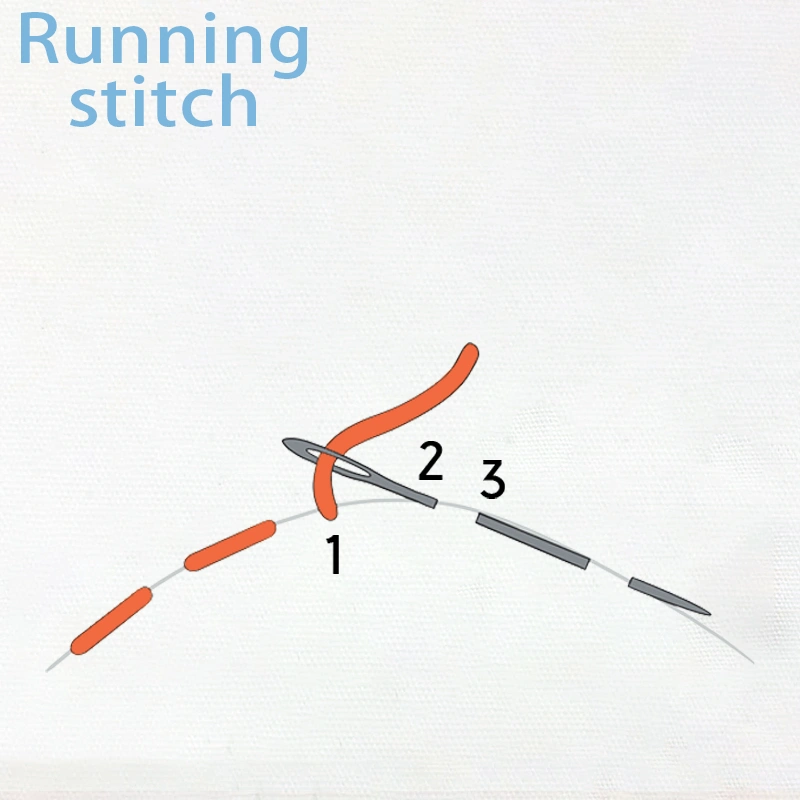
A running stitch, sometimes known as a basting stitch, is the most basic stitch used in the 10 beginner sewing skills. It is usually used as a temporary stitch during projects and is not as strong or sturdy as other hand-sewing stitches.
How to sew a running stitch or basting stitch:
- To create your first stitch, bring the needle through your fabric from the back to the front.
- Next, take your needle back down through your fabric from front to back, a short distance away from your initial entry point.
- Repeat this process, moving your needle a short distance every time you bring it through the fabric. You will create a line of stitches separated by small gaps.
2. Sewing a backstitch
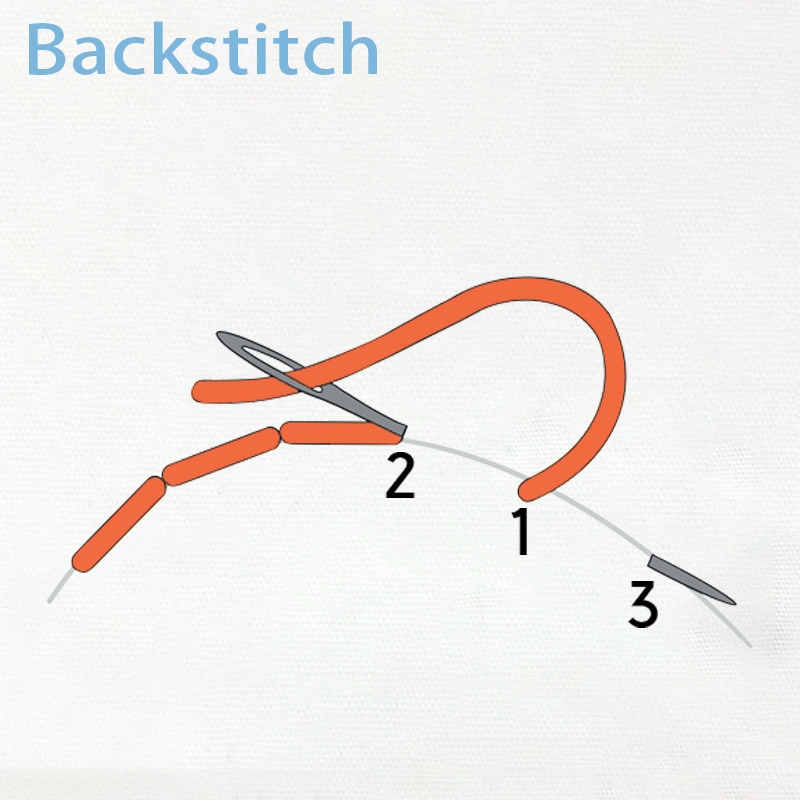
A backstitch is one of the most common stitches used in the 10 beginner sewing skills. It is a strong, reliable stitch that is used to mend seams and replace zippers. This stitch is great for small projects and is a great substitute if you aren’t near your sewing machine.
How to sew a backstitch
- Create one stitch in your fabric by bringing your needle up to the front of your work and then back down a short distance away.
- Next, bring your needle back through your fabric, a short distance away from your first stitch.
- When taking your needle back through the fabric, place it in the middle of the first stitch.
- Repeat this process, starting each stitch a short distance in front of the last and finishing each stitch in the middle of the last stitch.
3. Sewing a Slip Stitch
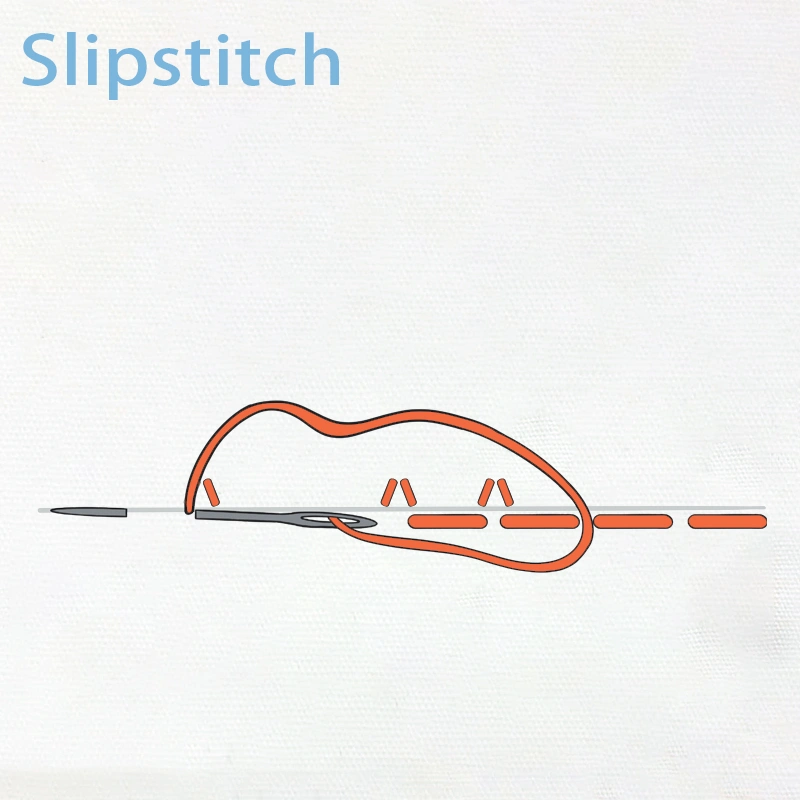
A slip stitch is generally used when hand-sewing hems. It creates an ‘invisible’ stitch that can’t be seen on the right side of the fabric, making it perfect for use on trouser leg hems.
How to sew a slip stitch
- First press the hem to be sewn by folding the edge of the fabric over twice, around ¼ inch each time.
- Hide your knot as explained above.
- When creating stitches, make sure to keep them level with the fold of your hem.
- Insert your needle from the back of your fabric to the front; just catch a few threads before returning the needle to the back of the fabric. Pull your thread through.
- Move your needle a short distance away from your first stitch.
- Repeat the process, creating tiny stitches on the front of your garment. This will create an almost invisible row of stitches.
4. Hand-sewing buttons
Some sewing machines can sew buttons for you, but it is often quicker and more accurate to sew them by hand. Although sewing machines are great tools to help create buttonholes, using a stronger thread can help keep your button in place for longer.
Before sewing down your button, make sure it is lined up correctly with the button hole.
How to sew a flat button
After marking where you want your button to go, place a toothpick through your fabric. This will help keep your button in place until it’s sewn down. To attach the button to your fabric, pass your needle up and down the holes to create an ‘X’ shape. Do this several times.
On your final stitch, bring the needle through the fabric and underneath the button.
Wrap your thread around the base stitches under the button a few times, and then insert the needle through the middle of the stitches.
Take the needle down to the back side of the fabric and finish off your sewing as normal.
5. Sewing a ladder stitch
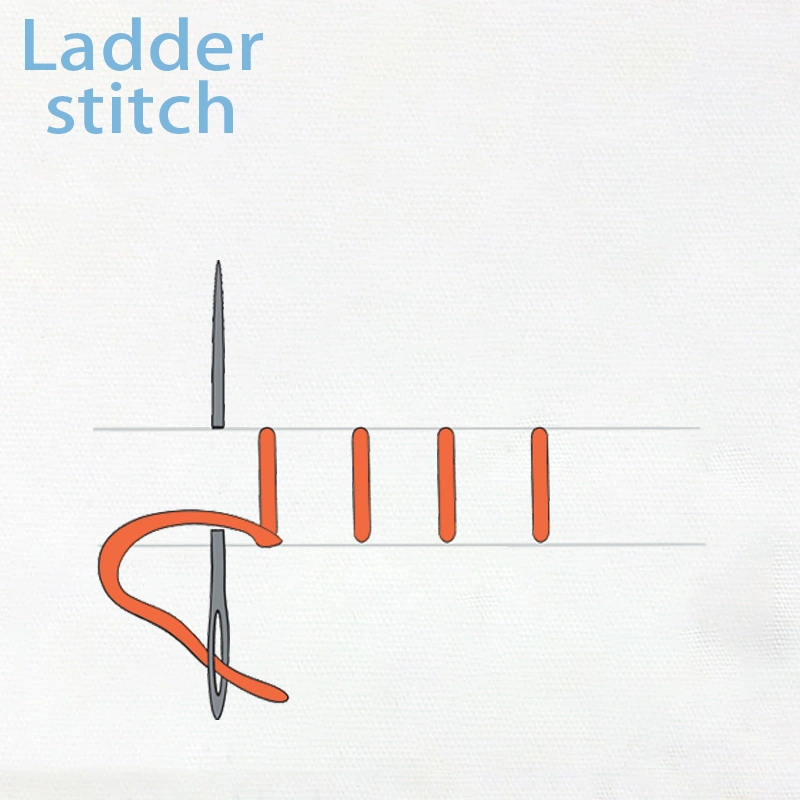
A ladder stitch is used to create an invisible seam and is great for closing gaps when sewing toys or mending garments.
How to sew a ladder stitch
- Fold the raw edges of your fabric toward the wrong side of your work. Hide your knot as explained above.
- When creating a ladder stitch, you generally work from right to left and sew only on the folds or seam allowance of your project.
- To create your first ladder stitch, make a small stitch along the opposite opening of your gap.
- Next, insert your needle on the original side of the opening, making another small stitch.
- Your stitches should begin to look like a ladder, with a thread straight across the open gap and hidden stitches along both sides.
- Pull your thread to tighten your stitches and close the gap; this can be done as you go along or at the end of your sewing, depending on the length of your project.
10 Beginner Sewing Skills: 5 Embroidery and Decorative Stitches
Next, the following stitches are embroidery and decorative in the 10 beginner sewing skills.
6. Sewing a chain stitch

A chain stitch is a decorative stitch that creates loops on top of your fabric in a design of your choice. You can create small or large chain stitches, depending on your design.
How to sew a chain stitch
- Bring your needle to the front of your work.
- Insert your needle back into the fabric in the same hole you’ve just made. Don’t pull your thread all the way through; make sure there is a loop left.
- Bring your needle back through to the front of the fabric, a short distance away from your loop stitch.
- Insert the needle through the loop of thread. Pull the thread to anchor the stitch, but make sure not to pull it too tight.
- Repeat the process to create more chain stitches.
7. Sewing a blanket stitch

A blanket stitch is generally used to decorate the edges of blankets, cushions, and other projects. It is best to use a thicker thread in a contrasting color to help the stitching stand out in your project.
How to sew a blanket stitch
- Hide your knot as explained above.
- Create your first stitch by taking your needle over the edge of the fabric, bringing it up through both layers of fabric, and back into the first hole made.
- To create your first stitch, insert your needle through your fabric a short distance away from the first stitch.
- Make sure you catch the thread under your needle before pulling it tight.
- Repeat the process to create a decorative project edge.
8. Sewing seed stitches
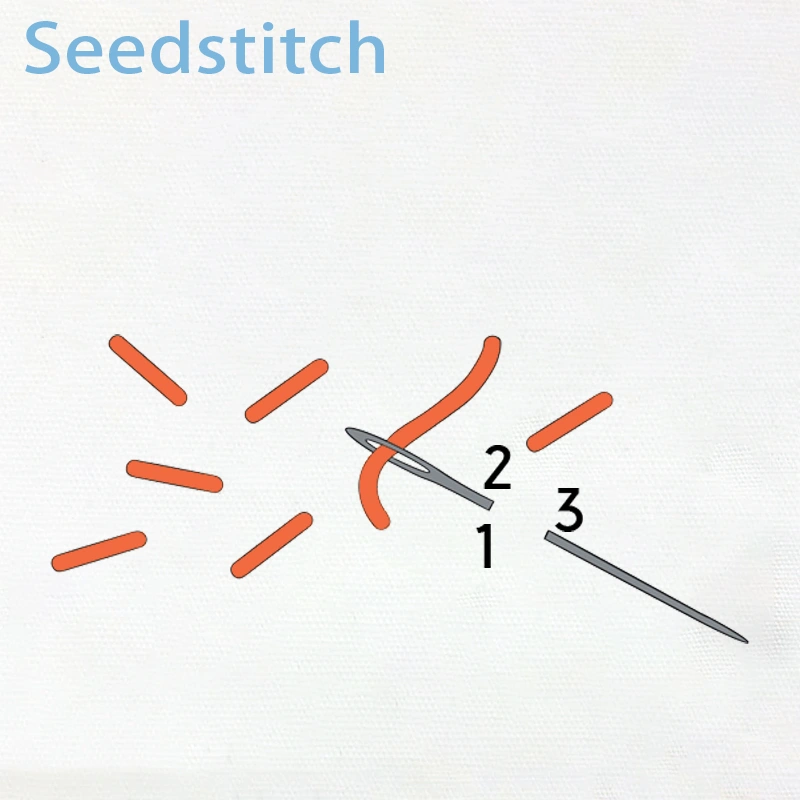
Creating a design using seed stitches is a great way to add texture and color to your project. Seed stitches are little straight stitches that are placed randomly over your design. They can also be used under some stitches, such as satin stitch, and under embroidery leaves or flowers to help give them depth.
How to sew a seed stitch
To create a seed stitch, follow the instructions for the running stitch. The only difference is that your needle doesn’t need to start the next stitch in a straight line; it can be placed anywhere.
A good tip is also to start making seed stitches at the top of your work to stop the threads at the back of the fabric from crossing over too much.
9. Sewing cross stitches
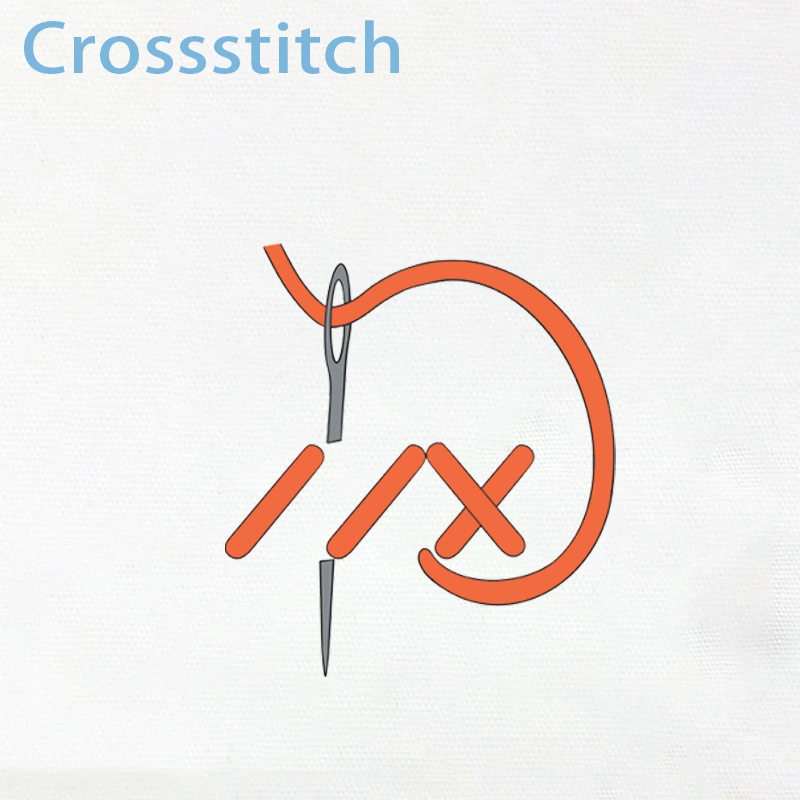
Creating cross stitches is a great way to embellish your projects. They can be added to garments, home decor, or used to create grided cross-stitch patterns. While cross stitches can be added to most fabrics, you learn the technique using 14-count Aida, which consists of sturdy woven fabric with measured holes in a square grid pattern.
How to sew a cross stitch
- These instructions are for working on 14-count Aida, but you can create singular cross stitches using the same process.
- To create your first stitch, bring your needle from the back to the front of your fabric. This will create the top left of your first cross.
- Next, create a diagonal stitch, taking your needle down to the back of the fabric; this will be the bottom right of your cross.
- Now bring the needle back to the front of the fabric to make the bottom left corner of your cross. This part of your stitch should be lined up with both edges of your first diagonal stitch.
- Complete your cross by making another diagonal stitch in the opposite direction, taking your needle down to the back of your fabric, and creating the top right corner of your cross.
- Repeat the process above to continue creating your cross stitches.
10. Sewing French knots
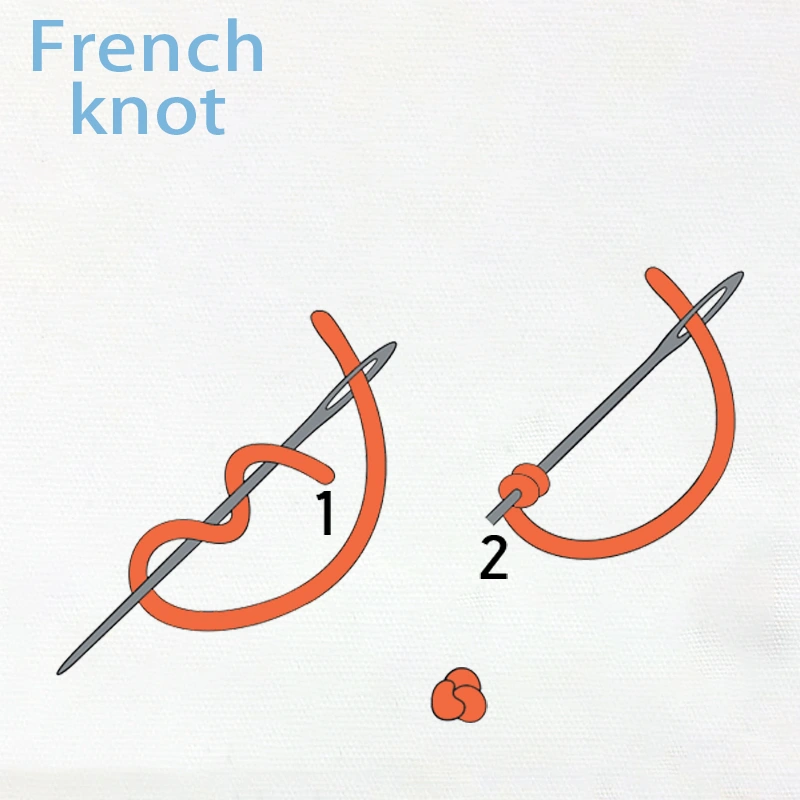
French knots are great for giving your project texture. They can be created alone or in groups. They can look intimidating, but with practice, you will be able to create perfect French knots every time.
How to sew a French knot
- Bring your needle and thread to the front of your work.
- To create your knot, you need to use both hands, one to hold the needle and the other to help tension the thread.
- Wind your needle around the tensioned thread 2-3 times without moving your needle too much.
- Insert your needle back down into the fabric, close to your original hole.
- Pull your thread slowly through, and your French knot will form.
Conclusion
Learning to sew these 10 beginner sewing skills is essential for anyone looking to dive into the world of sewing. These skills lay the foundation for successful sewing projects. With practice and patience, these skills can be honed, allowing beginners to embark on a fulfilling sewing journey.
Related articles:
Read Building Confidence: What is the First Thing a Beginner Should Sew? to discover your first sewing project!
Read Sew and Shine: Master the Art of How to Sew a Simple Dress in 9 Steps, use the above sewing skills to make a simple dress!