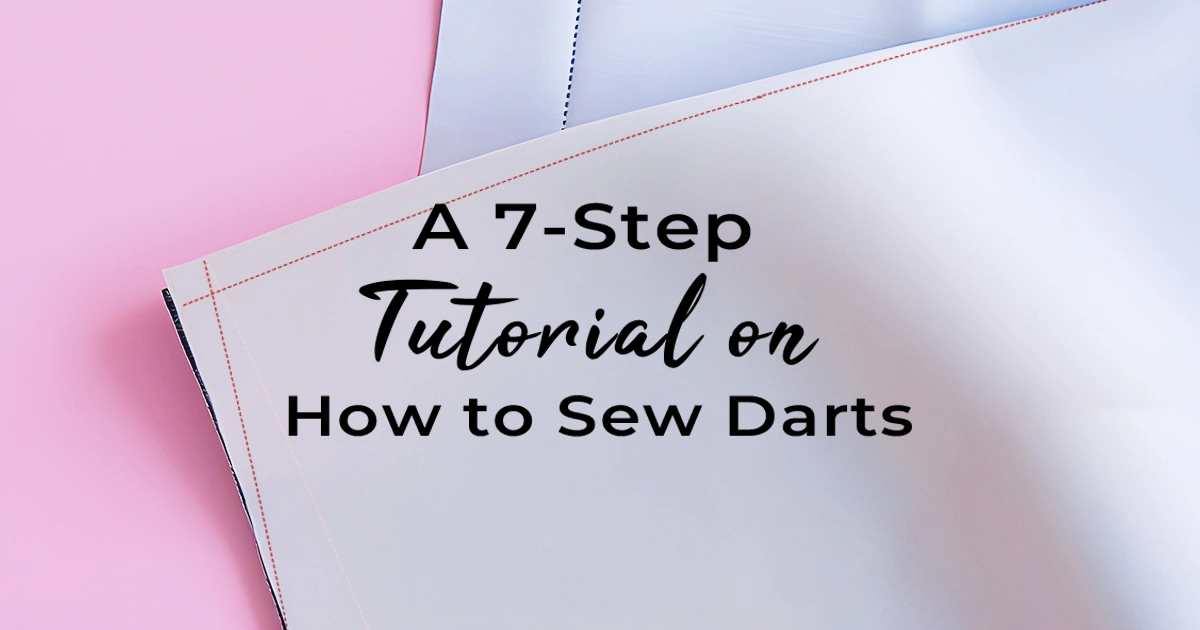
Have you ever felt overwhelmed by the idea of sewing darts for your garments? Well, you’re not alone. Darts are integral to giving clothes a three-dimensional shape, particularly around the bust area.
Luckily, our 7-step tutorial is here to help you master the world of how to sew darts with ease and precision. Ready to transform your sewing projects forever? Let’s get stitching!
What are darts?
Before you start to learn how to sew darts, it’s better to learn something about them.
Darts are a crucial part of sewing that often come into play while crafting garments. These shaping tools add contours to clothing, helping to convert flat fabric patterns into three-dimensional shapes.
Most frequently, you’ll find darts around the bust area where precise fitting is necessary for comfort and style. Depending on different patterns and styles, darts can vary in size and shape. They may be short or long, wide or narrow, straight or curved.
Sewing a clean dart involves several steps using key tools like a good sewing machine and marking tools for accurate measurements. The focus here remains on creating horizontal bust darts that make your clothes look well-fitted while enhancing their visual appeal.
Learning how to sew these precise darts not only improves your skills but also gives you power over managing the fit of your clothes.
Why are darts so important?
Darts mold your fabric around the curves of your body, giving any garment you sew a more fitted and flattering look. They are most commonly used in areas such as the bust, waist, or hips where precise shaping is essential for a perfect fit.
For instance, if you’re making a shirt without darts, it’s just going to hang off the shoulders and won’t have any shape or form around the chest and waistlines, leading to an oversized or box-shaped appearance.
This differs when sewing with darts. They transform flat fabric into 3-dimensional shapes that curve around the human figure instead of draping loosely on them like a tent. It’s through these helpful stitching lines that our clothes can hug our bodies better, emphasizing natural contours beautifully rather than hiding them away under yards of material.
Common Types of Darts
You’ll encounter different types of darts in the process of learning how to sew darts. Knowing some common types can improve your sewing skills and lead you to create a more tailored fit.
- Waist darts: They enhance the shape of the garment from waist to hip, essential for fitted items.
- Bust darts: You can find them starting under the arm at the side seam, pointing towards the fullest part of the bust area, which is crucial for shaping.
- French darts: This type provides an alternative to the usual bust darts. They are long and curve down to the side seam, providing a unique draping effect.
- Elbow darts: They are used in tailored jackets or blouses, allowing for more significant movement in clothing.
- Dart tucks: Unlike regular darts, they don’t end in a point but provide slight shaping while adding stylistic elements to your garment pattern.
- Contour darts: Commonly found around princess seams or waistlines, they help create a 3-dimensional shape for asymmetrical garments or body shapes with significant curves.
Necessary Tools and Materials for Sewing Darts
To learn how to sew darts, first you need to prepare a few essential tools and materials.
- Marking tools: Dressmaker’s carbon paper allows you to transfer the dart markings from your pattern onto your fabric. Tailor’s chalk or removable markers can also be used for the same purpose, making it possible to easily wash out any unwanted lines once you’re done with your project.
- Pins: Use pins to match the marked lines on your fabric accurately. It is recommended to use pins with rounded edges to prevent damage to your paper pattern and fabric.
- Quilting ruler: A quilting ruler helps you ensure accurate measurements and straight lines while marking and stitching your darts.
- Sewing machine: The sewing machine is a crucial tool for sewing darts in garment projects. It allows you to create neat and precise stitches, making the dart construction easier and more efficient.
- Iron and ironing board: The iron and ironing board play a crucial role in shaping the fabric and ensuring smooth, flat darts.
How to Sew Darts: Single-Pointed Darts
To learn how to sew darts, let’s start by sewing single-pointed darts, which is the easiest. Here’s a 7-step tutorial to show you how to sew them.
Mark the dart
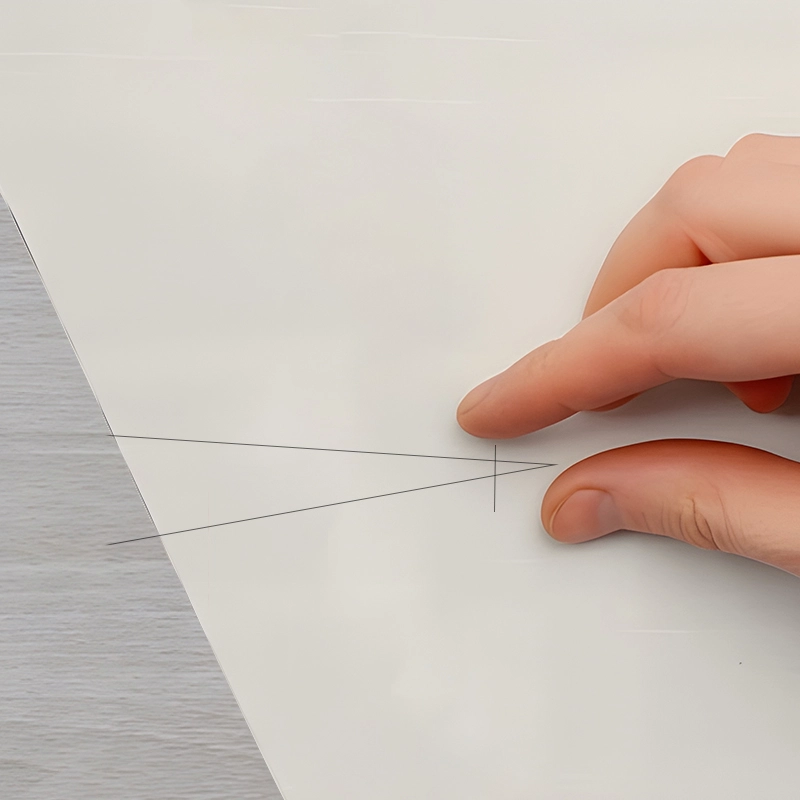
How to sew darts accurately? The first step is always to mark the dart on the fabric. This ensures that you stitch in the correct place and achieve a precise fit.
One way to do this is by transferring the marked lines printed on your pattern as a guide onto the wrong side of the fabric. Take note of where the dart point should be located and align it with your fabric. It’s also helpful to cross-mark a perpendicular line before reaching the dart point for added accuracy. By taking these steps, you’ll ensure that your darts are marked correctly and ready for sewing.
There are also various marking tools available, such as chalk, tracing paper, or fabric pens, that you can use to mark your darts accurately on different types of fabrics. These tools allow for clear visibility while sewing and ensure that you maintain precision throughout your project.
Pin the dart
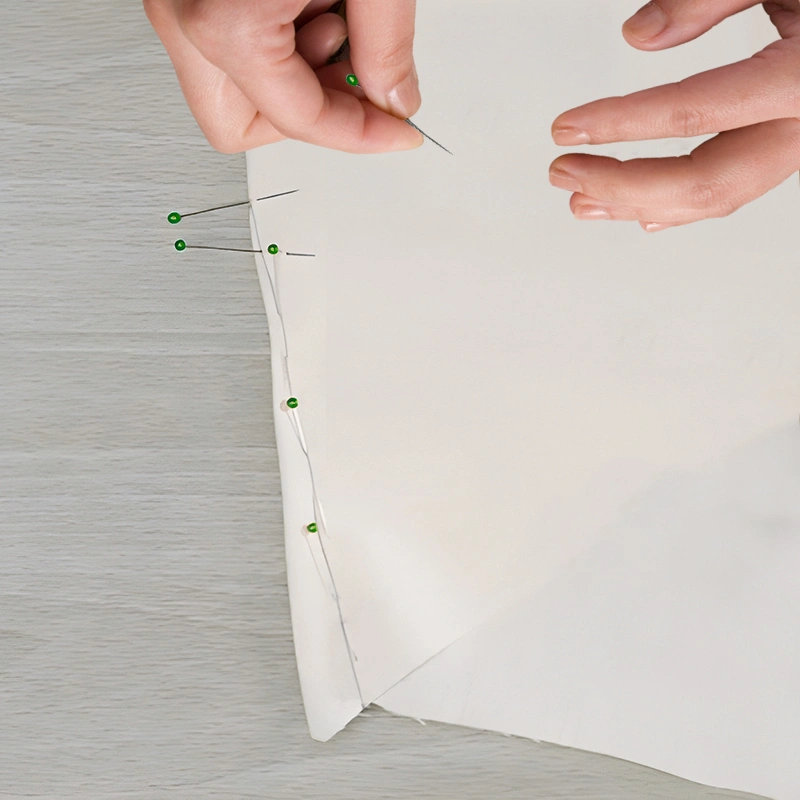
Pinning the dart is a crucial step in how to sew darts. Use pins with rounded edges to avoid damaging the fabric and pattern pieces.
Fold the dart in half along the center line and pin it securely in place. This ensures that your dart stays aligned during sewing. Proper pinning will help you achieve clean and professional-looking darts in your finished project.
Sew the dart
To sew the dart, begin by aligning the fabric edges of the marked dart line. Using a straight stitch on your sewing machine, start at the edge of the fabric and sew towards the dart point.
Remember to backstitch at both ends to secure your stitching. Stitching accurately along the marked line is important for creating a clean and precise dart shape in your garment.
Taper the dart seam
Tapering the dart seam is an important step in how to sew darts. This helps prevent the formation of a dimple and ensures a precise and professional finish.
To taper the dart seam, you should start by stitching along the dart line until you are near the point of the dart. Then, gradually reduce your stitch length as you approach the tip.
This tapering technique helps create a smooth and tapered seam that blends seamlessly with your fabric. By following these steps, you can achieve professional-looking darts in your garment projects.
Tie the threads at the tip
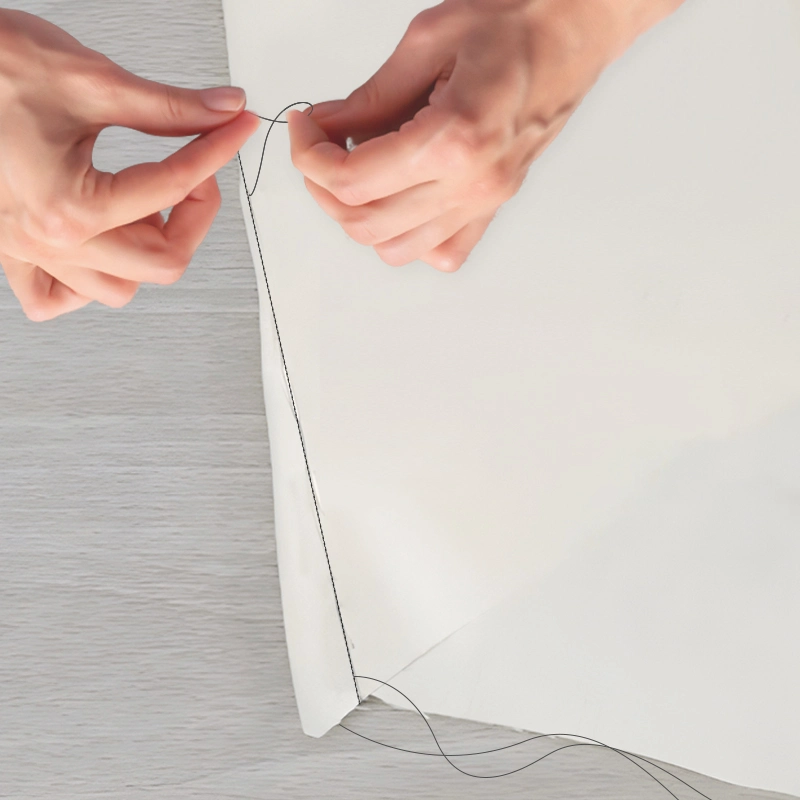
To secure the end of a single-pointed dart, you need to tie the threads at the tip. This ensures that your dart stays in place and doesn’t come undone.
There are two ways you can tie the threads: double knots and machine tacks. With a double knot, simply make a tight knot with the thread tails. Alternatively, you can use your sewing machine to stitch back and forth over the thread tails to securely fasten them in place.
Whichever way you choose, tying the threads at the tip will give your darts a professional finish and keep them from unraveling.
Press the dart
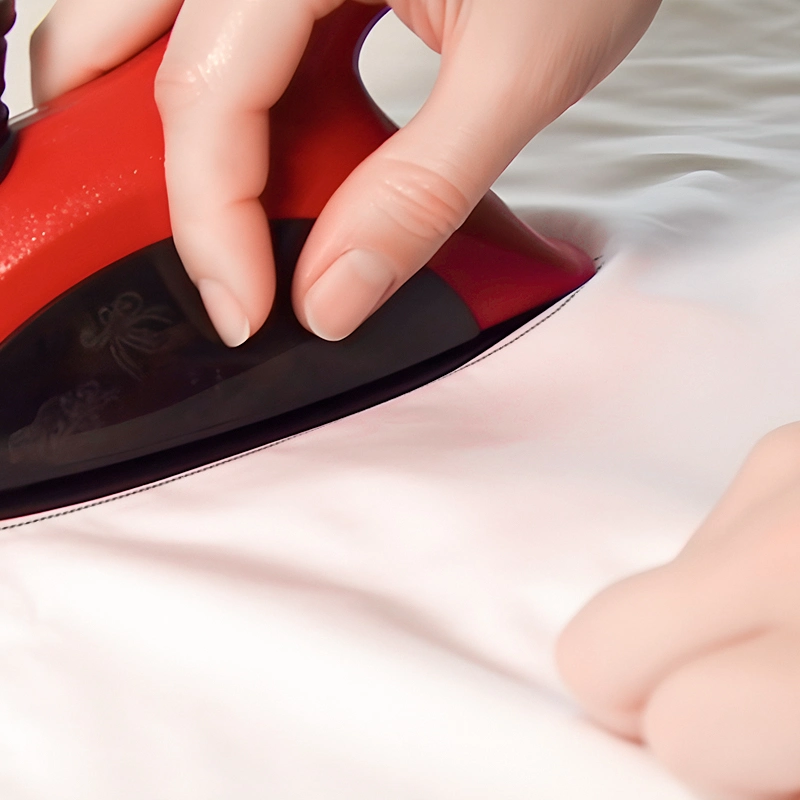
After stitching the dart seam, you will need to press it flat with an iron. Pressing darts helps to set the stitches and smooth out any wrinkles or puckering in the fabric. It also gives the dart a professional finish by creating crisp folds that enhance the shape of your garment.
Remember to use a dry iron and press gently without using steam or heavy pressure, as this could distort your fabric.
To get better results, you can use a pressing ham or roll up a towel to help shape the fabric while pressing.
Clip and trim the seam allowances (optional)
This step is an optional one in how to sew darts. If you’re dealing with bulky fabrics, trimming the seam allowance can help reduce bulk.
To trim the seam allowances, you can use a pair of sharp scissors or a rotary cutter. Leave about 1/8 inch on each side of the seam.
Remember to always follow your pattern instructions or personal preferences when deciding whether or not to trim the seam allowances along the dart seam.
Advanced Dart Sewing Techniques
How to sew darts: double darts and diamond darts
To add more shape and structure to your garments, you can sew double darts or diamond darts. Double darts involve sewing two darts close together on the back of a garment. While diamond darts are shaped like a diamond and are often used in more complex designs.
To sew these types of darts, you’ll need to fold and pin the fabric accurately before stitching them with a straight stitch. Be sure to use a shorter stitch length near the point of the dart for a smooth finish. And don’t forget to press the dart from the right side of the fabric to help shape your garment and create a professional look.
With practice, you’ll be able to master these advanced dart sewing techniques and take your sewing projects to the next level.
How to sew darts in thick fabrics
Sewing darts in thick fabrics requires some advanced techniques. When working with thicker materials, such as wool or denim, it is important to use the right tools and methods to mark and sew your dart.
One method you can try is using tailor’s chalk or dressmaker’s carbon paper to transfer the dart markings onto the wrong side of the fabric. Once marked, fold and pin the darts in place before sewing. Remember, when sewing, you’d better start sewing at the widest part of the dart and stitch toward the apex without backstitching.
Alternatively, you can try curved darts. They can also provide better shaping for thick materials.
Conclusion
For any beginner sewer, learning how to sew darts is an essential skill. By following our 7 simple steps and using the right tools, you can create clean and precise darts that will beautifully shape your garments.
With practice, you’ll be able to sew different types of darts and tackle more advanced sewing techniques. So grab your sewing tools. It’s time to start sewing fabulous darts!
FAQs
1. How do I sew an accurate single-pointed dart?
To sew accurate single-pointed darts, you begin by marking your fabric with chalk or dressmaker’s carbon paper. Pin at the point and end of the dart. Then stitch from the edge towards the point using a medium stitch length.
2. Can I use any type of fabric when learning how to sew darts easily?
Of course, yes. But remember that lightweight or sheer fabrics might require more careful handling compared to loosely woven fabrics. It’s important to consider this while cutting your fabric garment pieces for clothing and bag sewing projects.
3. When would I use a double-pointed dart?
You can use double-pointed darts on garments made from stretchy material because they allow more shape definition than standard pleats or gathering techniques.
Learn more sewing skills on Longan Craft Blog!