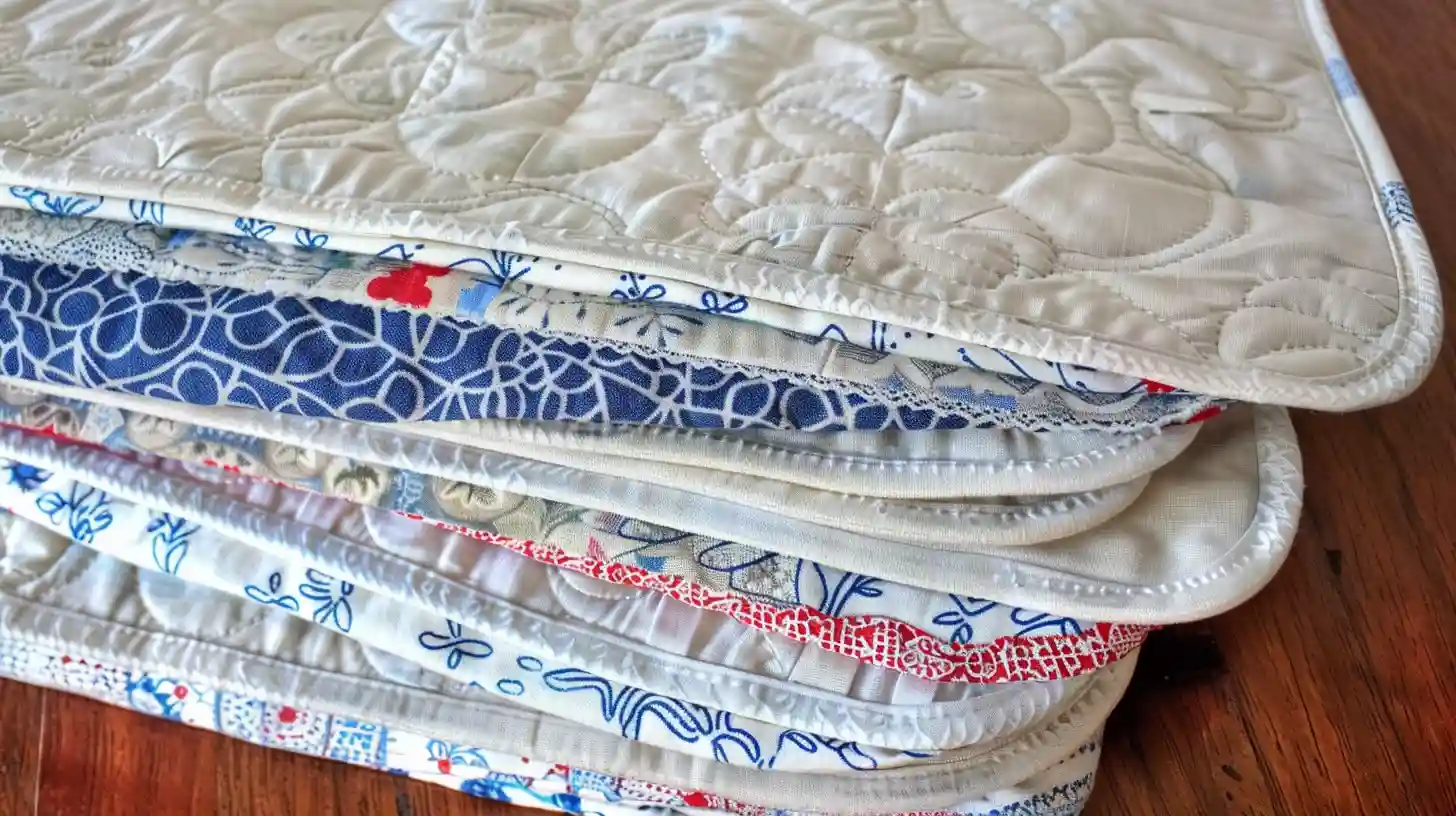
Many people adore quilting, but the idea of adding binding might make some people feel stuck. The final step of sewing binding on a quilt often feels like a hurdle. Binding is vital to finishing your project and protects the edges from wear.
This blog post will guide you through mastering this crucial skill with ease. We’ll cover everything from selecting the right materials to attaching and sewing your binding for a polished look. By following our simple steps, turning those raw edges into beautiful, durable finishes will become second nature.
Ready to perfect your quilt?
Key Takeaways for How to Bind a Quilt
- Select the right binding fabric for your quilt. This ensures it bends smoothly around the edges and matches in weight for even wear.
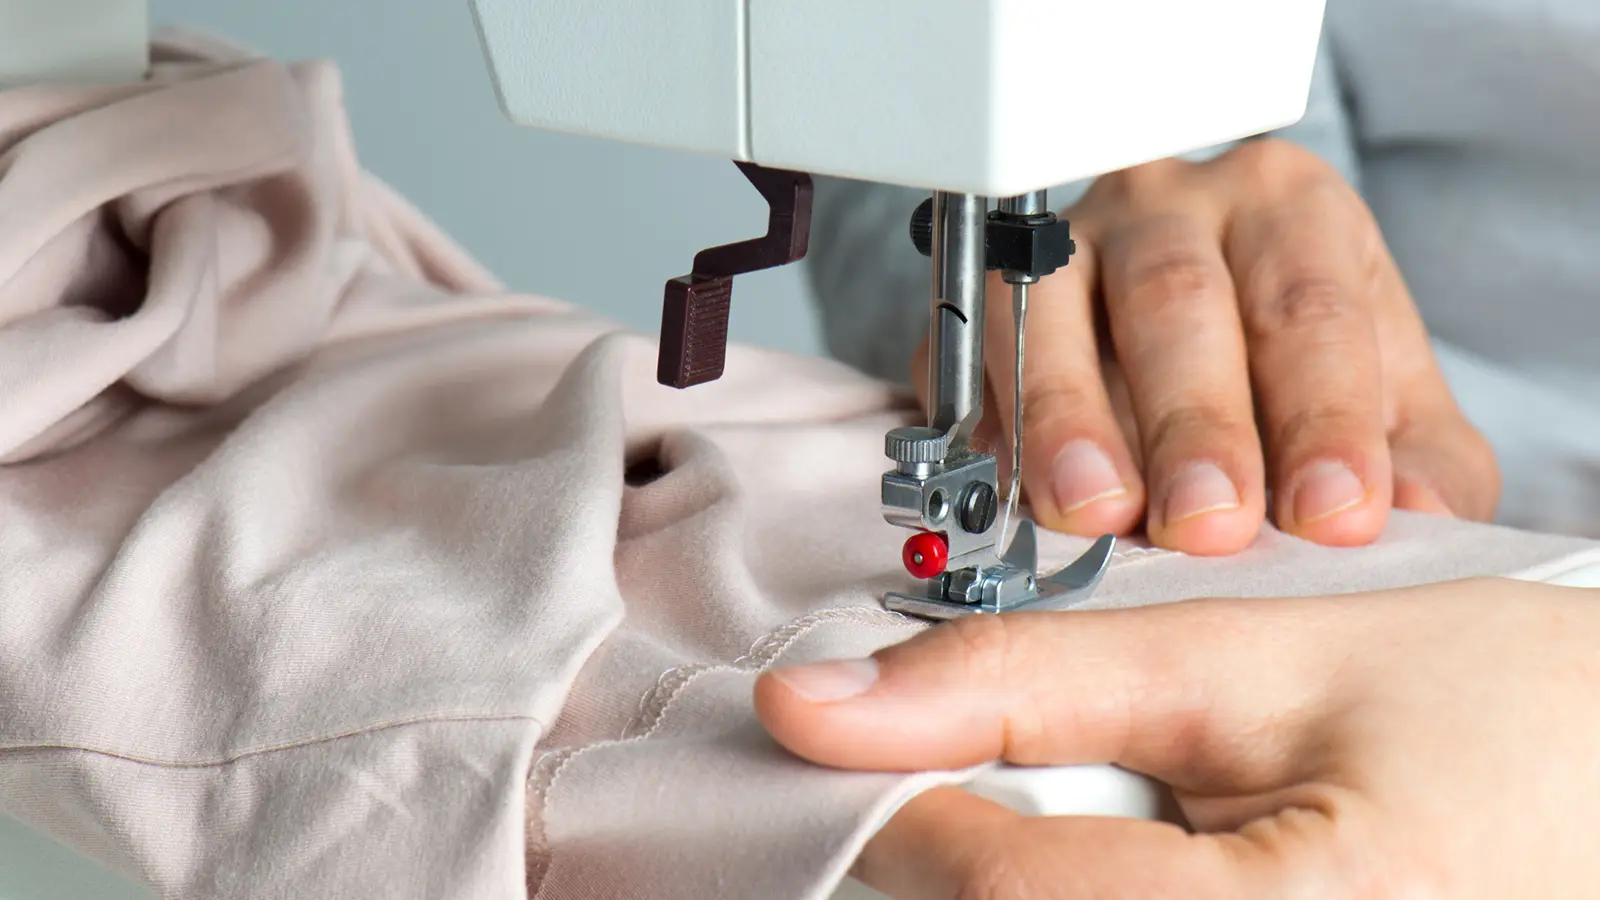
- Attach the binding using a sewing machine with matching thread and needle, maintaining a consistent quarter-inch seam allowance for durability.
- Secure the binding with pins or clips before sewing to keep it in place, ensuring a neat and polished finish once attached to your quilt.
- When joining ends of the binding, overlap them by a few inches, sew diagonally across, and trim excess fabric for a smooth join without bulkiness.
- Finally, fold the pressed binding over to the back of the quilt and either hand-stitch or machine-stitch it down for a clean look.
Gathering the Necessary Materials
You will need some essential materials to get started. These will set the stage for mastering the sewing binding on your beautiful quilt!
- Quilt with edges ready for binding: Your quilt is ready for the final yet crucial step—attaching the binding.
- Fabric for binding: Choosing the right fabric for binding is critical to finishing your quilt. Always use materials that match the weight and composition of your quilt to maintain its quality and durability.
- Sewing machine: Equip your sewing machine with a coordinating thread and needle that match your fabric. This setup ensures the machine stitches blend seamlessly with the binding and quilt.
- Matching thread: It’s important to select a color that closely matches the fabric used. The ideal thread should blend seamlessly with the binding and not stand out against the quilt.
- Quilting pins: Using quilting pins is crucial to ensuring your quilt binding stays in place while you sew.
- Scissors: Precise cutting with scissors ensures your binding is uniform and professional-looking.
Step 1: Making the Binding
Cut fabric strips for binding by the width required for your quilt. Join them together to create continuous binding. Then, press the binding thoroughly for a clean finish before attaching it to the quilt.
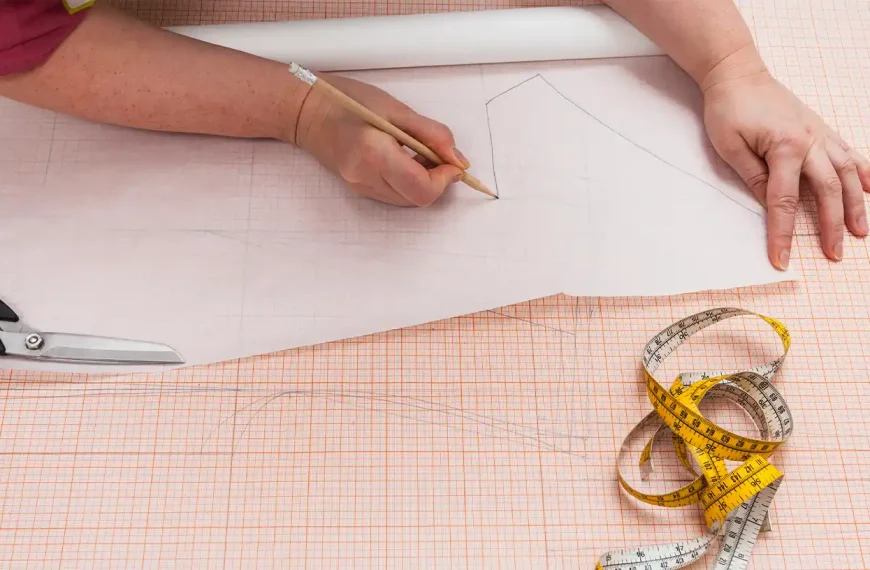
Cutting fabric strips for binding
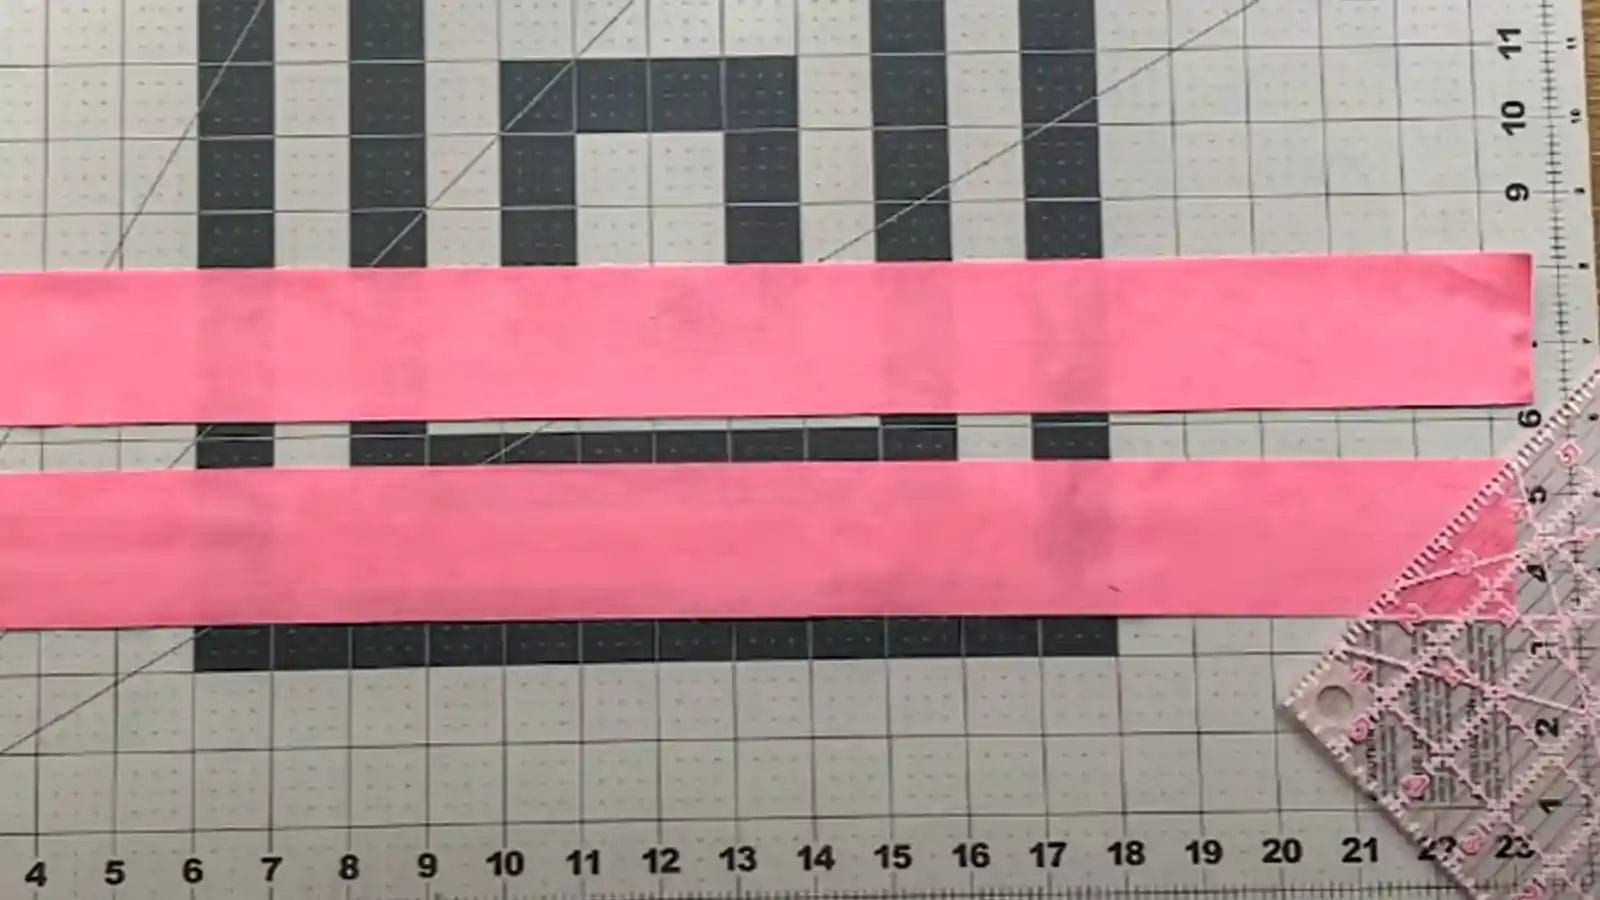
When cutting fabric strips for binding, it is crucial to ensure that the strips are cut straight with the grain of the fabric for straight edges. It’s best to cut the strips on their bases for curved or scalloped edges.
Usually, for single-fold binding, the fabric is cut into 1 1/4″ wide strips. For double-fold binding, a minimum of 2″ (5cm) wide strips are needed since the fabric is folded in half.
Joining strips to create continuous binding
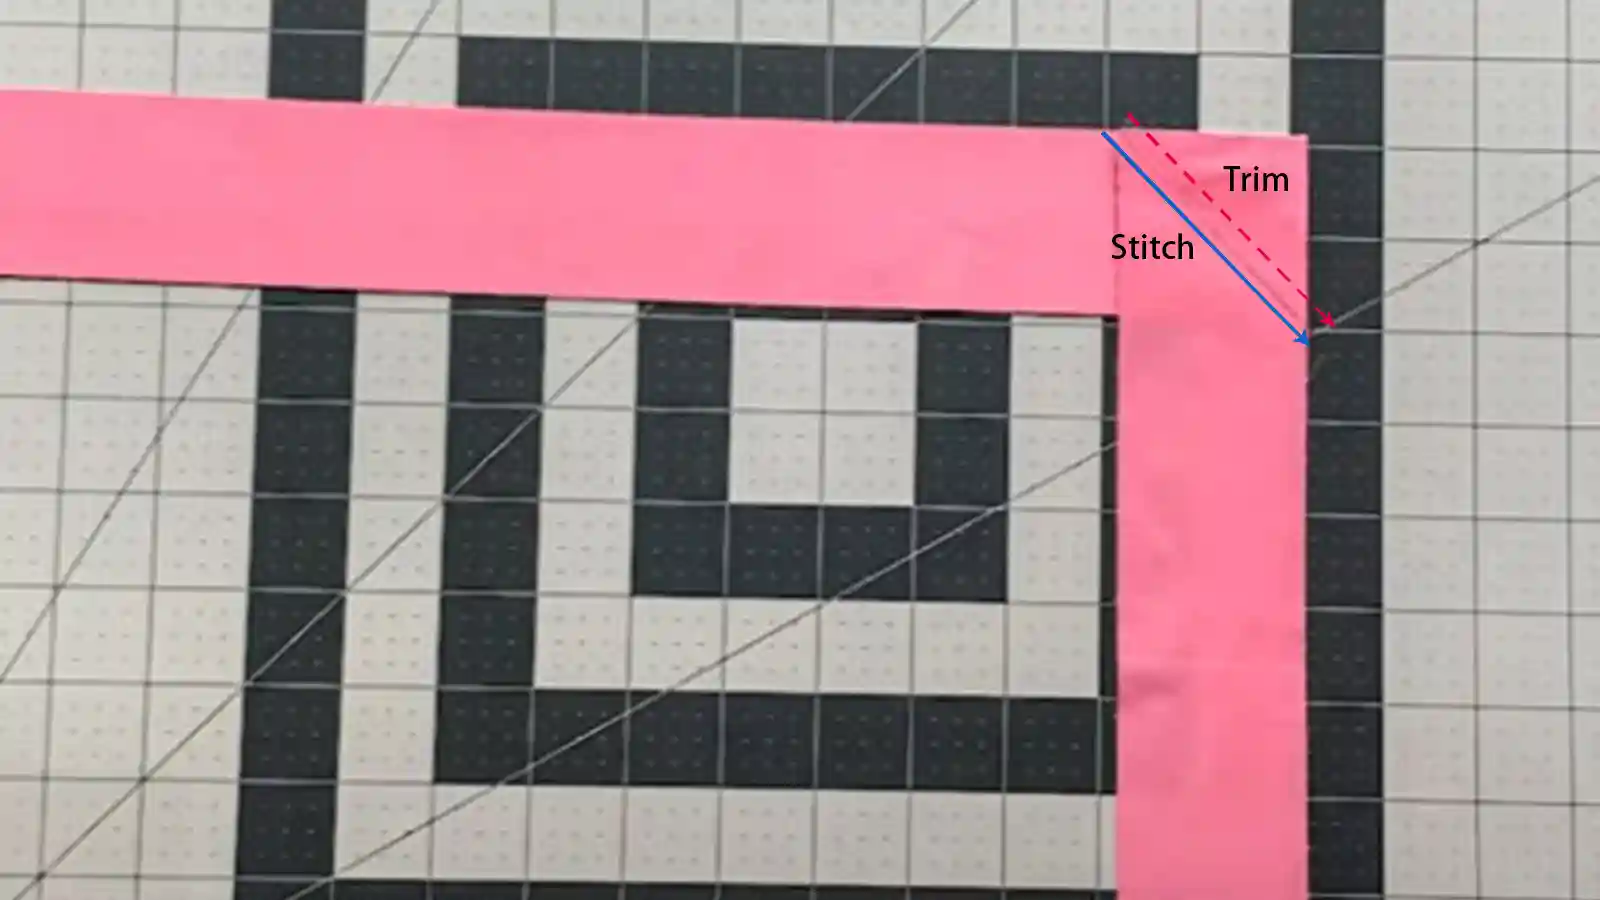
To create continuous binding for your quilt, join fabric strips with a diagonal seam. First, align two strips at right angles, with their right sides facing each other. Then, stitch along the marked line from corner to corner to form a 45-degree angle.
Trim the excess corner and leave a 1/4” seam allowance. Press the seams open for a smooth finish. Matching the diagonal seams when joining ensures your continuous binding has a clean and professional look.
Pressing binding for a clean finish
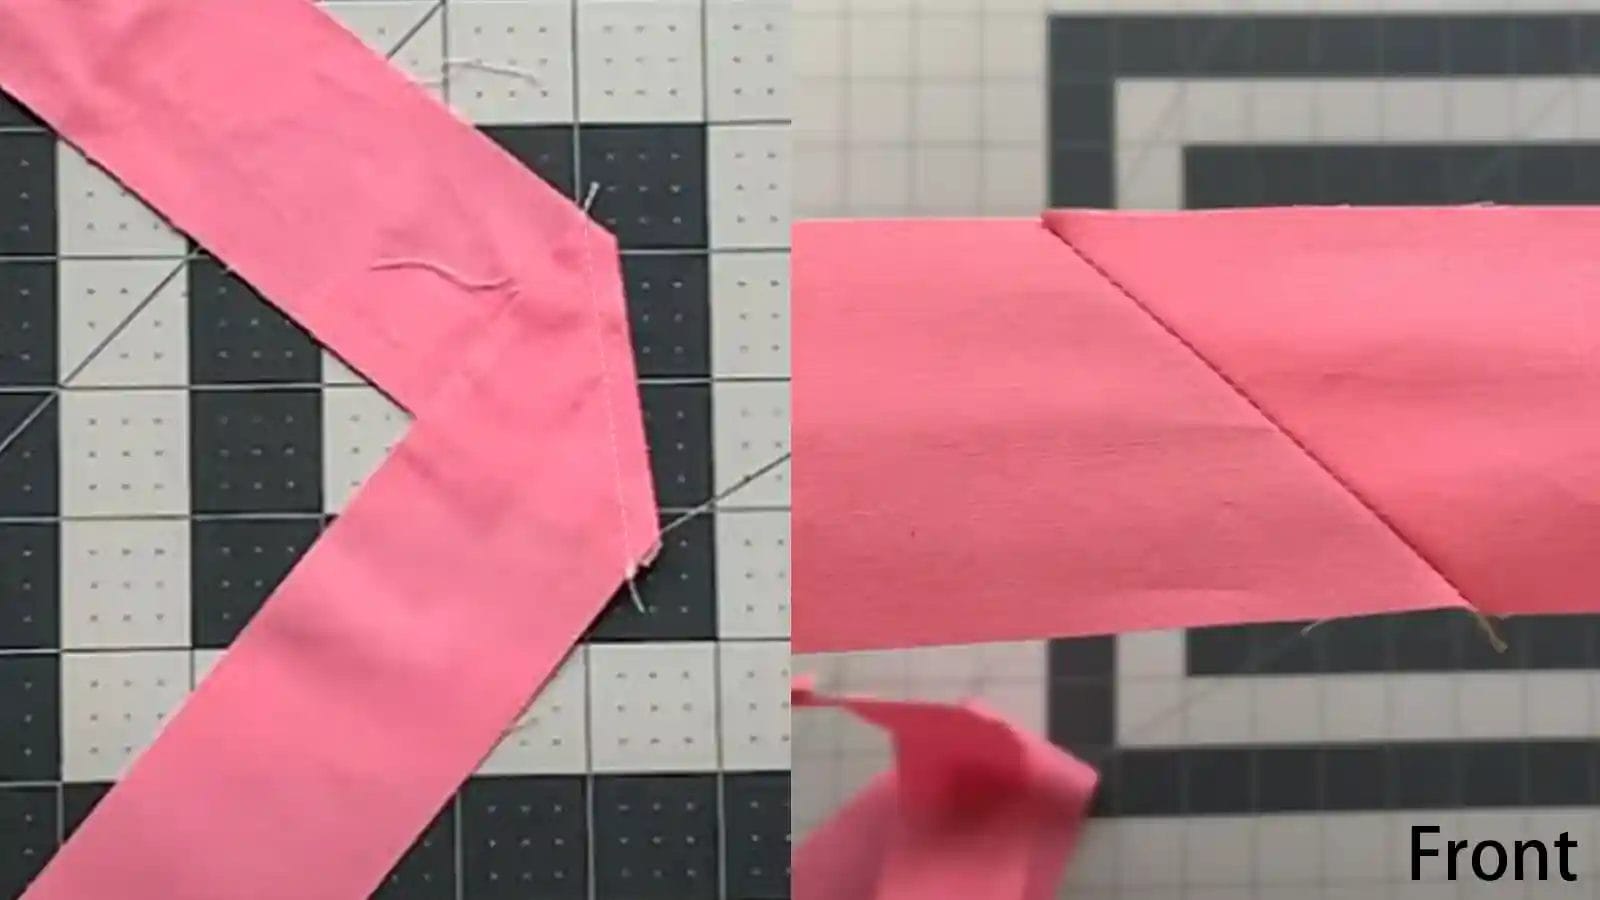
Fold the fabric in half and then press it to make your binding. This step is crucial for achieving a professional look and ensuring the binding sits neatly against the quilt edges.
Using proper pressing techniques helps eliminate any wrinkles or puckers in the binding and contributes to a clean and polished finish.
Step 2: Sewing the Binding to the Quilt
Align the raw edges of the binding and quilt, pinning the binding before sewing it with a 1/4-inch seam allowance. Read on for more detailed instructions on this crucial step to ensure a professional finish for your quilt.
Aligning the raw edges of the binding and quilt
When aligning the raw edges of the quilt and binding, you have two options: hand sew the binding in place using a blind hem stitch or complete the quilt binding on the machine.
Each method offers different ways to neatly connect the edges of your quilt and ensure a professional finish.
Remember that aligning the raw edges of the binding and quilt during this process will improve not only functionality but also aesthetic appeal by ensuring that your corners are tidy.
Pinning the binding in place
Now, you can proceed with pinning this prepared binding along the edge of your quilt. Make sure it is securely in place for either hand or machine stitching.
Remember that ensuring accuracy at this stage will produce a more polished finish on your quilt. Once pinned carefully and accurately, you can continue attaching your binding for a professional touch.
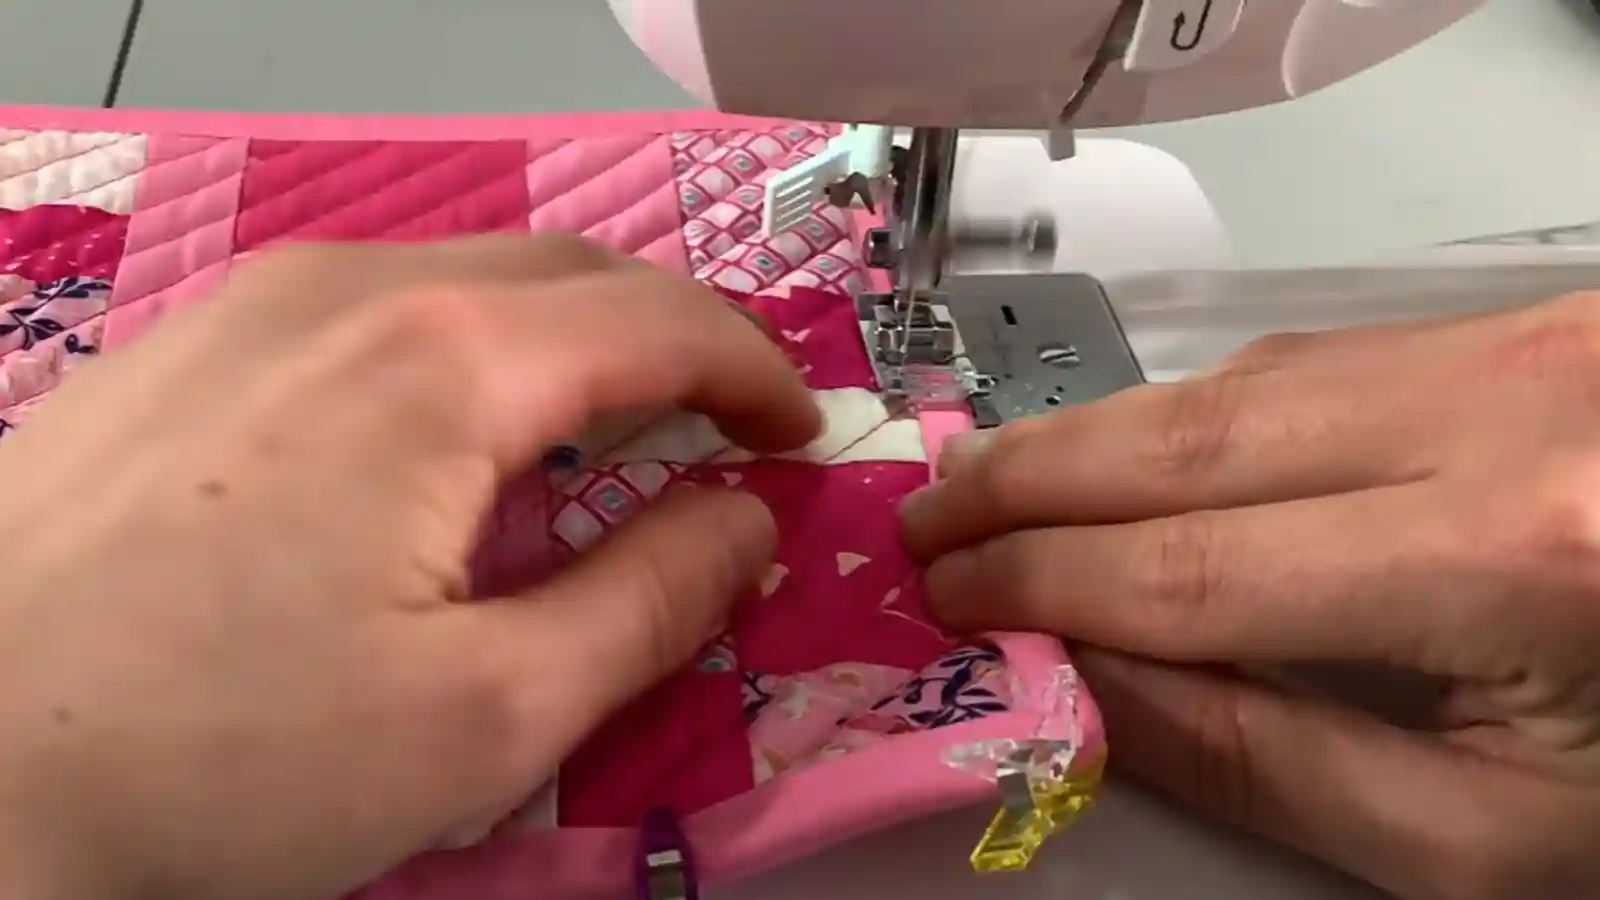
Sewing binding to the quilt with a 1/4-inch seam allowance

After pinning the binding, sewing it to the quilt with a 1/4” seam allowance is crucial for a clean and polished finish. This standard seam allowance ensures the binding is securely attached, providing durability and a professional look.
It also calls for precision, as it helps create neat edges and prevents fraying over time.
Mitering corners for neat edges

Before reaching the corner, ensure to halt the sewing process and maintain a distance of 1/4″ from the edge of the fabric. To aid in this step, consider placing a needle at the 1/4″ mark as a guide for stopping. Rotate your needle and stitch directly into the quilt’s corner.
Create a mitered corner by folding the binding upwards to form a diagonal fold over the stitch in the corner. Press the fold with your fingers. Next, fold the binding back down so that the top fold aligns with the quilt’s edge, positioning the raw binding edges for sewing the next side.
Repeat the mitering process at other corners. Then, continue sewing until you approach where you started the binding.
Step 3: Joining the Binding Ends
 a
a
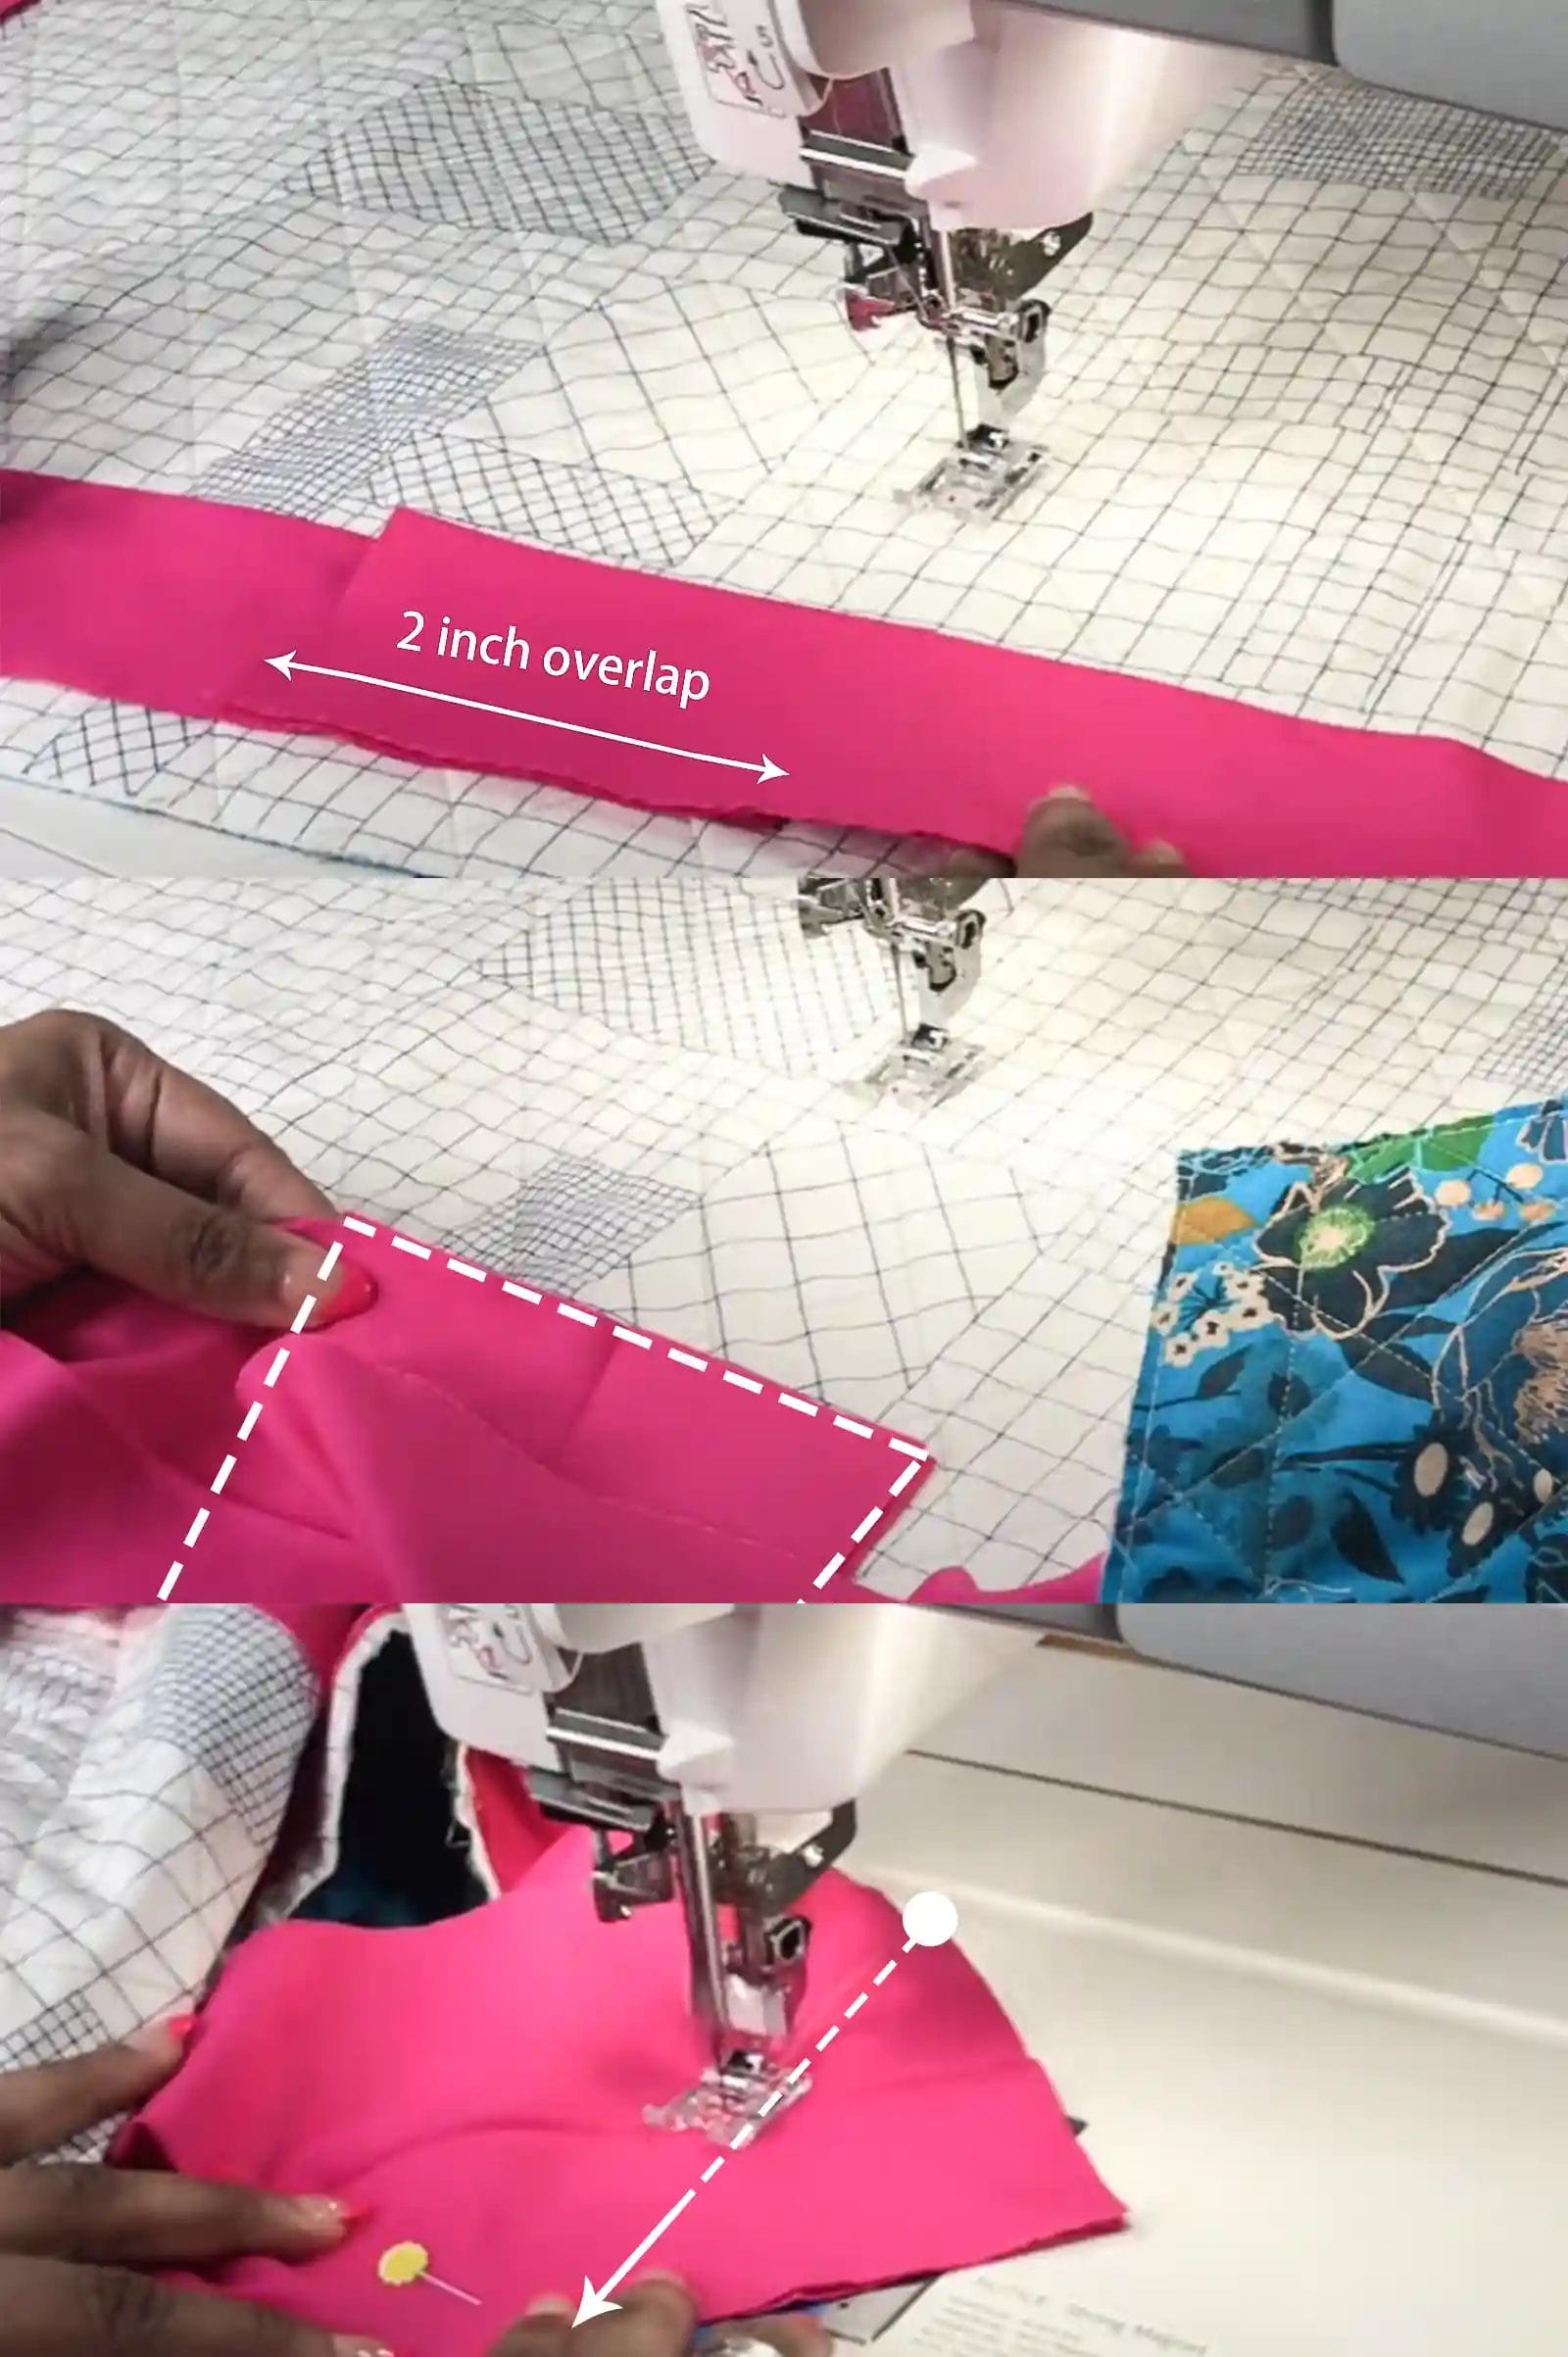
To join the binding ends, overlap one end over the other by approximately 2”. Pin it in place and stitch diagonally from corner to corner. Trim excess fabric to a 1/4” seam allowance, then carefully open and press the seam flat.
Ensure that the joined binding strip is the correct length and not too loose before trimming off the extra fabric on each side of the seam.
Step 4: Finishing Touches
Fold the binding over to the back of the quilt, then hand-stitch or machine-stitch it in place for a polished finish. To learn more about perfecting your quilt binding, keep reading our tutorial!
Folding the binding over to the back of the quilt

Fold the binding over to the back of the quilt, covering the raw edges. Ensure that it lies flat and smooth against the quilt edge. Using pins or clips, secure the binding before hand-stitching or machine-stitching it down for a clean and professional finish.
Remember to press the finished binding once again, so it lays perfectly flat and enhances the overall look of your quilt.
Hand-stitching or machine-stitching binding to the back
To finish the quilt binding, consider hand-stitching it to the back using a blind hem stitch. This technique provides a classic finish and allows for more control over the stitching process. Ensure that your stitches are even and secure for a professional appearance.
An alternative option is stitching the binding by machine. This method is efficient and can provide a neat and uniform look when done carefully. Use a matching thread color to blend in with the fabric, and take your time to ensure straight and consistent stitching along the entire length of the binding.
Pressing the finished binding for a professional look
Press the finished binding with an iron to create a smooth and polished appearance. Ensure that the pressed edges are crisp, contributing to a professional finish for the quilt.
Pressing precisely is crucial to achieving a neat and tailored final result. Remember not to rush through this step. Proper fabric pressing is important for giving your quilt a polished and professional appearance. Take your time during this process, as it sets the stage for the overall look of your finished quilt.
Conclusion
Mastering the art of sewing binding on a quilt involves preparing and attaching the binding and then joining the ends for a polished finish. These practical techniques are easy to implement and will enhance your quilting projects with professional results.
Applying these strategies can significantly improve your finished quilts, ensuring durability and aesthetic appeal. For further guidance, consider exploring tutorials that offer specific fabric requirements and measurements, as well as tips for achieving a professional finish.
Embrace the opportunity to elevate your quilting skills with confidence!
Learn more sewing tips at Longan Craft Blog! Dive into the fabric world with Longancraft!
FAQs
1. Can I machine-bind my quilt or hand-stitch it?
You can do both! Machine-bind your quilt for speed and durability, or hand-stitch the binding for a traditional finish. Choose based on your comfort level and the look you want.
2. What is bias binding, and when should I use it?
Bias binding is made from fabric cut at a 45-degree angle to its weave, making it more flexible. Use bias binding on quilts with curved edges or when you want extra durability.
3. How do I attach binding to the corners of my quilt?
When you reach a corner of your quilt, fold the binding up and down to create a mitered corner. This method creates neat, sharp corners.
4. What’s the best way to finish my quilt’s binding?
To finish your quilt’s binding neatly, sew it down until you’re about 12 inches from where you started attaching it. Join both ends of the bindings with an angled seam before sewing them back onto your quilt.
5. Are there different methods for attaching my quilt binding?
Yes! You can choose between machine sewing for quickness or hand stitching for precision. Each has unique steps leading to securing that beautiful folded edge over the raw edges around your masterpiece.
Learn more sewing tips on Longan Craft Blog! Dive into the fabric world with Longancraft!