Vivid veils are a symbol of sophistication and style, and you’ve probably wondered how to make one without sewing. This guide is perfect for you! By selecting a stunning pre-trimmed fabric, strategically shaping it, and working with pins for precision, you’ll be surprisingly successful. A dab of creativity and a couple of metal hair combs later, you’ll have your very own handmade veil.
But what’s the full process, you ask? Stick around to embark on this stylish journey that will leave you with more than just a veil, but a whole new skill set.
Key Takeaways
Silk chiffon and lace trim are ideal materials for creating an elegant, no-sew veil.
Accurate measuring and marking techniques are crucial for achieving a professional finish.
The lace trim should be pinned and adjusted carefully to avoid wrinkles and enhance the veil’s sophistication.
A comb or hair clip can be attached securely to the veil, transforming it into a stunning bridal accessory.
Materials You Need
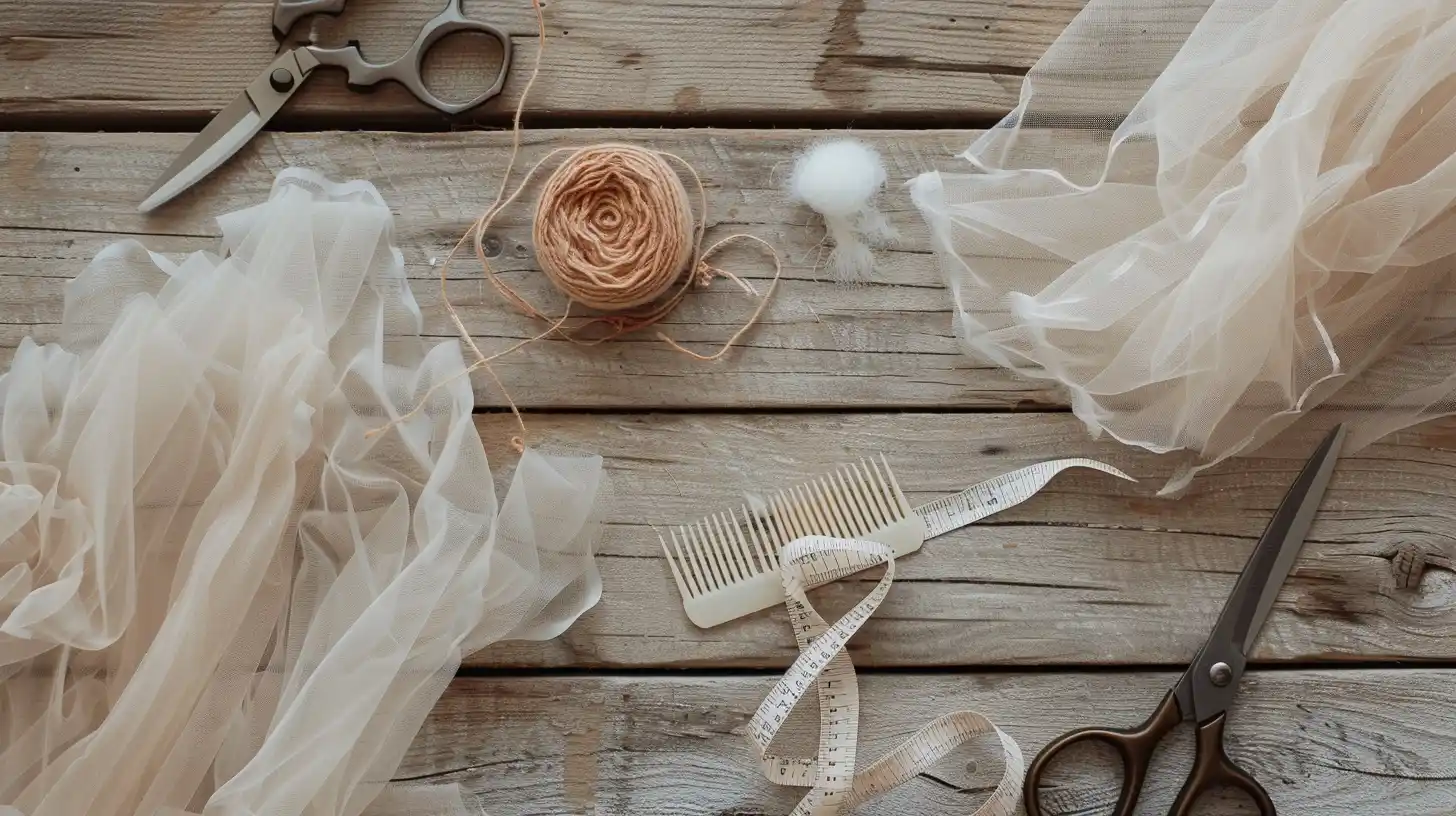
As you embark on this DIY project, be sure to gather your essentials. These materials are transforming a simple piece of fabric into a beautiful, elegant veil.
Silk Chiffon
Use a lightweight and delicate silk chiffon as a no-sew veil for a beautiful and easy-to-make accessory. It’s elegantly translucent and gently falls into soft, graceful folds; a perfect reflection of the bride’s beauty. Silk chiffon’s delicate nature adds an ethereal touch to your veil, making it look like it’s floating on air. Plus, it’s available in various colors, giving you the freedom to create a veil that perfectly matches your wedding theme. You will find it easy to manipulate this fabric. It drapes well, making it easy to style your veil in any way you want. With silk chiffon, creating an elegant no-sew veil isn’t just possible; it’s effortless.
Lace Trim
Silk chiffon adds a flowing feel to your no-sew wedding veil. Adding lace ribbon can make it look even more special, giving it a romantic and regal touch. The lace trim will be your secret weapon, transforming your pre-made veil base into a bridal masterpiece. With a pair of scissors, cut the lace trim to match the length of your veil. Allow it to dry completely before wearing. With these simple steps, you’ve just elevated a basic veil to a statement piece, all without a single stitch!
Measuring Tape
Before starting this project, make sure to have a measuring tape, which is essential to ensure the perfect length and width of your veil. Remember, precision is key. Therefore, don’t hesitate to measure multiple times. This tool helps you figure out how much fabric you need for your veil, preventing waste and ensuring a perfect fit.
Water-soluble Marker
A water-soluble marker comes in handy to mark those measurements directly onto your fabric. This marker isn’t just any marker—it’s a clever tool in your crafting arsenal. Designed for temporary markings, it’s an artist’s dream—there one minute, gone the next. With just a quick rinse, your fabric is as pristine as a blank canvas, void of any stray lines or marks.
A Sharp Scissor
Ever wondered how to achieve flawlessly smooth cuts on your veil fabric? It’s all about using a sharp scissor. A quality scissor, sharp and agile, is your best friend in this DIY endeavor. Precise cuts are important for creating a seamless look when making a veil.
Safety Pin
You can make a veil using a safety pin instead of sewing traditionally. Use safety pins to attach your veil to the hair combs without sewing. They offer a powerful and transparent grip. Choose pins that blend seamlessly into the fabric, ensuring they’re securely fastened.
Hot Glue Gun
You’ll now explore the magic of a hot glue gun, a handy tool that can turn your piece of fabric into a beautiful no-sew veil. This device can help you secure the edges of your fabric, giving it a clean and polished look. Be mindful not to use excessive glue to prevent visible residue or damage.
Combs or Clips
Hair combs, with their secure grip and varying sizes, are ideal for most hair types and styles. They seamlessly blend into your wedding hairstyle, providing a firm hold for your veil. Alternatively, clips offer a chic, versatile touch, easily attaching to your veil and giving you freedom in styling. Make your selection based on your personal preference and desired look, ensuring your veil enhances your bridal beauty.
Instruction for Making a Wedding Veil
Ready to craft your dream wedding veil without a single stitch? Let’s roll up our sleeves and get started! Instead of buying a wedding veil, you can make an inexpensive veil by yourself. Here is a helpful tutorial.
Step 1: Fold Silk Chiffon in Half Twice
Fold your silk chiffon in half lengthwise. Make sure the edges align perfectly. This will set the foundation of your no-sew wedding veil. This initial fold is pivotal in creating symmetry, key to a visually pleasing veil.
Once complete, move to the next step, folding it in half again but this time horizontally. This forms a smaller square, making your veil more manageable and easy to work with.
Ensure the edges of the silk chiffon are even and smooth. This precision maintains a symmetrical veil design, vital to the overall appearance.
Indeed, this simple folding technique is the beginning of creating a stunning, personalized veil without a single stitch. No sewing machine, no problem!
Step 2: Position the Measuring Tape at the Center of the Fabric and Mark the Suitable Length
After meticulously folding your silk chiffon, grab your measuring tape and carefully locate the exact center of the fabric. The central point is crucial for determining the desired length of your veil. Precision is key here to ensure a flawlessly symmetrical cut. Gently lay the measuring tape along the fabric, keeping it secure to avoid any unwanted shifts. Double-check your marking before proceeding to guarantee accuracy and avoid any length discrepancies later on. Marking the suitable length on the fabric is like tailoring a dream, where every inch counts. So, take your time, breathe, measure, and mark.
Step 3: Keep the End of the Measuring Tape Still and Mark the Same Length along the Edge of the Square
Keep one end of the measuring tape in the corner of your fabric square. Mark the same length along the edge to make sure the veil looks even and seamless. This becomes your guideline, a blueprint of sorts. With every inch you move along the edge, your fabric starts to take shape. The mark you make isn’t just a line, but a commitment to precision.
Step 4: Cut along the Arc Line and Get a Circle Fabric
Trace the scissors along the marked arc line to cut out a quarter circle. This will create a beautiful no-sew wedding veil. As you cut along the arc line, you shape the fabric into a flowing drape that will become a beautiful bridal accessory. It’s vital to maintain a steady hand, ensuring every incision is precise for a clean, symmetrical edge.
This quarter circle shape is the foundation of your veil, a testament to your creativity and craftsmanship. Remember, your fabric scissors are your best friend in this process, aiding in carving out your desired shape.
And there you have it – the base of your veil, cut to perfection, ready for the next step.
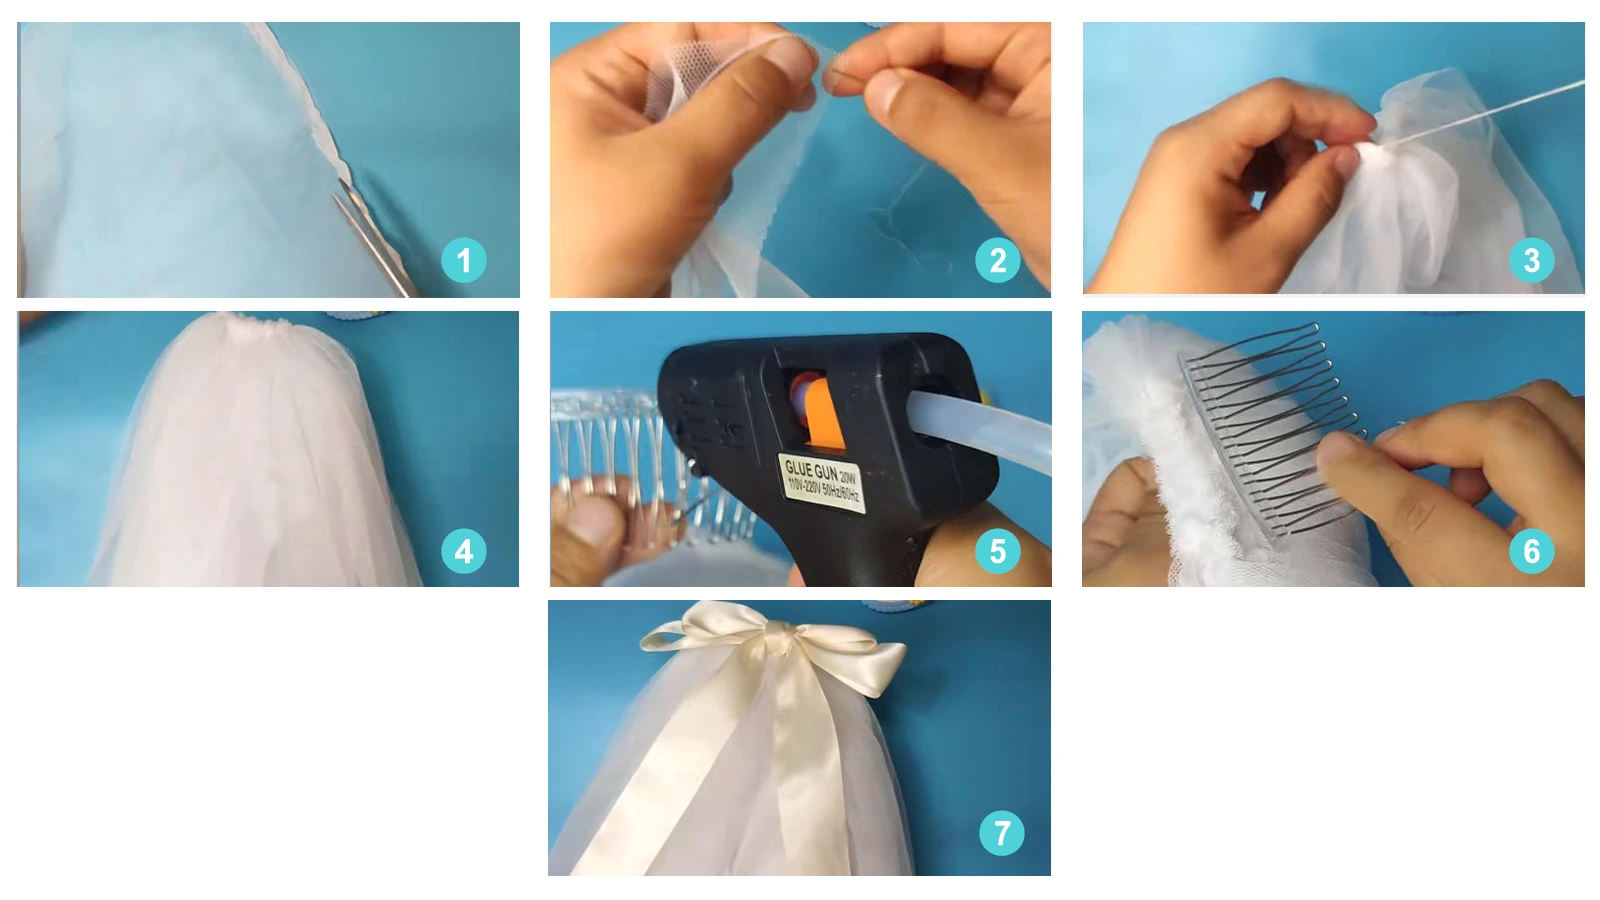
Step 5: Pin the Lace Trim to the Edge of the Circle
Start by carefully pinning lace trim around the edges of your circular fabric to create an elegant border for your veil. The lace trim isn’t just decorative; it’s the key to transforming your fabric into a breathtaking bridal accessory.
Start by spreading your circular fabric flat, ensuring the edges are smooth. Gently unroll your chosen lace trim, letting its beauty grace the rim of your fabric. Use small, fine pins to secure the trim in place, ensuring it forms a uniform circle. As you pin, adjust the lace to avoid bunching and smooth out any wrinkles.
The careful process is important to create a veil that shows your style and adds elegance to your wedding outfit.
Step 6: Use a Hot Glue Gun to Fix the Lace to the Edge of Circle Fabric
Use your hot glue gun to carefully apply a thin line of glue along small sections of the fabric’s edge as you continue making your veil.
Created with a hot glue gun, lace trim, and fabric circle shows your creativity and patience. Carefully press the lace onto the hot glue to make sure it sticks firmly to the fabric.
You methodically and gracefully work around the edge of the fabric circle, attaching the lace with an unbroken rhythm. Allow the hot glue to dry completely, creating a secure bond between the lace and fabric, before handling your masterpiece.
Step 7: Add a Comb or a Hair Clip to the Bridal Veil
Add a comb or bobby pins to turn your fabric and lace masterpiece into a bridal veil. To securely attach the comb, thread the needle through the ruched section of the veil. Loop the thread around each tooth of the comb, ensuring each loop is cinched tight. This will provide a sturdy, durable attachment, so your veil won’t come loose.
Remember to check the orientation of the fabric, ensuring the right side is facing outwards for hairstyling. When your comb is securely affixed, style the veil on your head to see your vision come to life. With just a comb or a hair clip, you can create a stunning, no-sew bridal veil.
Conclusion
You have it there! You’ve just crafted your very own veil without touching a needle or thread. It is a great option. With some creativity, a thoughtful selection of fabric, and simple tools, you’ve achieved a stunning result.
Remember, the beauty of DIY is personalizing to your heart’s content.
So go ahead, wear your veil with pride and bask in the glory of your newfound skill.
Get more DIY tips on Longan Craft Blog! Dive into the fabric world with Longancraft!