Have you ever finished sewing only to find your stitching coming apart? This common frustration happens to many. But fear not! We have a guide that tackles this issue head-on.
This article breaks down various ways to secure hand-sewn projects, whether using simple knots or backstitch reinforcement. You’ll discover how to prevent unraveling and ensure your work stays intact for ages.
Get ready to elevate your sewing game! Keep reading for all the essentials on finishing stitches flawlessly.
Key Takeaways
- Always tie off threads properly to prevent seams from opening and your project from coming undone.
- Practice different knot-making techniques on scrap materials to improve your skills before moving on to more important projects.
- Choose the right needle for your sewing project based on the type of fabric you’re working with.
- For those using a sewing machine, remember to lift the presser foot after completing your stitching to create some slack before cutting off excess thread. Tying a knot close to where you finished adds extra security against unraveling.
Importance of Properly Ending a Stitch
Finishing your sewing project the right way means ending each stitch with care. If you don’t tie off threads properly, seams might open up, and all your hard work could come undone.
This step is crucial for both beginners and advanced sewers. It ensures that every piece of fabric stays together as it should.
Practicing knot-making on scrap materials helps improve your skills before working on important projects. Methods like backstitches or a simple double knot can greatly affect the longevity of your creation.
Always leave enough thread at the end so you have room to work without pulling the fabric too tight.
Different Methods to End a Stitch by Hand
There are various methods for finishing a hand stitch. Consider reinforcing the last stitch or making a simple double knot to secure the end of your thread. Another option is to use backstitch reinforcement for added strength.
Method 1: Loop through the Last Stitch
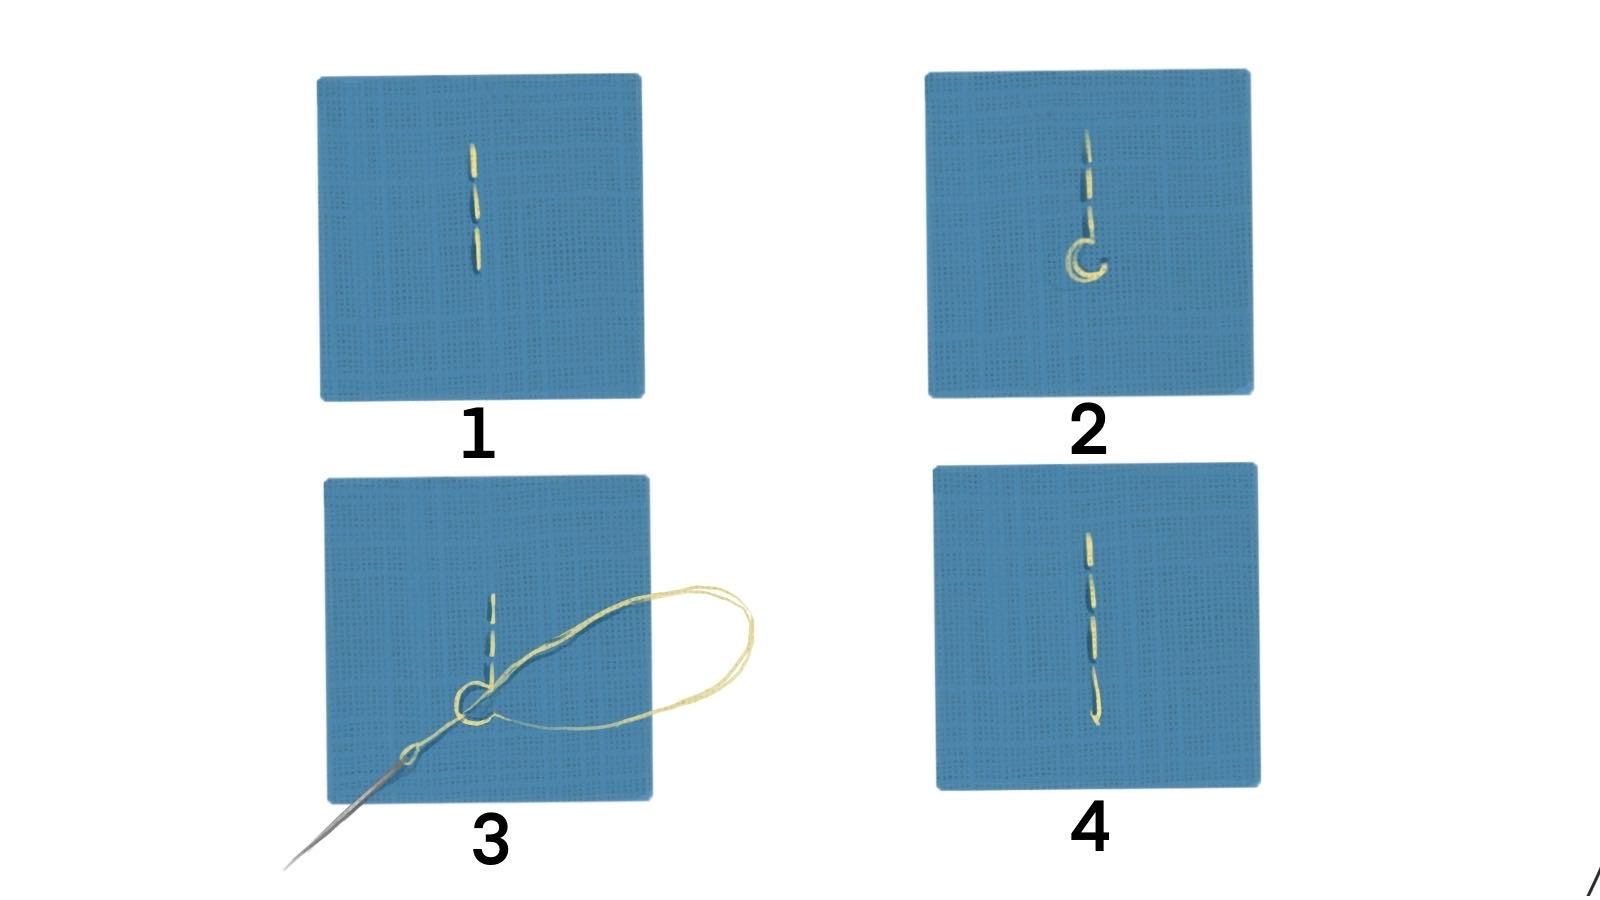
- Pull the needle through the fabric on the side you’re working with. For easy handling, leave about six inches of thread at the end.
- Then, insert your needle close to where your thread comes out, but don’t pull it all the way through yet. This creates a small loop on the fabric’s surface.
- With a little care, push your needle through the loop. Now firmly tug on the thread until it cinches against the material, forming a secure knot.
- Next, slide your needle under a few neighboring stitches on what you often call the wrong side of your piece of fabric. This effectively hides both the needle and excess thread after tying off.
- To finish, carefully snip off any remaining part of the thread near your knot without clipping into any other stitches or the fabric itself. This ensures everything stays intact and leaves your work looking neat and polished.
Method 2: Reinforce the Last Stitch
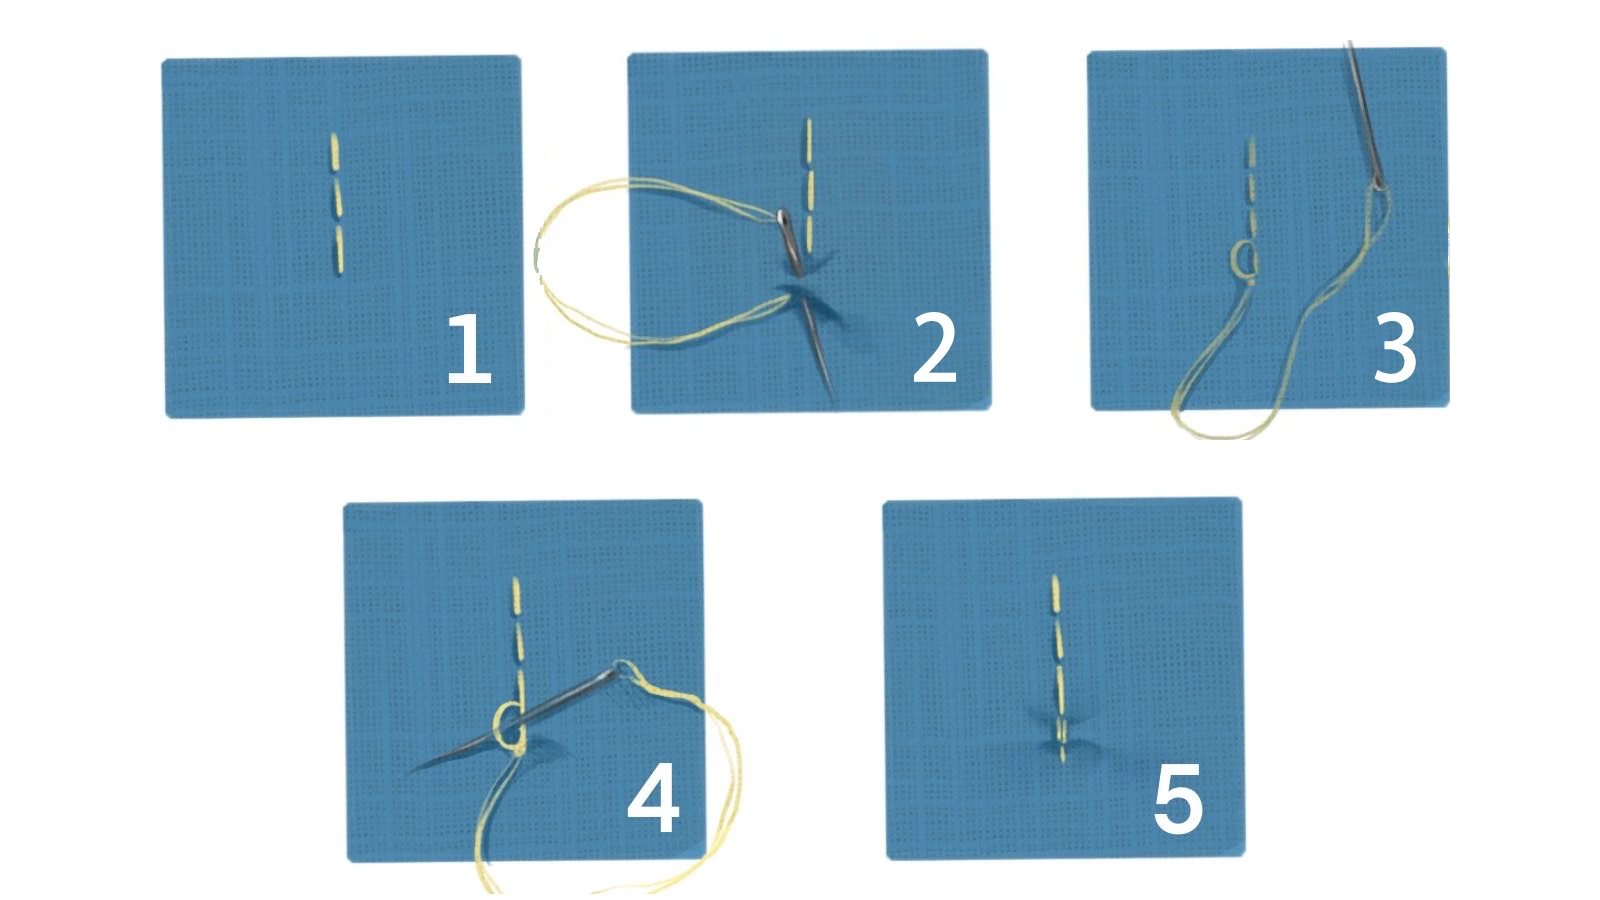
- First, ensure your needle is on the underside of your fabric to reinforce the last stitch. This helps hide the reinforcement from view.
- Then, slide your needle beneath a few completed stitches near the end of your seam. Gently pull until you form a small loop with your thread.
- Pass the needle through this loop to create a tight knot right against the fabric.
- Next, perform this step again to ensure maximum security for your workpiece. By doing so, you tie what’s known as a double knot without adding bulk or making it visible on the top layer of material.
This method keeps seams tightly closed and prevents them from unraveling over time, keeping your handiwork looking neat and professional.
Method 3: Knot by Hand
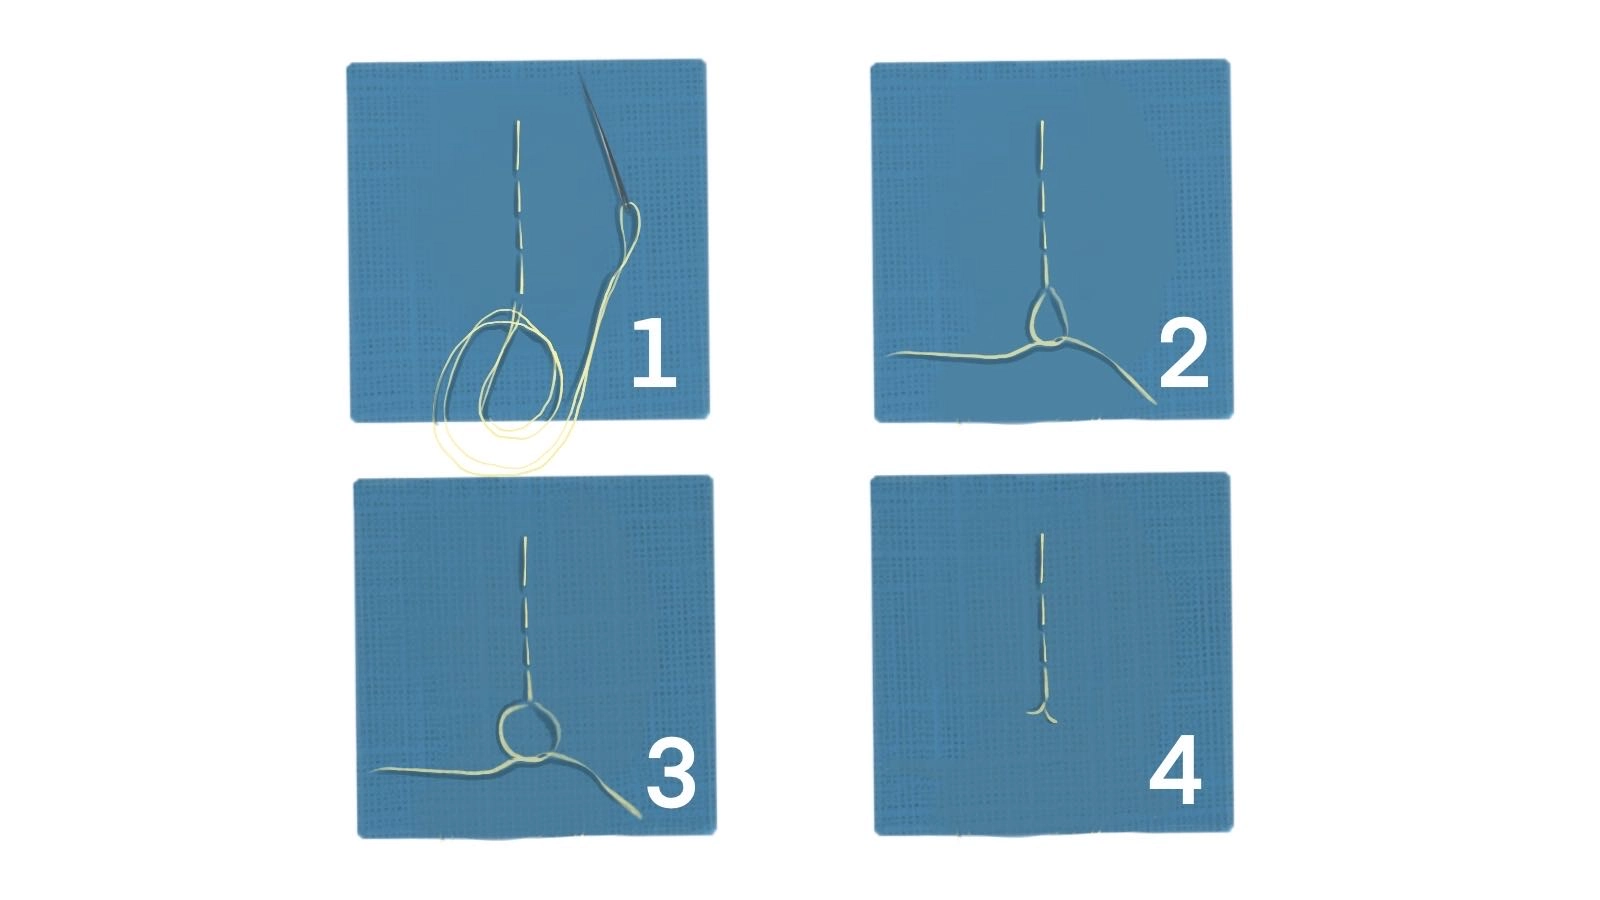
- After making the final stitch, cut the thread near the needle, but leave about six or seven inches of thread.
- Then, cross the two ends of the thread and pass the lower thread through the loop. Gently tug both threads in opposite directions. Avoid applying too much pressure, which can damage or wrinkle the fabric.
- Repeat the process to make a double knot.
- Trim the excess thread once the double knot is complete for a clean appearance.
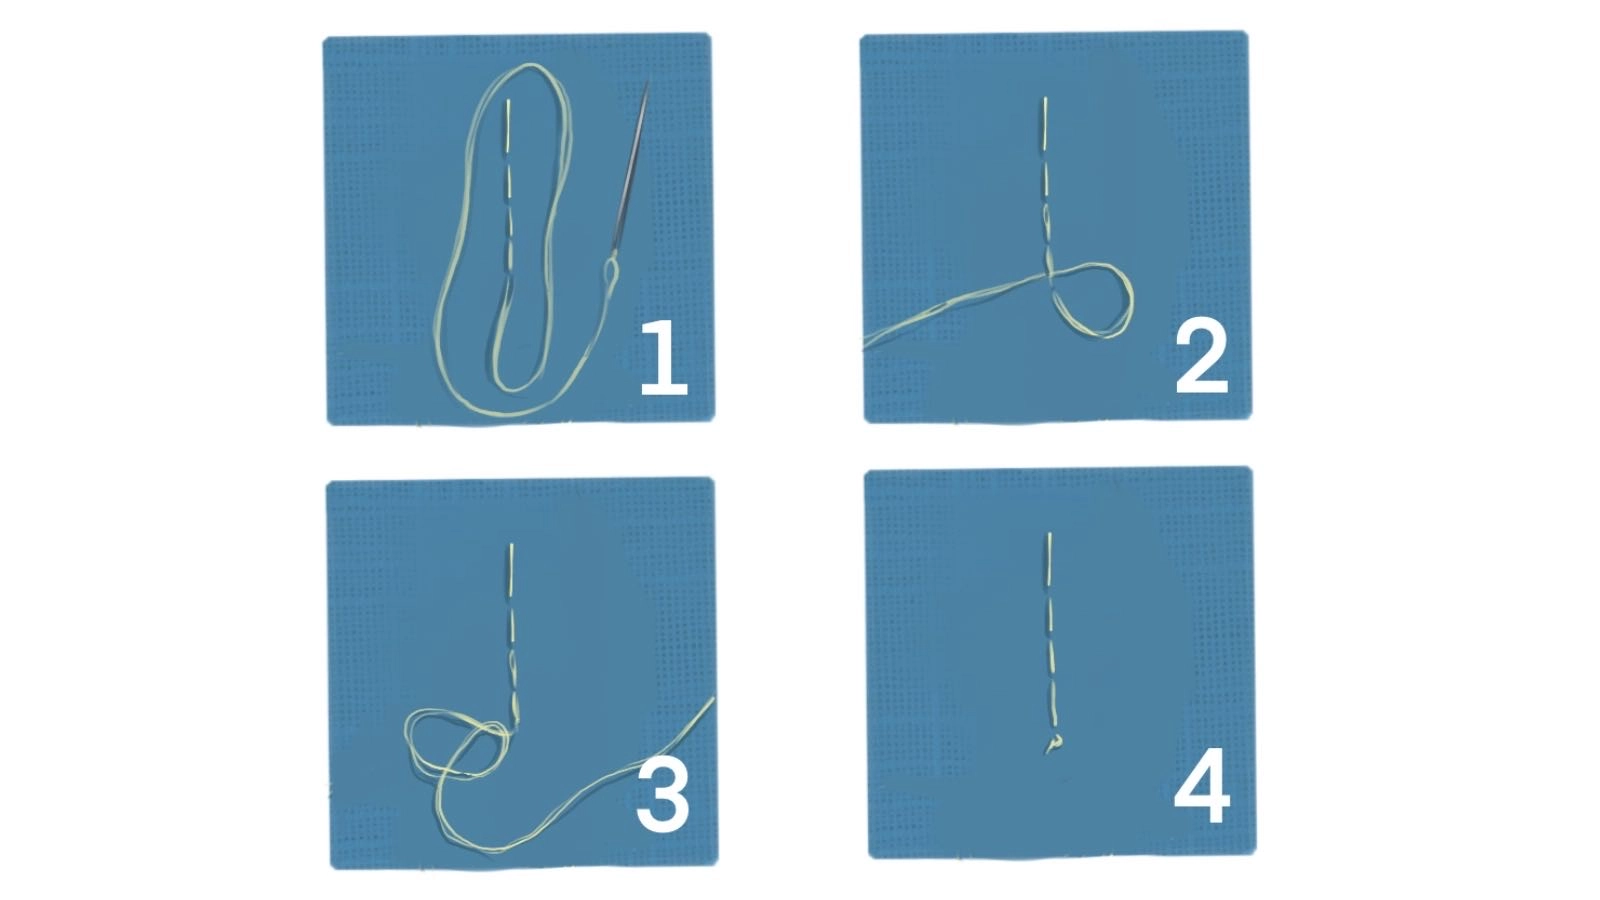
Method 4: Backstitch
- Sew each stitch until there is one stitch left. Make sure you have at least six inches of thread remaining for knotting.
- Next, insert the needle into the middle of the last stitch and insert it forward to where the final stitch should be.
- Gently pull to create a loop, then pass the needle through it and pull gently to close it.
- Repeat the process to double-secure the knot.
- After you make the knots, trim away any excess thread.
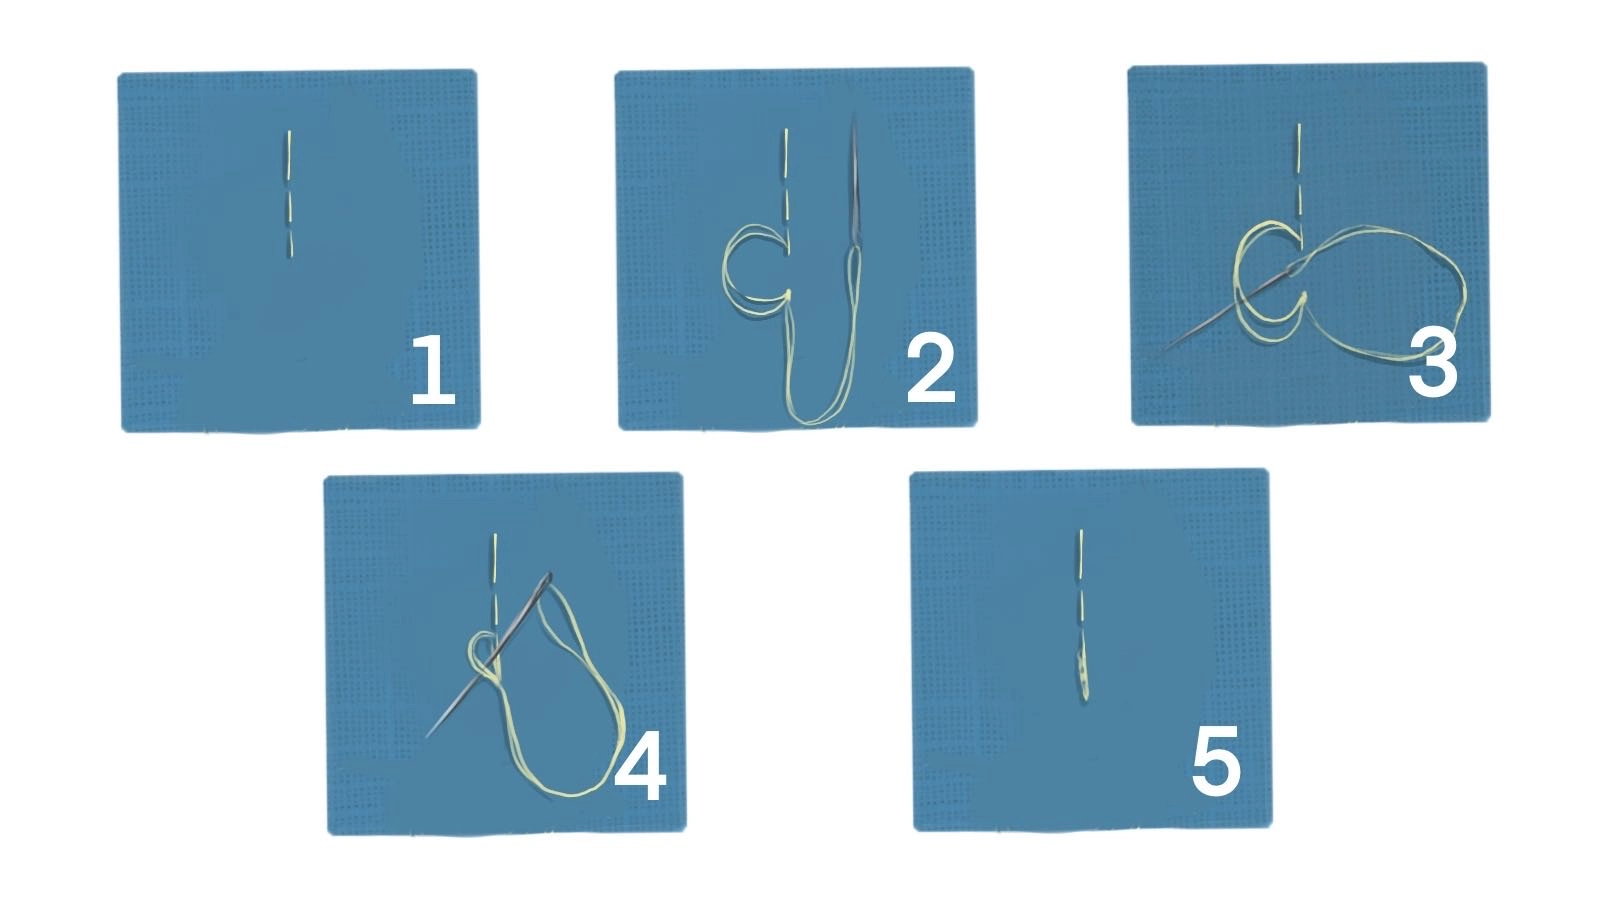
Method 5: Simple Double-Knot
- Make the last stitch and leave enough thread for the knot.
- Then, wrap the thread around your pointer finger to create a loop.
- Slide the needle slowly through this loop. Pull tight to form the knot close to where your stitching stops.
- Repeat the process and make a double knot.
- Finally, cut the excess thread for a professional look.
How Many Knots Should I Make When Finishing a Stitch?
When finishing a stitch, it’s essential to make two or three knots for added security. This ensures the thread remains in place and doesn’t come loose over time. Making multiple knots gives you peace of mind that your hand-sewn projects will withstand wear and tear without unraveling.
What is the Best Needle to Sew by Hand?
The most suitable needle for hand sewing depends on the type of fabric and the project at hand. When stitching lightweight fabrics, such as silk or chiffon, a fine needle with a small eye is ideal to avoid puckering or tearing.
A universal needle works well for medium-weight fabrics like cotton or linen. A sharp needle works best with heavy fabrics such as denim or canvas due to its extra strength and ability to penetrate thick layers smoothly.
When choosing needles for hand sewing, consider fabric weight and thread type to avoid machine damage and ensure smooth stitches.
Conclusion
In wrapping up, you’ve learned various techniques for properly finishing hand stitches. These practical strategies will effortlessly secure your stitches and prevent unraveling, making your sewing projects more efficient.
By implementing these techniques in your sewing projects, you’re poised to witness a significant improvement in the quality of your finished products. Keep crafting!
Learn more sewing tips at Longan Craft Blog! Dive into the fabric world with Longancraft!
FAQs
1. How do I tie a knot at the end of my hand-sewing project?
To tie a knot at the end, make a small loop with your thread close to the fabric, push the needle through this loop, and then pull tight to secure your stitching.
2. What is backstitching, and how does it help with hand sewing?
Backstitching involves making two or three tiny stitches backward at both the start and end of your seam. It helps lock stitches in place so they don’t unravel.
3. Can I finish my stitch without tying a knot?
Yes, you can finish without a knot by weaving the needle through some of the stitches you made on the back of your fabric before cutting off any excess thread.
4. How do I know when to reduce stitch length while finishing hand stitches?
Make smaller stitches to reduce stitch length towards the end of your seam. This provides extra strength and prevents bunching up when tying off or adding finishing knots.
5. Why is bringing the needle out on the right side important when starting or ending my stitching?
Doing so ensures that any knots or ends are hidden inside or along seams where they won’t be seen once you finish your piece.