Are you ready to add a touch of style and practicality to your clothing? Sewing pockets into your garments not only enhances their functionality but also allows for an element of your personality to shine through.
This blog post is going to be your comprehensive guide, simplifying the process of how to sew pockets with 3 popular styles: inseam, patch, and zipper. Let’s dive in and uncover the secrets behind crafting perfect pockets!
How to Sew Pockets: Types of Pockets to Sew
Diving into the world of how to sew pockets, you will encounter various types of pockets to sew. Here is a list of common pockets:
- Inseam Pockets: They are hidden pockets commonly found in dresses, skirts, and even pants. You sew them into the seams of your garment, making them an integral part of the clothing’s design.
- Patch Pockets: Unlike inseam pockets, patch pockets sit on the exterior of your garment. They serve not just a functional role but also provide a decorative touch to the outfit. You can enhance them further by using contrasting fabric or attaching ribbons and bows.
- Zipper Pockets: These pockets use zippers to close the pockets at the top, which creates a secure pocket closure. You can also use zippers at the sides of pockets.
- Flap Pockets: Just as the name suggests, flaps are used to cover the openings of the pockets. The flaps can be rectangular or, of course, in other shapes. There are also double flap pockets.
- Expandable Pockets: These pockets use tucks, pleats, folds, or gathers to expand the pocket volume and hold more items. Common expandable pockets are accordion pockets and cargo pockets.
- Kangaroo Pockets: They are a large type of pocket on the front of tracksuit tops for carrying more items.
- Faux Pockets: These pockets don’t open, so they are only for decoration.
There are still a lot of pocket types that I don’t mention. In this blog, I will only focus on the 3 most popular pockets. Learning how to sew pockets with these three types will help you handle most pockets afterwards.
How to Sew Pockets: Inseam Pockets
Let’s start your sewing adventure by learning how to sew inseam pockets. Here’s a step-by-step guide.
What supplies you’ll need
Always prepare everything before you start any sewing project.
- Fabric for your pocket and garment
- Basic sewing supplies (matching thread, needle, sewing machine, scissors, ruler, or measuring tape)
- Fabric pins or clips
- Tailor’s chalk or other markers
- Iron and ironing board for pressing seams and ensuring a neat finish
Make the pocket pattern template
There are three ways you can make a pocket pattern template. The first way is that you can make one by using an existing pocket on another garment as a guide. The second is to draw geometric shapes like rectangles and squares to create your own unique design. Another way is to find an existing template on the Internet and print it out.
For sewing beginners, I recommend you use a pattern on the Internet, which is the most convenient method.
Cut the pocket pieces
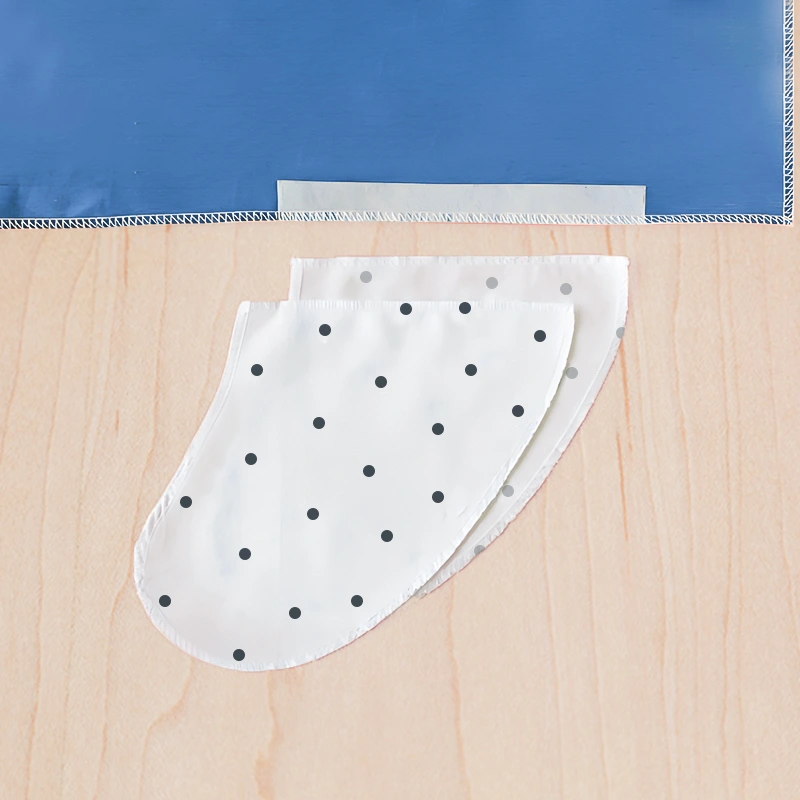
Now you can cut the two pocket pieces according to your pattern template. Make sure you leave a seam allowance of at least 1/2 inch on all sides.
Decide on the pocket placement
Decide where you want the pockets to be on your garment. Remember to mark the placement with chalk or markers.
Pin the pockets
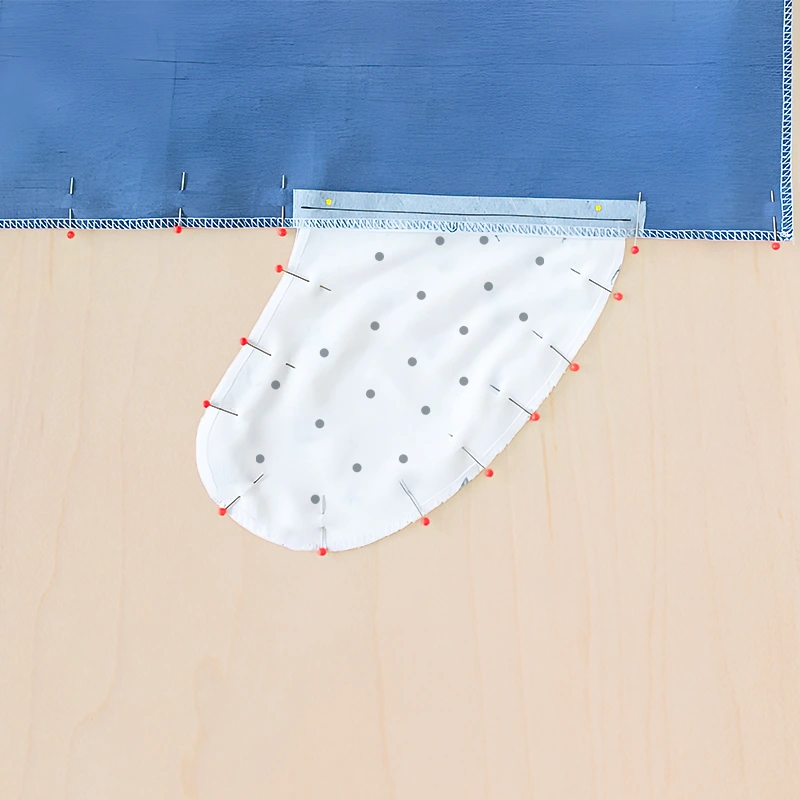
Place one pocket piece in place on your garment with the right side down. Remember to align the top of the pocket with the garment’s side seam. Use pins or clips to hold it in place.
Stitch the pocket
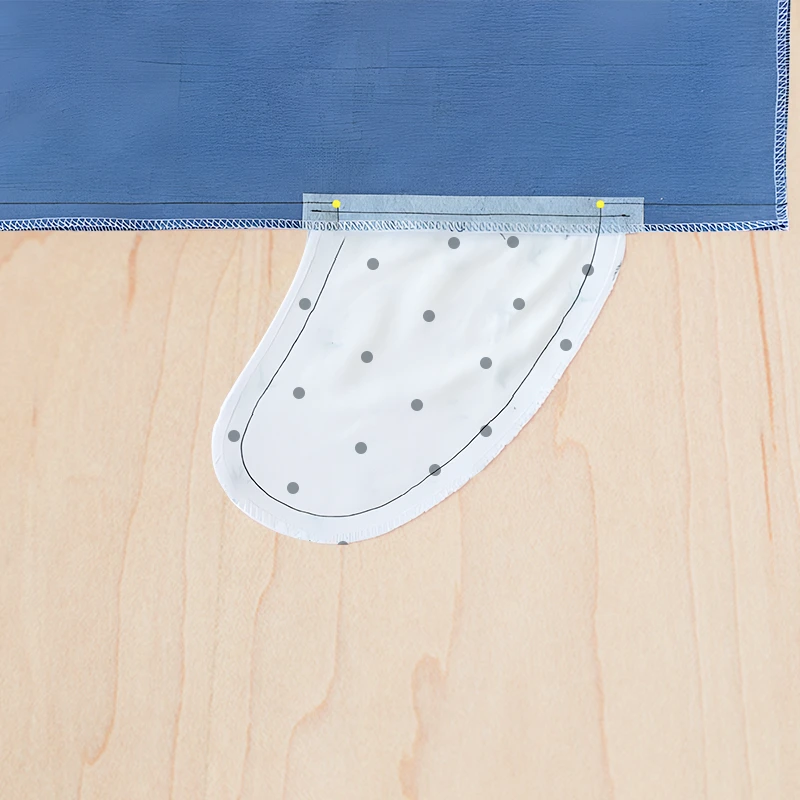
Use a straight stitch to stitch the piece to the garment, about 1/4 inch from the edge. With the right sides together, stitch the front and back pieces together. Start sewing just below the top edge of the pocket and backstitch to secure the thread. Then sew down the side seam of the garment, attaching the pocket.
Press the side seam
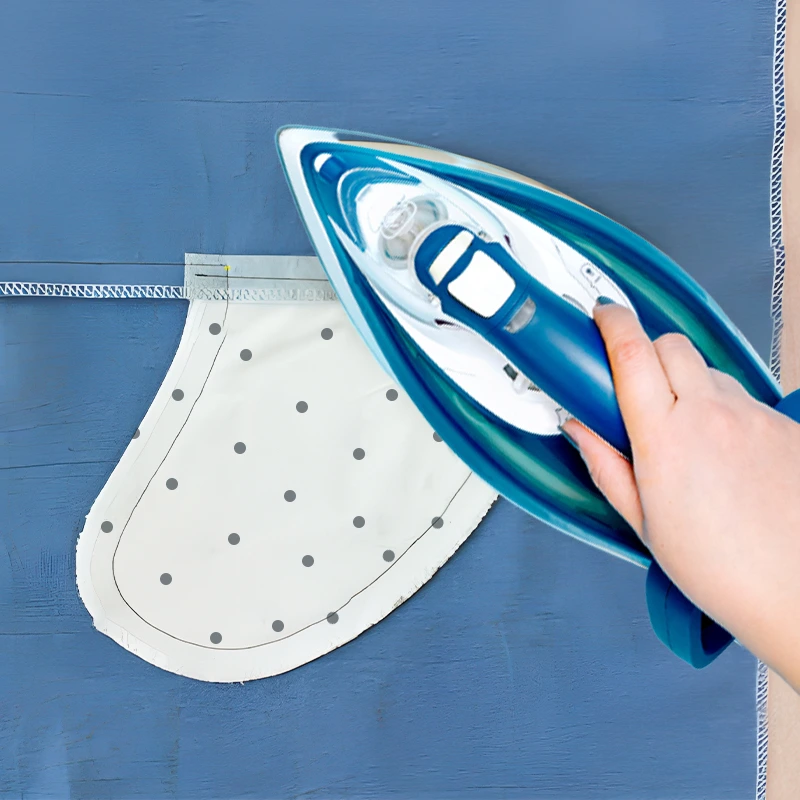
Use an iron to press the seam in order to create a crisp and professional look.
After these steps, your pockets are now attached to your garment. Attach your inseam pockets to a homemade dress in this blog post.
How to Sew Pockets: Patch Pockets
After inseam pockets, let’s learn how to sew patch pockets, which are common and popular too.
What supplies you’ll need
To sew a patch pocket, here’s a list of the supplies you’ll need:
- Garment for attaching the pocket to
- Fabric for the pocket
- Interfacing (optional)
- Basic sewing supplies (matching thread, needle, sewing machine, scissors, ruler, or measuring tape)
- Pins or clips
- Iron and ironing board for pressing the fabric
Create a pattern
To sew a patch pocket, you’ll first need to create a pattern. The easiest way to make a pattern is by using a commercial pattern. You can choose the size and shape you want.
Cut the fabric

Cut out one pocket piece along the pattern. Ensure that you leave enough seam allowance (at least 1/2 inch on each side) for sewing later on. For thin fabrics, you can reinforce it by adding fusible interfacing before cutting it out. This will make your pocket sturdier and more durable over time.
Fold and press the sides

Fold and press under the seam allowance mentioned before on all sides of the pocket. Use an iron to press for clear creases.
Sew the pocket
Sew around the previous creases on all sides, about 1/4 inch from the edge. Take care to backstitch at both ends to reinforce the stitches. Once stitched, clip any excess fabric near curved edges or corners for a clean finish. Turn the pocket right side out and press it flat with an iron.
Attach the pocket
To attach the patch pocket to your garment, pin it in place. Make sure it is positioned correctly before sewing. Using your sewing machine or needle and thread, stitch along the edges of the pocket, backstitching at the beginning and end for added durability. Once you’ve attached the pocket, give it a gentle press with an iron to flatten any wrinkles or creases.
And that’s it! Your pocket is now securely attached and ready to be used.
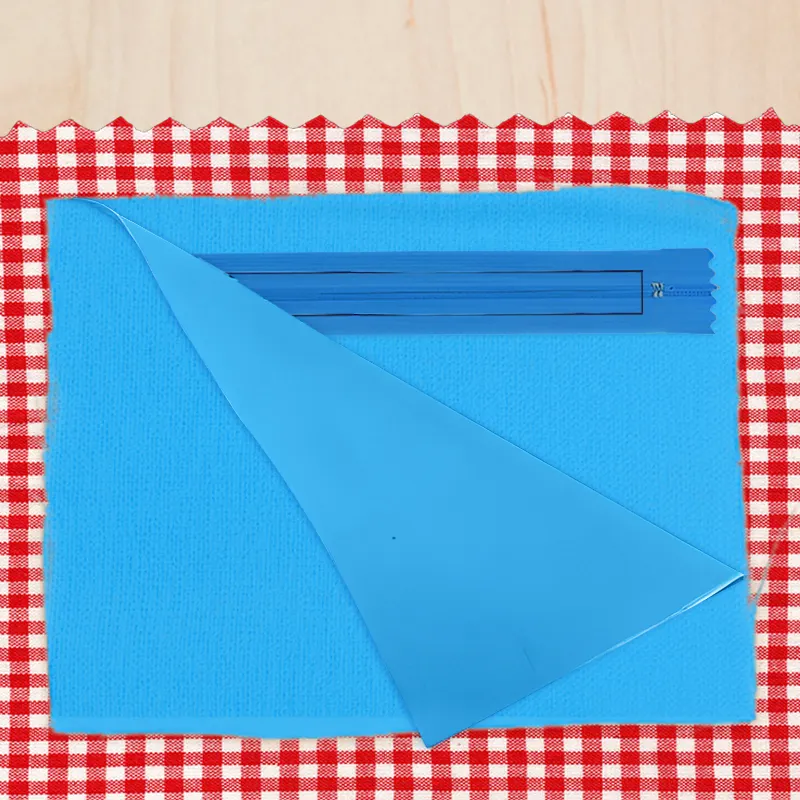
How to Sew Pockets: Zipper Pockets
Now turn to the last part: how to sew zipper pockets. Here’s a detailed tutorial.
What supplies you’ll need
To sew a zipper pocket, make sure you have the following supplies:
- Fabric for the pocket and lining
- Zipper (length according to your desired pocket size)
- Basic sewing supplies (thread, needle, sewing machine, scissors, ruler, or measuring tape)
- Marking tools for marking the fabric
- Pins or clips to hold fabric together
- Iron and ironing board for pressing fabric
Prepare your fabric
Choose the fabric for your pocket and lining. You can choose the same fabric for both. Or you can use two different fabrics for a striking effect.
Cut two lining pieces
Cut two rectangular pieces for the zipper pocket lining. Make sure the two pieces are the same size.
Decide the zipper length
To sew a zipper pocket, you need to measure the zipper correctly. I recommend your zipper be 2 inches shorter than the pocket. But at the same time, your zipper should be 1 inch longer than the pocket opening you’ll make later.
Mark the lining opening
The easiest way to mark the pocket opening is by placing the printed template on top of the lining fabric. Then use a pencil or fabric marker to pierce through the paper on the four edges of the rectangle. Doing this will leave four small marks, which are enough for you to draw the lines later.
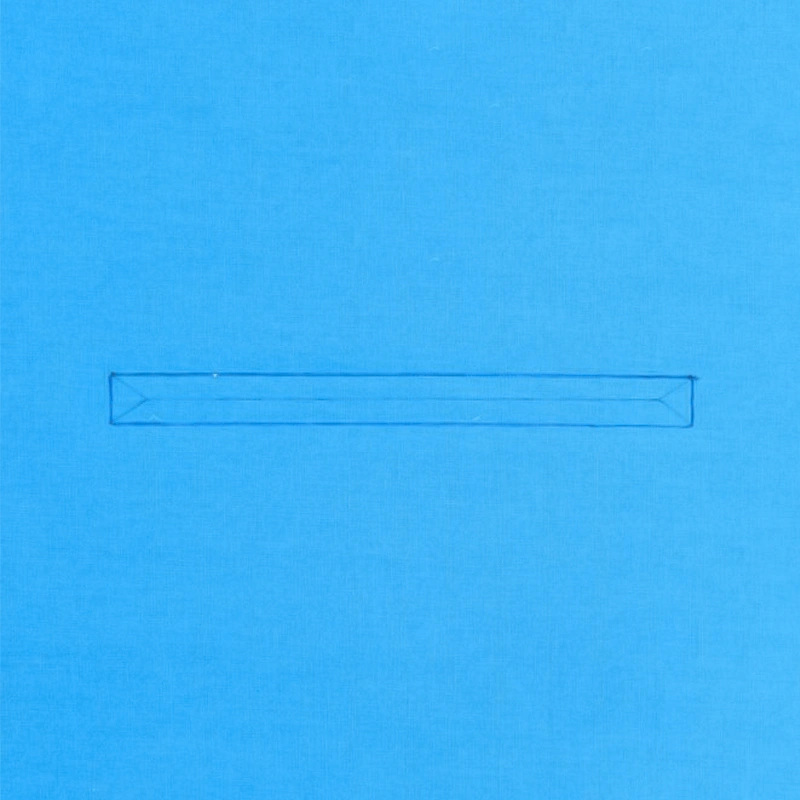
Stitch the opening and cut the center
After marking the opening on the lining fabric, use a zipper foot on your sewing machine to stitch along the marked lines with the main pocket piece and the lining. Make sure to reinforce the stitches at both ends of the opening for added durability.
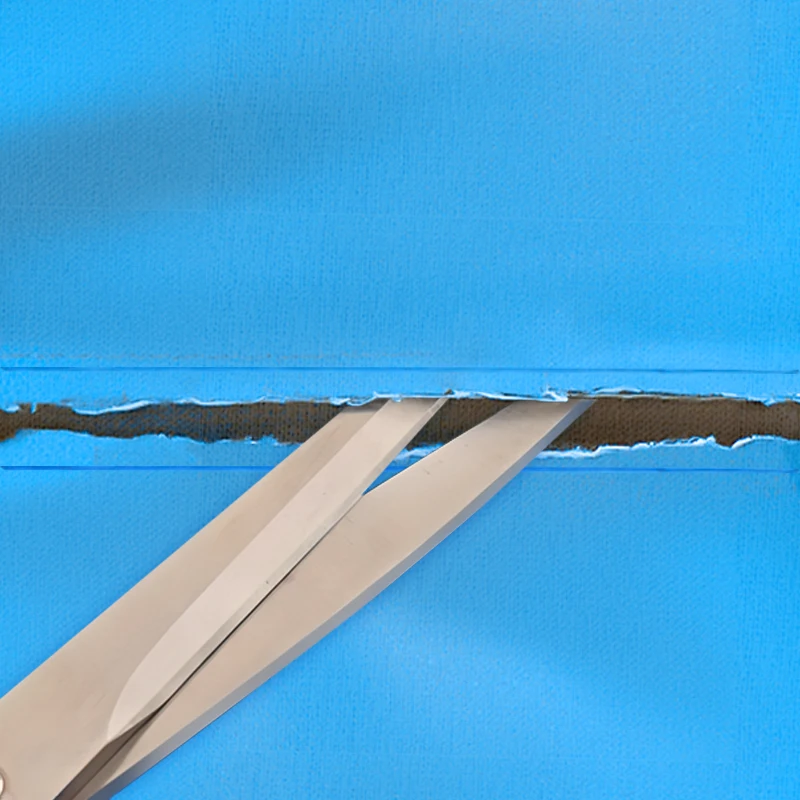
Once you’ve stitched along the entire length of the opening, draw a line through the center of the opening and draw little rectangles on the end. Carefully cut down the center line using sharp scissors or a seam ripper. This will create an opening for your zipper to be inserted later on in the process.
Turn the pocket lining to the back
To turn your zipper pocket the right way out, carefully reach into the opening and grasp the fabric on the opposite side. Gently pull it through, guiding the fabric until it’s completely turned to the correct side.
Use a pencil or chopstick to push out any corners or edges that need shaping. Once it’s fully turned, press the pocket with an iron to smooth out any wrinkles.
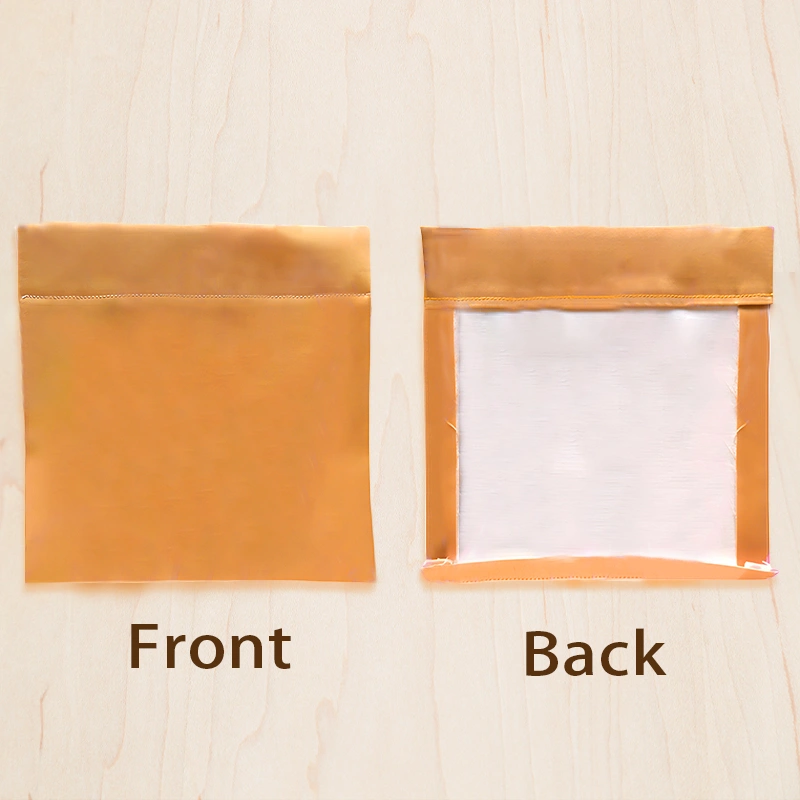
Attach the zipper to the pocket

Put the main piece on the bottom and the lining on top. Put the zipper on the opening and make sure the zipper back is on top. Also, the zipper pull should be visible from the front side. You can use quilter’s double-sided tape to hold it.
Then stitch around the zipper edges. Cut off any extra zipper tape.
Stitch two lining pieces together
Turn the fabric to the wrong side and place the other lining piece on top with the right sides together. Match the four raw edges of the fabric pieces and pin them in place.
Stitch all four ways around the lining edges with a 1/4 seam allowance. You only need to sew the lining pieces, not the main pocket fabric underneath.
Now your zipper pocket is done, and you can attach it to your garment.
Conclusion
Now that you know how to sew pockets, you can add this useful and stylish element to your garments. Whether you choose inseam, patch, or zipper pockets, the process is simple and rewarding.
With a few basic sewing techniques, you’ll be able to create functional and attractive pockets for all your sewing projects. Happy sewing!
FAQs
Q: What tools do I need to sew a pocket?
A: To sew a pocket, you need sewing supplies such as fabric types suitable for your garment, sewing tools like scissors and needles, and threads matching your fabric color.
Q: Can I decorate my stitched pocket?
A: Absolutely! You can use various sewing embellishments to decorate your pockets, like lace trim, pom-poms, or even embroidery initials, using hand stitching techniques.
Q: Do I always need a pattern to stitch a patch pocket?
A: No! Sewing from a pattern is useful but not necessary. One can create bespoke tailoring pieces by drawing stitching lines directly onto the fabric after stabilizing it.
Q: What if the edge of my sewn pocket starts fraying?
A: You can prevent this by reinforcing the fabric using techniques like topstitching along the edge stitch line or binding edges that add durability to handmade clothes.