First, cut a piece of fabric for your pocket. Fold the right and left sides of the fabric inward by 1/2 inch and press. Repeat with the bottom edge. For the top, fold it in 1/2 inch, then another 5/8 inches, press, and stitch. You can achieve neat corners by pressing firmly along the diagonal line. Position the pocket on your apron and secure with pins. Finally, stitch the sides and bottom edge in place. That’s it! You’ve just added a pocket to your apron. Now, why not stick with me a little longer and discover how to level-up your apron design craft skills? Follow the quick and easy steps to make one pocket on a half apron. You’ll find much fun from sewing.
Key Takeaways
- Begin by measuring, cutting, and selecting a piece of fabric that fits pocket needs and complements the apron design.
- Fold and press the edges of the fabric for clean, stable edges, making sure to fold the top edge inward twice for a sturdy top hem.
- Stitch the top hem carefully to transform the fabric into a functional, visually appealing pocket that complements the apron design.
- Pay attention to the corners of the pocket, pressing along the diagonal for a flat, professional finish.
- Place the pocket on the apron, making sure it’s functional and looks good, pin it, then sew the sides and bottom. This will securely attach the pocket.
How to Sew a Pocket on an Apron
Let’s get started on sewing a pocket onto your apron. You’ll begin by cutting a piece of fabric for your pocket, folding the right and left sides, and pressing them.
We’ll help you with each step, from folding and stitching the top hem, to making sure the edges are clean and smooth.
Step 1: Cut a Piece of Fabric for a Pocket
The first step is measuring and cutting a piece of fabric to fit the size and design of your apron. Remember to smooth out the raw edges while trimming. This initial step is crucial, as it determines the size of your pocket and its functionality. The fabric piece should adequately fit your pocket needs, considering the items you plan to store.
Precision in cutting is vital to prevent uneven edges or misalignment when you sew the pocket onto the apron later. Also, take into account the aesthetic appeal of the pocket. Choose a fabric that goes well with your apron’s design, making sure it is both practical and visually appealing.
Step 2: Fold right and left sides of the fabric 1/2 inch, then press.
After cutting two rectangle fabric pieces, fold the right and left sides of the fabric by 1/2 inch to create a clean, finished edge for the pocket. This fold is critical in achieving neat pocket edges, acting as a guide for your stitching.
Your next step is to press these folds. By applying heat, you’ll set the folds in place, ensuring they stay put while you’re sewing. This helps maintain a professional appearance for your pocket.
With your pocket edges neatly folded and pressed, you’re setting a strong foundation for a durable, long-lasting apron pocket.
Step 3: Fold the bottom edge of the fabric 1/2 inch and press.
To construct the pocket, fold the bottom of the pocket up by 1/2 inch for a clean finish before attaching the pocket. Make sure your fold is neat and precise, as it will create a stable base for the pocket apron.
After folding, the next step is to press the fold. This is essential for securing the fold and maintaining a crisp edge during sewing. The act of pressing not only locks in the fold but also contributes to a professional look on your apron.
Step 4: Fold top edge of the fabric 1/2 inch, then 5/8 inch again, and press, then stitch along folded edge of the top hem.
Next, you’ll create a robust and clean top hem for your pocket by folding the top of the pocket inward by 1/2 inch and then folding it over again by 5/8 inch. This double-fold technique provides a sturdy, professional finish to the pocket. It’s vital to press these folds firmly, maintaining crisp edges.
Now, it’s time to stitch. Guiding your machine along the folded edge, secure the top hem of the pocket to the apron fabric. Make sure you’re stitching with precision. This step is important because it turns your fabric into a useful pocket, making your apron more practical and attractive.
Step 5: Take the corner of the fabric and pull the corner up, then press the fabric along the diagonal to ensure that the folded edges do not protrude.
To get a smooth corner that doesn’t stick out, gently lift the corner of the fabric in your pocket and press it firmly along the diagonal fold. To fold apron pockets neatly, precision and attention are required to maintain neatly folded corners for a professional appearance.
The folded edges, when pressed correctly, should lay flat and contribute to a polished finish.
This step is very important in making your apron pocket. It shows that being patient and careful can result in a well-made apron.
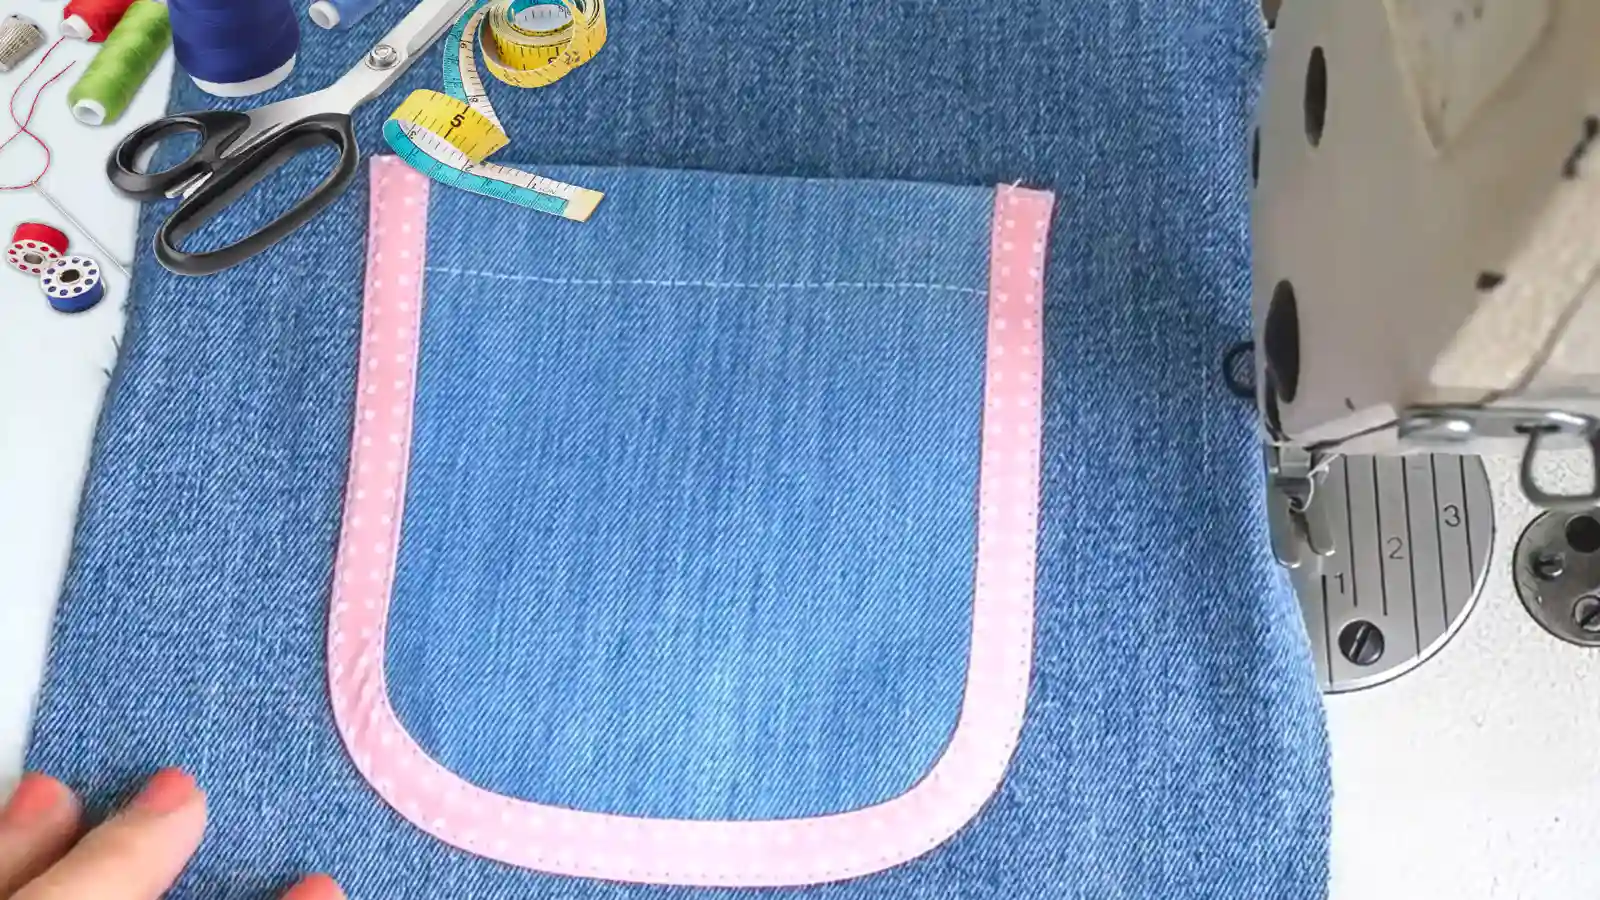
Step 6: Place the pockets on the apron, securing the sides with pins.
Now, carefully position the pockets on your apron at the desired locations, keeping in mind both functionality and aesthetics. Visualize where you’ll be reaching most often while wearing the apron. That’s the ideal spot for pocket placement! Use your measuring tape to ensure each pocket is evenly spaced from the apron’s edges. Remember, being precise is crucial when sewing. Pockets are important for both the function and appearance of your apron.
Pin the pockets in place by inserting pins through the fabric, ensuring that they go through both the pocket and the apron. This helps prevent any shifting or misalignment while you’re sewing them on. Now you’re ready for the next step!
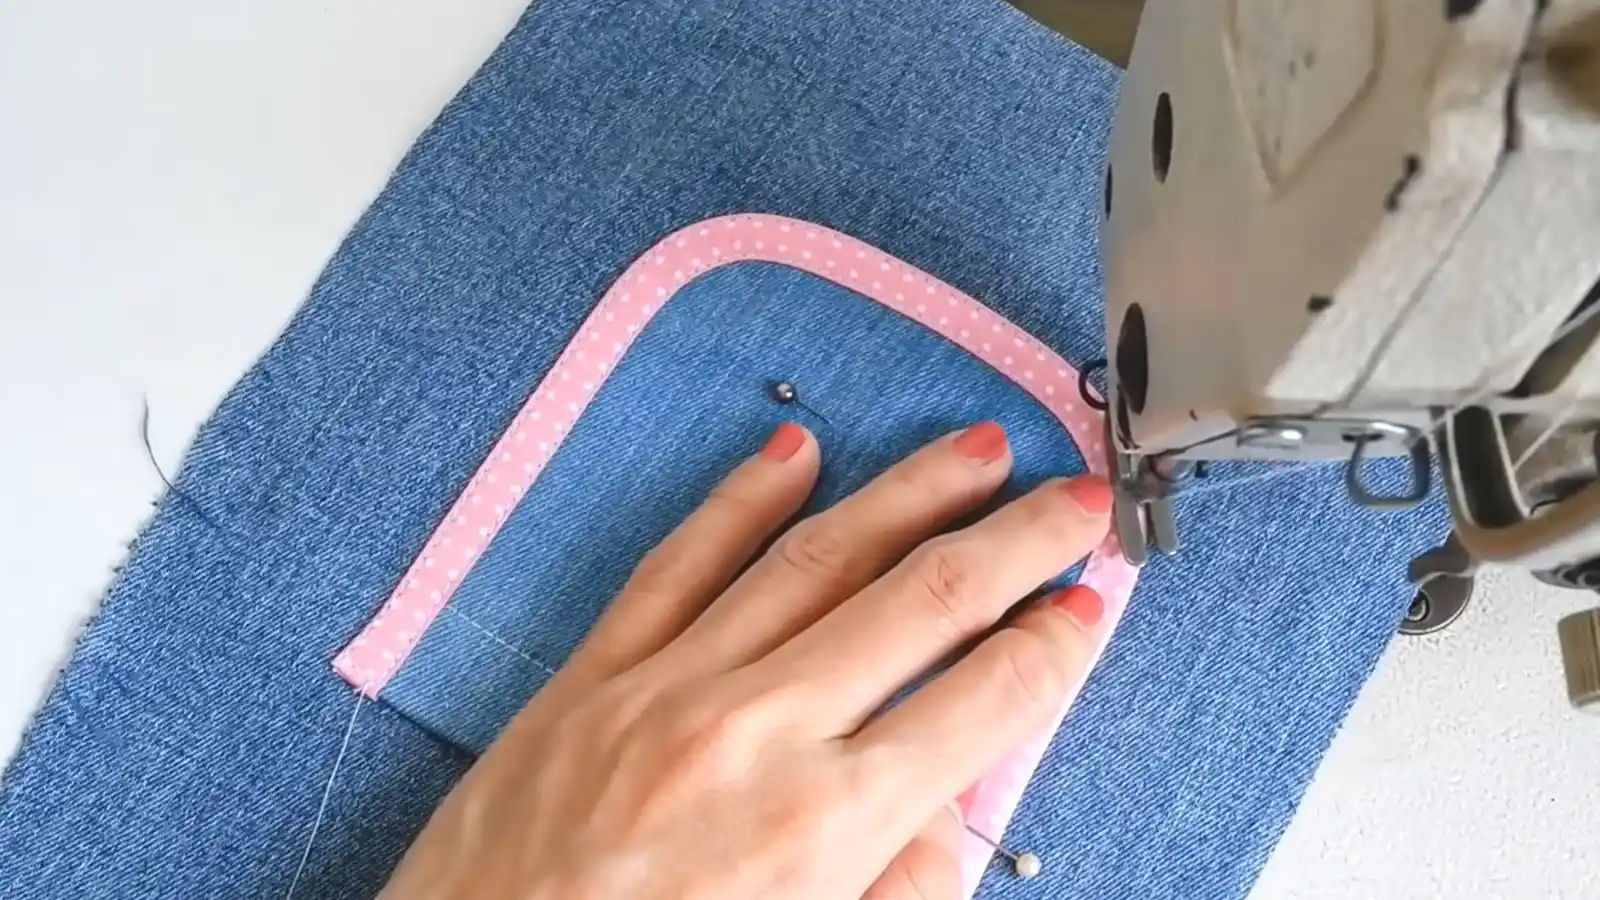
Step 7: Stitch 2 sides and bottom edge of the pocket.
Now that the pockets are in the right position and pinned securely, use a long basting stitch to sew along the sides and bottom edge to attach them firmly to your apron. Start from the top of one side of the pocket right side, carefully following the seam. Stitch close to the edge, maintaining a consistent seam allowance for a neat and professional finish.
Remember to backstitch at the beginning and end of your sewing lines. This provides added reinforcement, ensuring your pockets won’t easily rip or come undone with use.
Once you’re done stitching, press the seams flat. This step is important as it smooths out any wrinkles or creases, giving your pocket a polished look.
Conclusion
And there you have it! You’ve just learned how to sew pockets onto an apron. With some patience and basic sewing skills, you can easily add a practical and stylish feature to your apron.
It is a great idea to sew love pockets on aprons. Remember, a pocketed apron isn’t just an accessory; it’s a baker’s best friend.
Happy baking, and happy sewing!
Learn more sewing tips on Longancraft Blog and explore the world of fabrics on Longancraft!