Are you looking to elevate your sewing projects with a professional touch? One skill that can take your creations to the next level is mastering the art of sewing bias tape. Bias tape is a versatile sewing notion that can add a polished edge to garments, quilts, and other projects.
In this article, we will guide you through the steps of sewing bias tape, helping you to achieve clean, professional-looking finishes every time. Get ready to take your sewing skills to the next level and create stunning, professional-quality pieces.
Key Takeaways
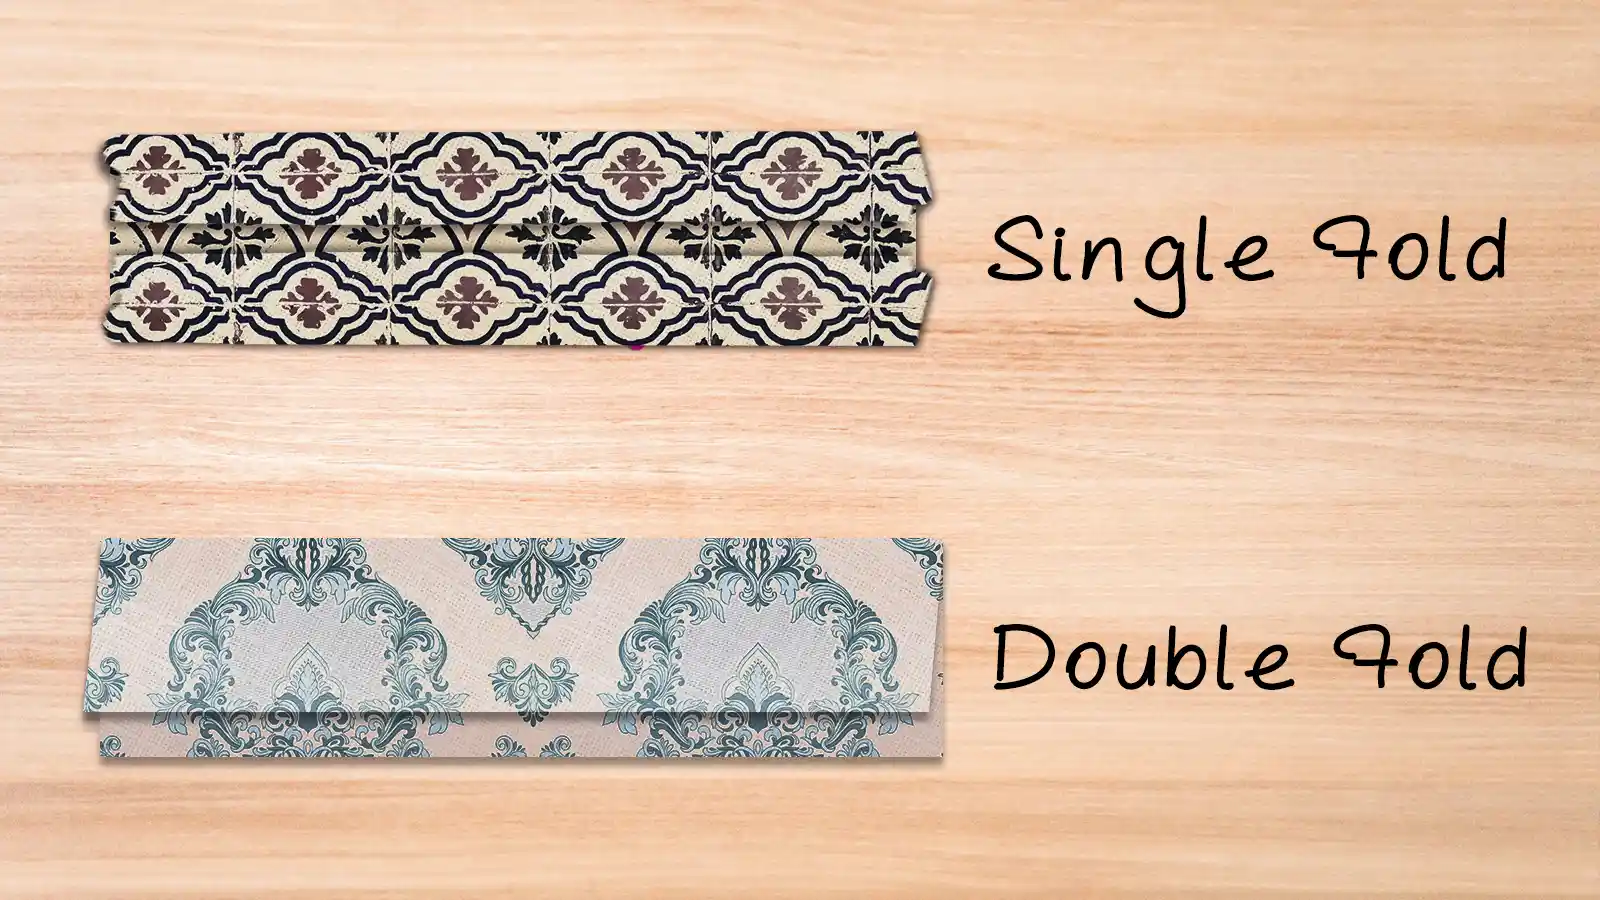
- Choose between single-fold or double-fold bias tape based on the desired finish and edge protection.
- Align the bias tape with the fabric edge, pinning or clipping to secure it before sewing.
- For double-fold bias tape, insert the fabric edge into the fold, ensuring an even alignment on both sides.
- Use a straight stitch to sew close to the open edge of the single-fold tape or along the edge of the double-fold tape.
- Press the sewn bias tape with an iron for a crisp, professional appearance. If necessary, use a pressing cloth to protect delicate fabrics.
A Brief Overview of Bias Tape
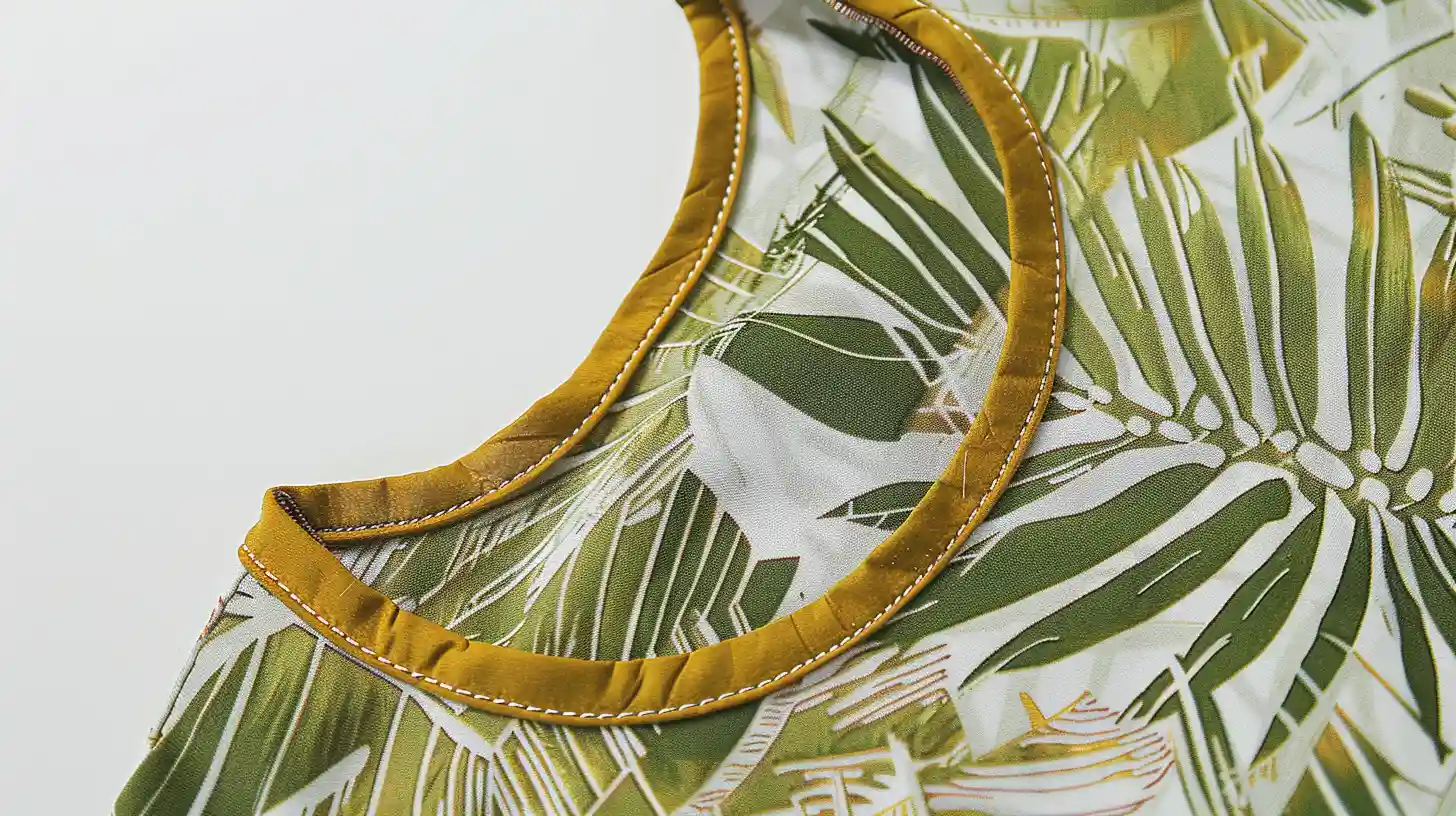
Bias tape is a stretchy strip of fabric cut on the bias. It serves as a versatile tool for finishing edges and adding decorative flair to your sewing projects.
When you sew bias tape, you can choose between a single fold, which has one edge folded, and a double fold, which offers a cleaner finish with both edges folded twice. This adaptability makes it ideal for tackling any curved edge, ensuring a smooth, professional look.
Making your own bias tape not only cuts costs but also lets you customize your projects with unique patterns and colors. Whether binding necklines and armholes or adding a decorative touch, understanding how to use bias tape properly is critical for achieving those crisp, clean finishes that elevate your sewing work.
Supplies Needed
Before diving into your sewing project, you’ll need to gather key supplies, including pre-made bias tape and a bias tape maker for precise creation.
To sew bias tape effectively, selecting a medium-weight, non-stretch woven fabric is crucial. This fabric type guarantees a neat and professional finish by neatly covering the raw edge.
Additionally, you shouldn’t overlook the importance of a basic sewing kit. Essentials such as scissors, pins, and an iron are indispensable. These tools help you cut the bias tape to the required length, secure it in place before sewing, and press it for a crisp appearance.
How to Sew Bias Tape: Single-Fold Bias Tape
To attach single-fold bias tape, mark the fabric where you’ll sew the binding, ensuring a strong, precise seam. Then, open the bias tape and align the narrower side right against the raw edge of the fabric. This step is crucial for a clean finish.
Pin the bias binding in place, with the right sides facing each other, to prevent any shifting while you sew. Then, meticulously sew along the crease of the bias binding. After sewing, you’ll want to press the seam to flatten it, which helps in achieving a polished look.
Next, carefully fold the bias tape over to the other side of the fabric. To finalize the application, sew along the edge of the bias tape to secure it firmly.
How to Sew Bias Tape: Double-Fold Bias Tape
Applying double-fold bias tape involves carefully aligning its edges at a right angle to the fabric’s edge before sewing, ensuring a polished look visible from both sides.
To sew bias tape like a pro, start by pinning it along the fabric’s raw edges. This step is crucial for keeping everything in place.
Next, sew along the first fold of the tape, close to the edge. Remember, pressing the seam allowance towards the double-fold bias tape and then refolding it neatly around the raw edge is key for a clean finish.
Following these steps can significantly enhance the appearance of your sewing projects, making them look professionally done.
Tips for Sewing Bias Tape
When sewing bias tape, choosing between pinning and clipping it in place can make a big difference in managing it as you sew.
Handling corners and curves presents its own challenges, requiring specific techniques to achieve a clean, professional look.
Let’s explore how to tackle these aspects effectively to elevate your sewing projects.
Pinning vs. Clipping
Choosing between pinning and clipping bias tape in place can affect the outcome of your sewing project. Your option is more than just a matter of preference. It’s about securing your work with stability and precision.
Clips, unlike pins, can prevent your bias tape from shifting or distorting as you sew. They offer a more stable hold, particularly over longer stretches, ensuring that your tape remains in perfect alignment. This is especially crucial when dealing with delicate or slippery fabrics, where pins might cause damage or unwanted shifts in your stitches.
In essence, choosing between pins and clips could be the deciding factor in achieving the polished look you aim for.
Corners and Curves
Mastering the art of sewing bias tape around corners and curves can elevate the quality of your sewing projects, ensuring a polished and professional finish.
When sewing bias tape around corners, you’ll need to clip at the corner to allow the tape to fold neatly, creating a sharp look.
For concave curves, you might find it helpful to create small pleats in the bias tape, letting it ease around the curve without wrinkling.
Conversely, when dealing with convex curves, you’ll want to gently stretch the tape to fit snuggly against the curve, avoiding puckering.
Remember to press the bias tape with an iron as you go, giving your project a crisp, professional appearance. Furthermore, practice makes perfect, so try these techniques on scrap fabric first.
Creative Uses for Bias Tape
Now that you’ve mastered sewing bias tape, let’s explore how to use it to elevate your sewing projects creatively.
Add Contrast or Decorative Elements to Garments
Bias tape offers a versatile way to inject contrast and creativity into your garments. It can turn simple pieces into standout wardrobe favorites. By choosing bias tape in contrasting colors or patterns, you’re able to add eye-catching decorative elements to your projects. Sewing bias tape along hems, cuffs, or pockets personalizes your clothing and elevates its design, making each piece unique.
Imagine the impact of using bias tape on seams, edges, or piping. It’s a simple way to make your garments pop. Don’t shy away from mixing and matching different widths or types of bias tape for intricate detailing. Experiment with bias tape in geometric patterns or unexpected placements to showcase your creativity and style. This will transform ordinary garments into works of art.
Bind Quilt Edges with Bias Tape
Binding quilt edges with bias tape isn’t only about securing the layers together. It’s an artistic statement. Adding a pop of color or a contrasting hue to your quilt edges can enhance its appeal.
When you sew bias tape around the corners, its flexibility shines, allowing for a smooth transition that conventional fabrics can’t match. Achieving a clean, polished look requires careful pinning and sewing, especially around those tricky corners. Remember, it’s not just about preventing fraying. It’s about elevating your quilt’s aesthetic and ensuring it stands the test of time.
Customize Home Decor Projects with Bias Tape
You can transform your home decor by incorporating bias tape accents into pillows and curtains. When you sew with bias tape along the edges of these items, you’re uniquely customizing your space.
Making bias tape from fabrics that contrast or complement your existing decor can elevate the look of plain items, giving them a designer touch. Using bias tape for decorative accents on table linens or even upholstered furniture edges adds a bespoke flair that’s both budget-friendly and stylish.
Conclusion
Now that you’ve mastered it, sewing bias tape will elevate your projects to a new level of professionalism. Remember, it’s all about practice and patience. Keep your stitches neat, align the tape carefully, and don’t hesitate to try creative uses for your bias tape.
Whether it’s finishing edges or adding a unique touch, bias tape’s versatility will never let you down. So, go ahead and pin, sew, and confidently conquer your next sewing challenge!
Learn more about sewing tips at Longan Craft Blog, and dive into the fabric world with Longan Craft!
FAQs
How can I make bias tape neatly?
To sew bias tape neatly, you’ll need to press it first, pin or clip it securely, and sew it close to the edge. Remember, practicing on scraps and paying close attention to corners ensures a clean finish.
What is the best stitch for bias tape?
Your best bet is a straight stitch close to the edge. It’s secure and looks professional. Remember to use a matching thread to make it barely noticeable.
Should I sew bias tape to the right side of the fabric?
Yes, you initially attach bias tape to the wrong side of your fabric, then fold it over to the right side for a clean finish. This method hides stitches and gives your project a professional look.
How can I sew ready-made bias binding?
To sew ready-made bias binding, align it with the fabric’s edge and pin it in place. Sew along the edge using a straight stitch, then press the seam allowance towards the binding for a crisp finish.